
In the previous article, we discussed about generating application from RAML using Anypoint Studio and in this article, we will discuss on deploying the application in CloudHub.
Deploy the application in CloudHub:
Now that we have successfully run the application and tested it, the next step is to deploy the project in the CloudHub. CloudHub is the Platform as a service (PaaS) owned by MuleSoft and it provides managed, multi-tenanted and highly available cloud platform for Mule applications.
Mule applications can be deployed on both ON PREM and in the Cloud. Mule Runtime is a separate application that can be deployed ON PREM and it can provide the runtime needed for Mule applications. It is like IIS server for hosting web applications for Microsoft programmers and the runtime will provide configurations, libraries and other dependencies that are needed for the Mule applications to run. But, in this article we are going to deploy in the CloudHub as cloud deployments are the new trend that most of the companies are following in order to register their presence to the consumers on internet. Second advantage is easy scalability and high availability when compared to ON PREM deployments.
You can deploy to the CloudHub either from Anypoint Studio or upload the package file directly in the Anypoint Platform through “Runtime Manager”. Directly deploying to Cloud is similar to the Publish option available for Microsoft programmers in the Visual Studio IDE.
In order to publish to CloudHub from Anypoint Studio, first need to configure the Client Credentials (Client Id and Client Secret) by going to “Preferences” option and selecting the “Anypoint Platform for APIs”.
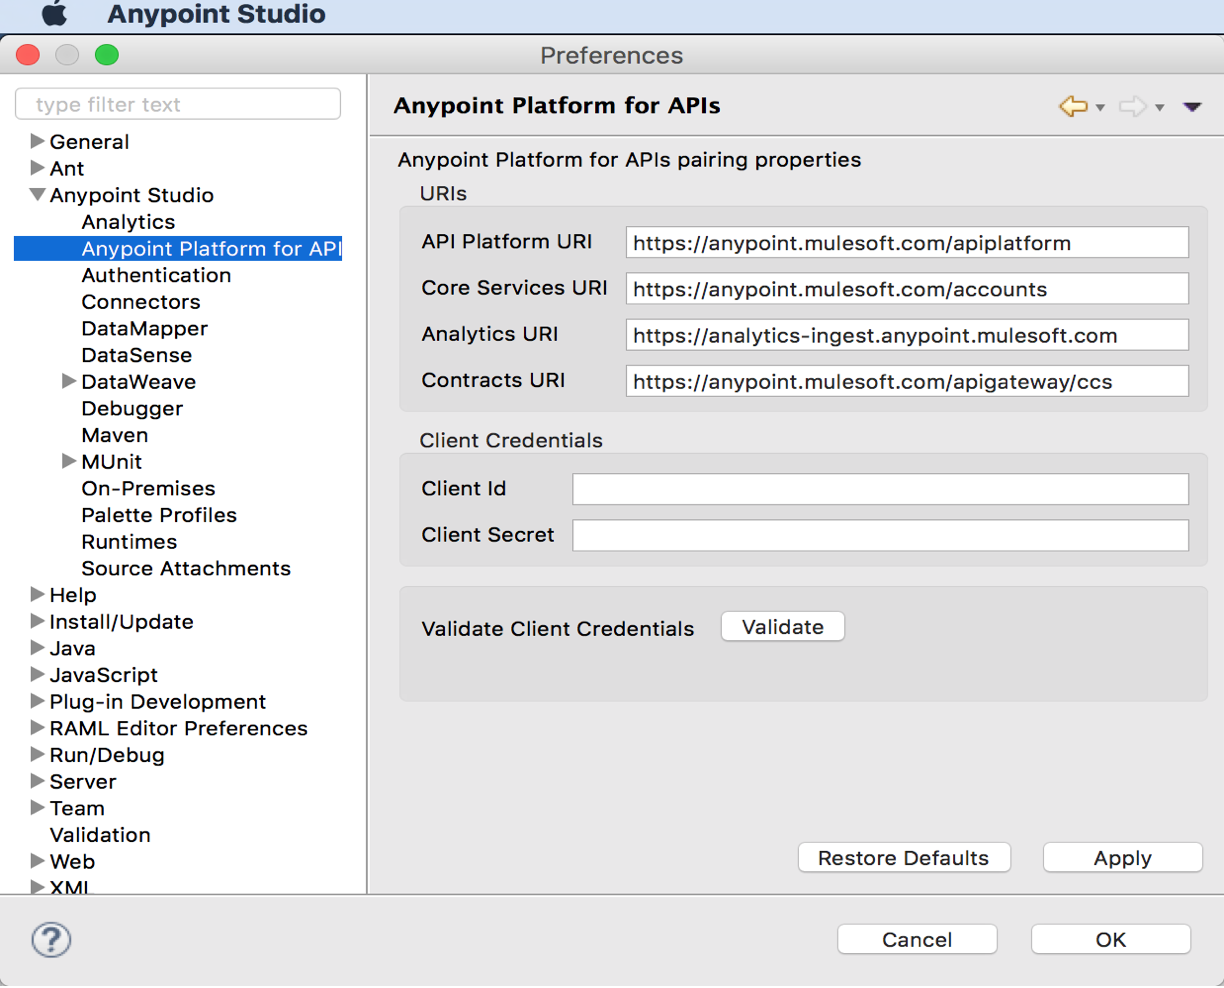
Figure 22 – Anypoint Platform for APIs
You can get the “Client Id” and “Client Secret” values by logging into “Anypoint Platform” website and click “Access Management” on the home page. You should see your organization name on the page. Since I registered with my company name, it will show “Dummy LLC”.
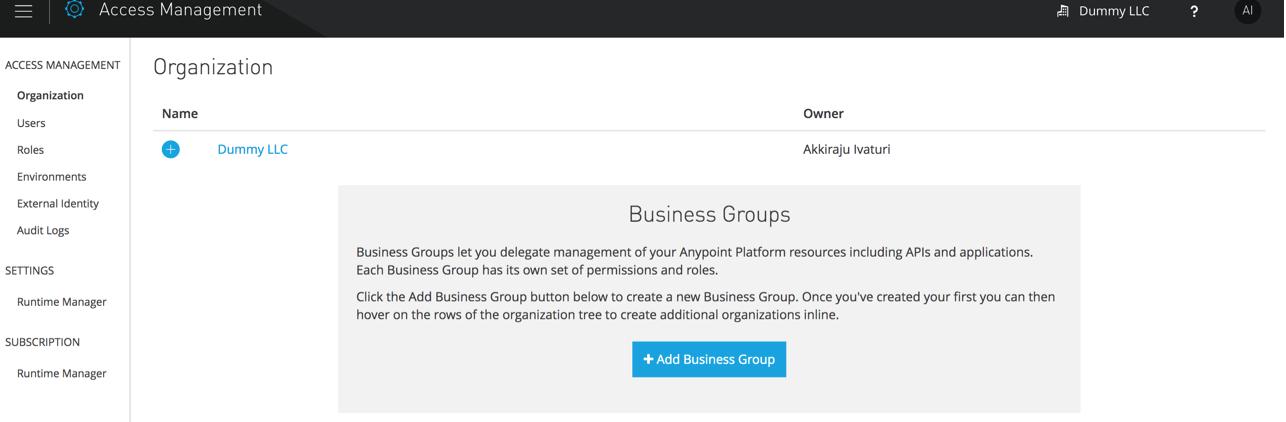 Figure 23 – Access Management
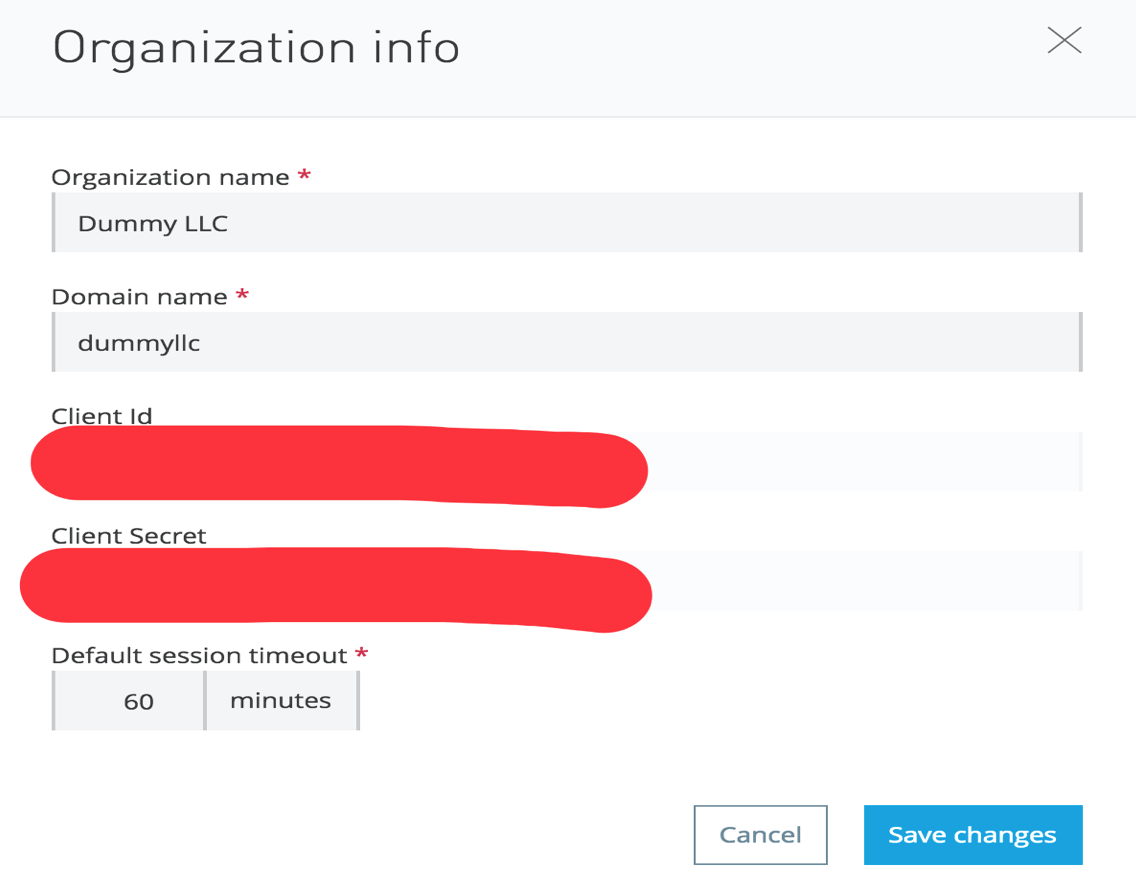 Figure 24 – Client Id and Client Secret screen
Copy the details and paste it in the “Anypoint Platform for APIs” screen. Now right click on the project and select “Anypoint Platform” and it provides two options to deploy. One is to Cloud i.e. to CloudHub and second option is to Mule Management Console. “Mule Management Console” as the name suggests it is a web application that monitors the Mule applications. You can write a script in the Mule Management Console to take the package and deploy in the Mule servers (i.e. deploy in the Mule Runtime).
In this article our focus is on deploying to cloud and so we will not discuss more about Mule Management Console.
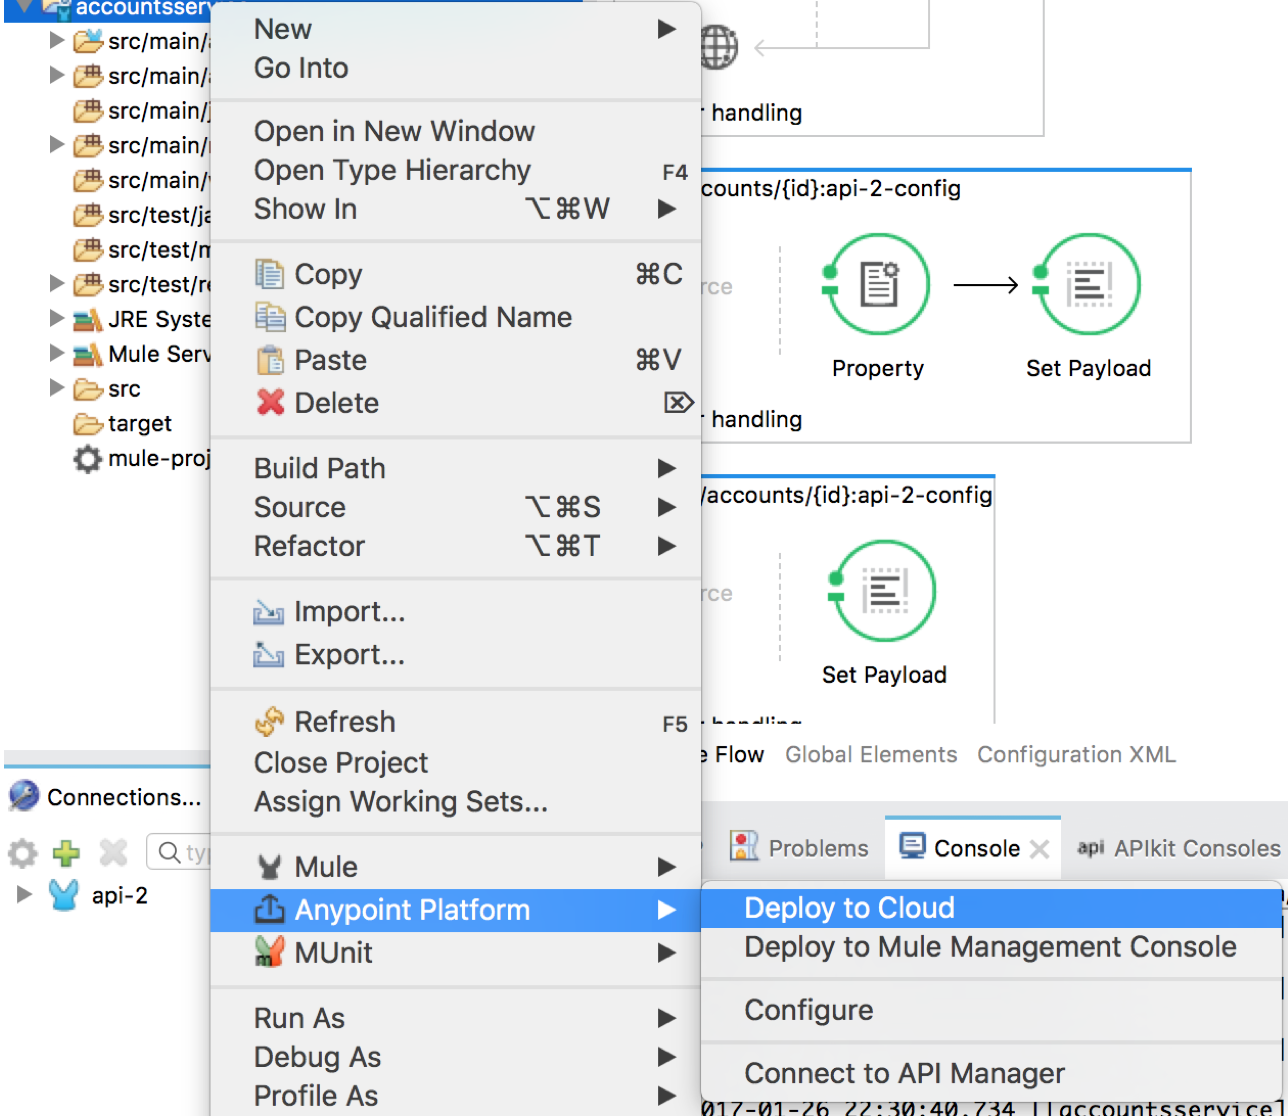
Figure 25 – Deploy to Cloud
When you click on the option “Deploy to Cloud”, it will open a popup window with the “Runtime Manager” screen and provides configuration options like Runtime version, Worker Size, number of Workers. Since I am using a trial version I do not have much options to select for this application to deploy. So, I would go with the default settings and click on “Deploy Application” button. It will take some time and should get deployed. You can verify the deployment by logging into the Anypoint Platform and going to “Runtime Manager” screen.
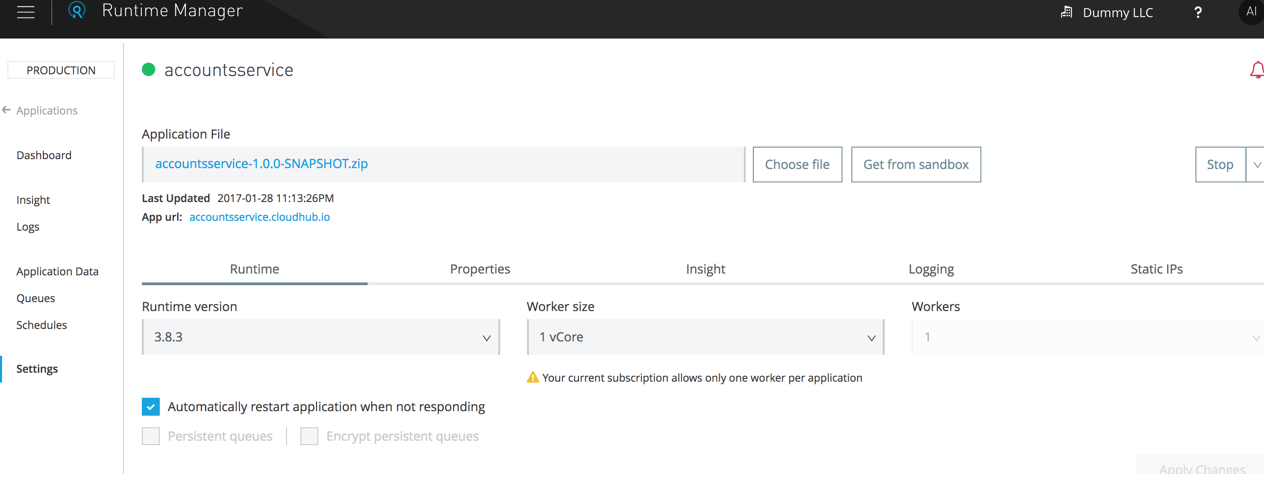 Figure 26 – Deploying to CloudHub
Here is how the screen should look like after the deployment:
 Figure 27 – Deployed applications in the CloudHub
If you click on the application name (in my case, accountsservice), it will take you to dashboard screen of the Runtime Manager. Your application is created in the CloudHub with the Domain accountsservice.cloudhub.io. I will send few requests to the application in order to view the traffic and CPU/Memory % by browsing the api http://accountsservice.cloudhub.io/api/accounts
Dashboard provides the overview of the mule messages, CPU and Memory of the application with option to check for last hour, last 24 hours and last week. You should see the CPU and Memory % increased as the number of requests for your application increases. Here is how it looks like in the Dashboard:
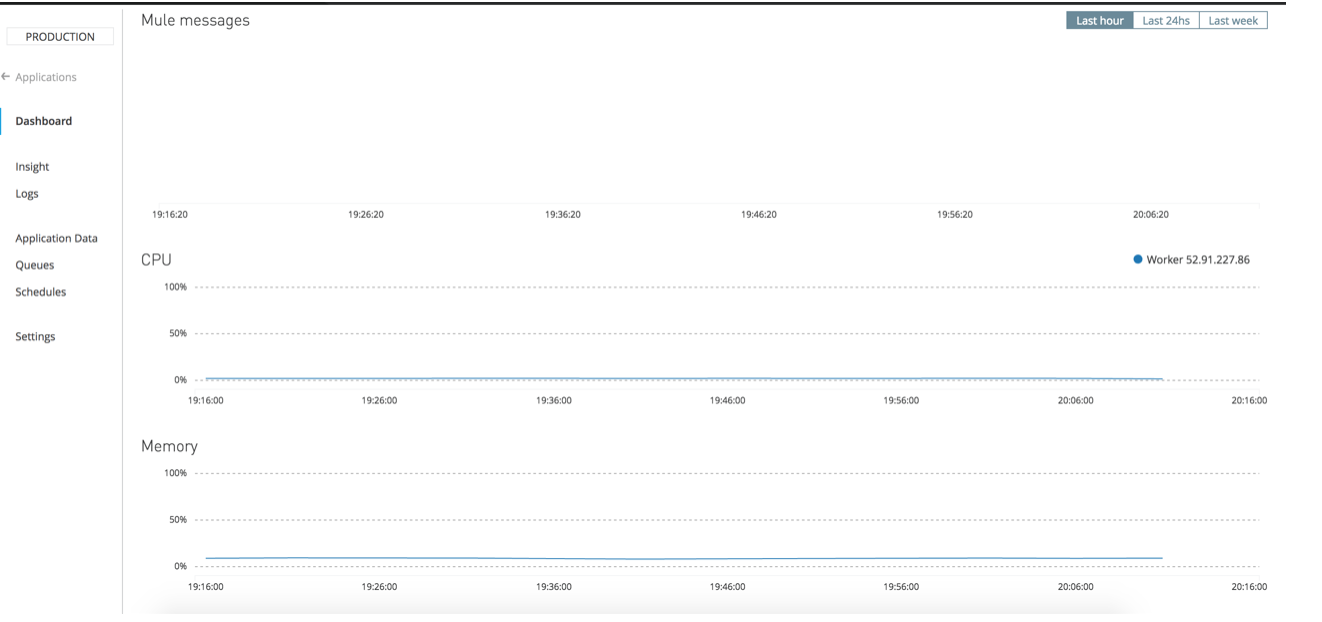
Figure 28(a) – Dashboard in Runtime Manager
When requests are sent, you should see the mule messages hiked up in the graph.
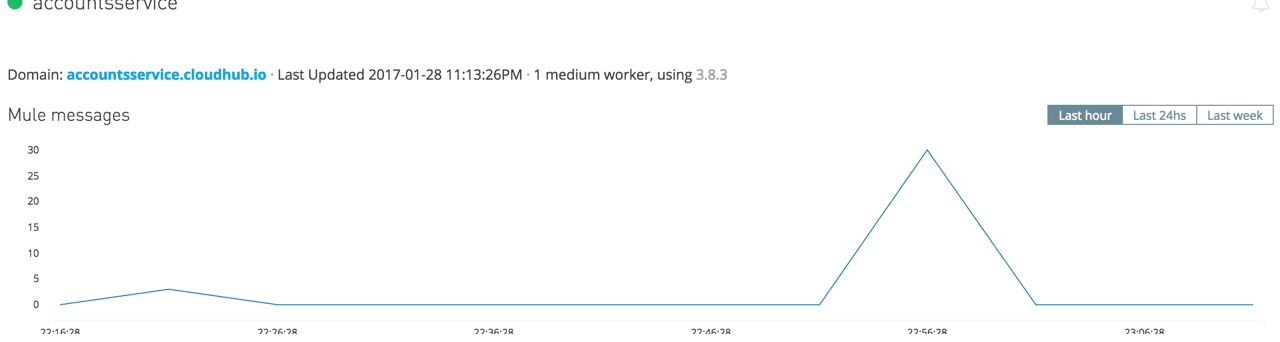
Figure 28(b) – Mule Messages
You will also have option to view the logs for the application and the application data in the Runtime Manager.
You can change settings of your application like Runtime version, Worker Size and Number of Workers.
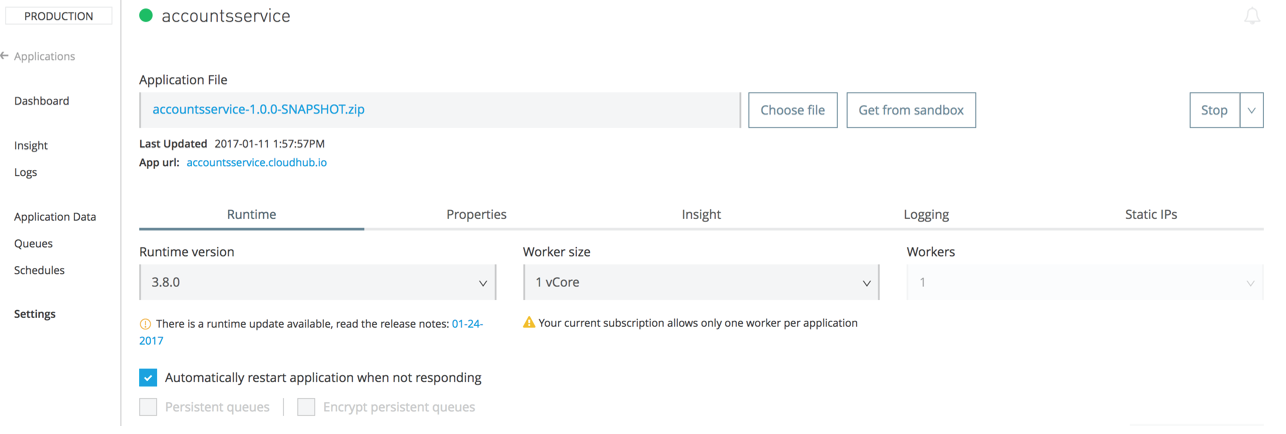 Figure 29 – Settings screen in Runtime Manager
Now if you go back to the “API Manager” and click on the API created and now you should see the Requests graph bumped for the period that I have hit the URL as below:

Figure 30 – Number of requests
If you see on the top of the graph, there is a link provided for “Analytics Dashboard” which will display the following information:
- Requests by Date
- Requests by Location
- Requests by Application
- Requests by Platform
This information provides the application owners to analyze the requests based on different criteria and helps in understanding the peak traffic hours and helps in increase the workers or core if needed.
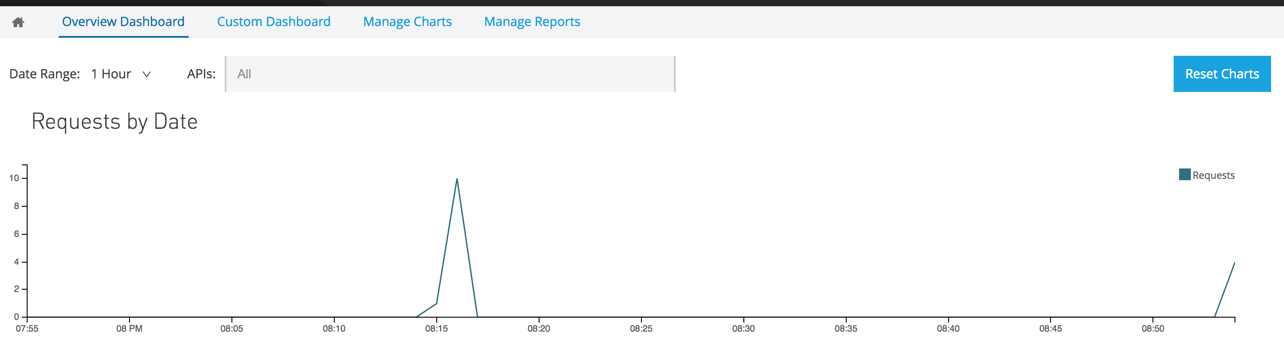 Figure 31 – Requests by Date
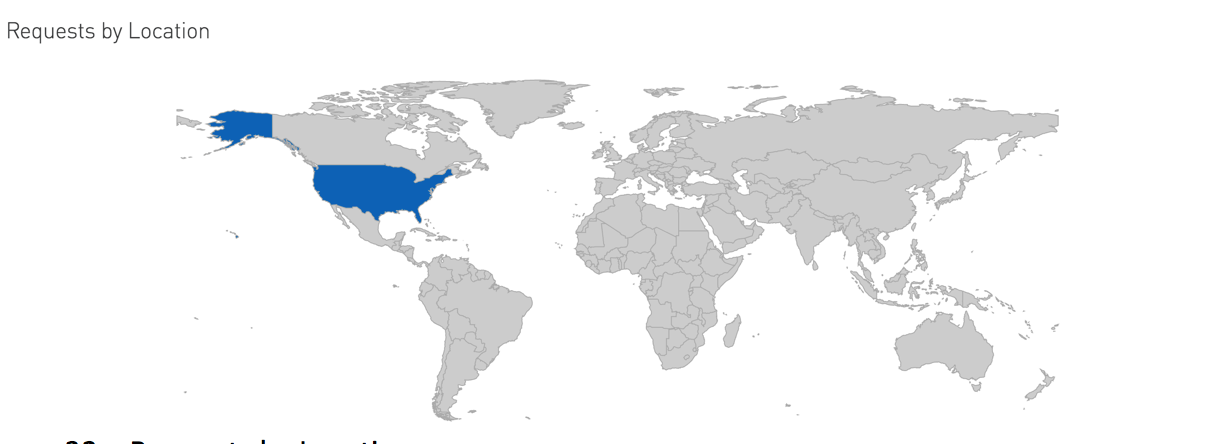
Figure 32 – Requests by Location
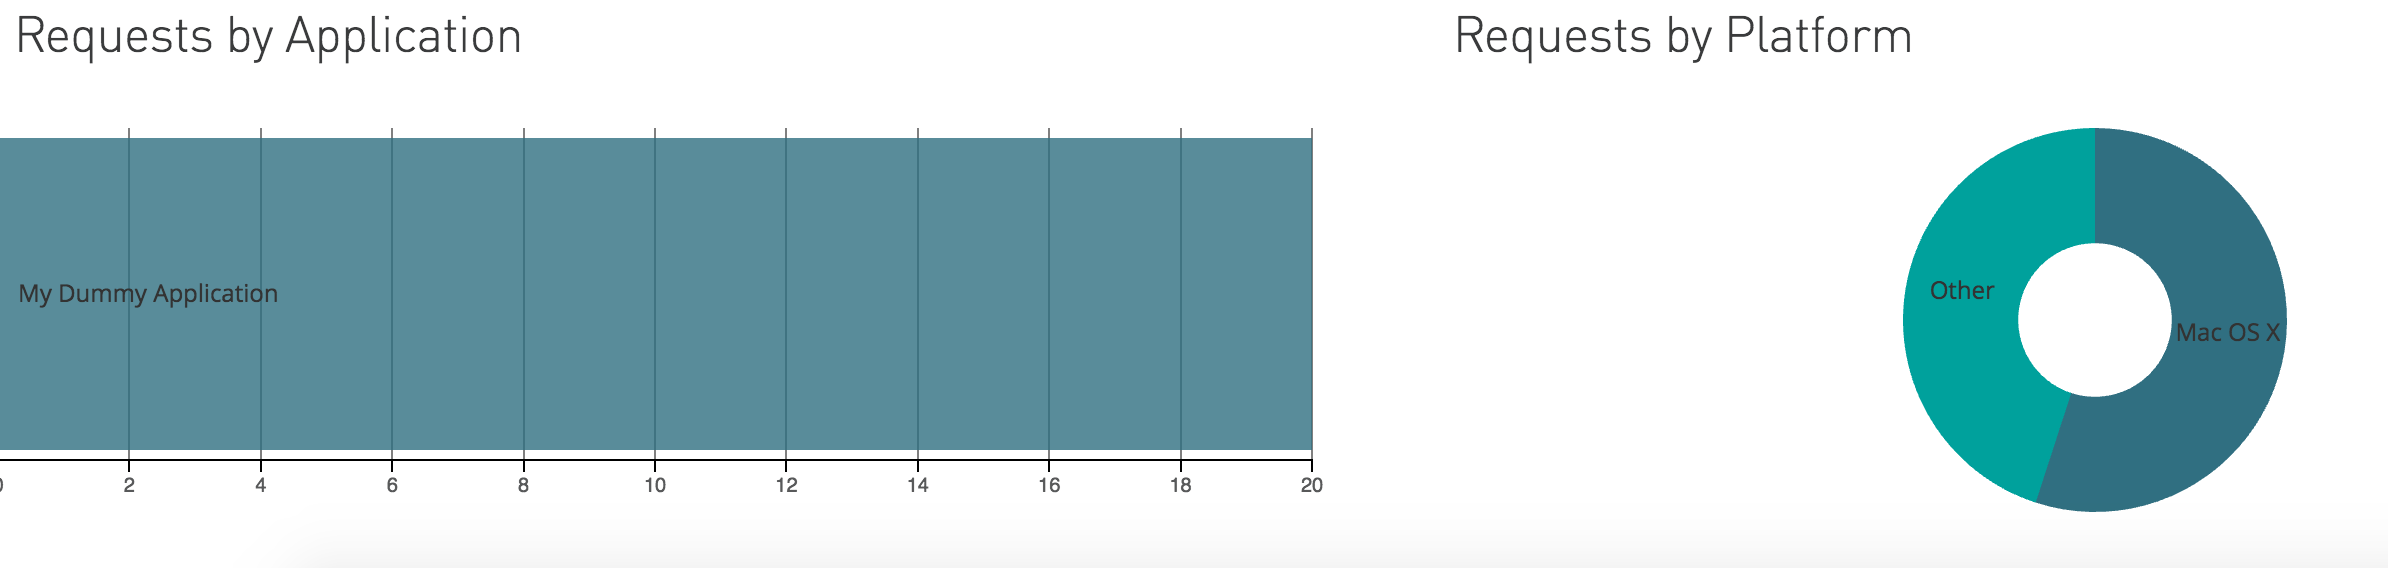 Figure 33 – Requests by Application and Platform
So, Anypoint Platform provides overall platform for deploying the applications and provides features to monitor the requests to your applications.
There is one more way of deploying application other than the one I have explained earlier. You will package your project and then go to “Runtime Manager” and click the button “Deploy Application” and it should take you to the page “Deploy Application” and choose the package and upload to the CloudHub and also specify the worker size and number of workers for your application.
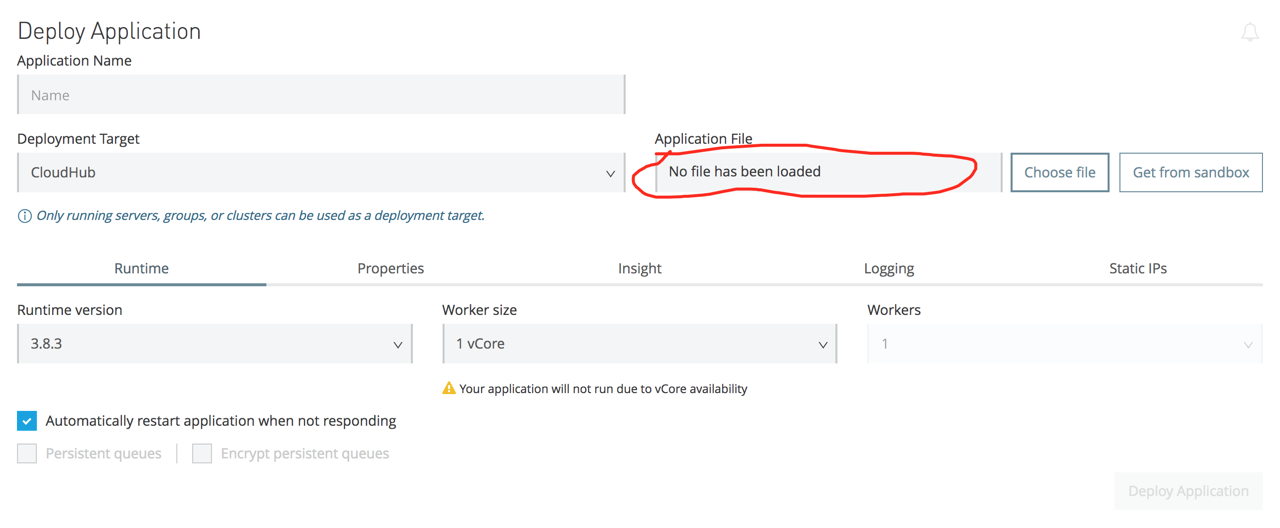
Figure 34 – Deploy application from Runtime Manager
You can also set up alerts for your service in the Runtime Manger. If the alert condition matches, then an email will be sent to the registered users for the alert.
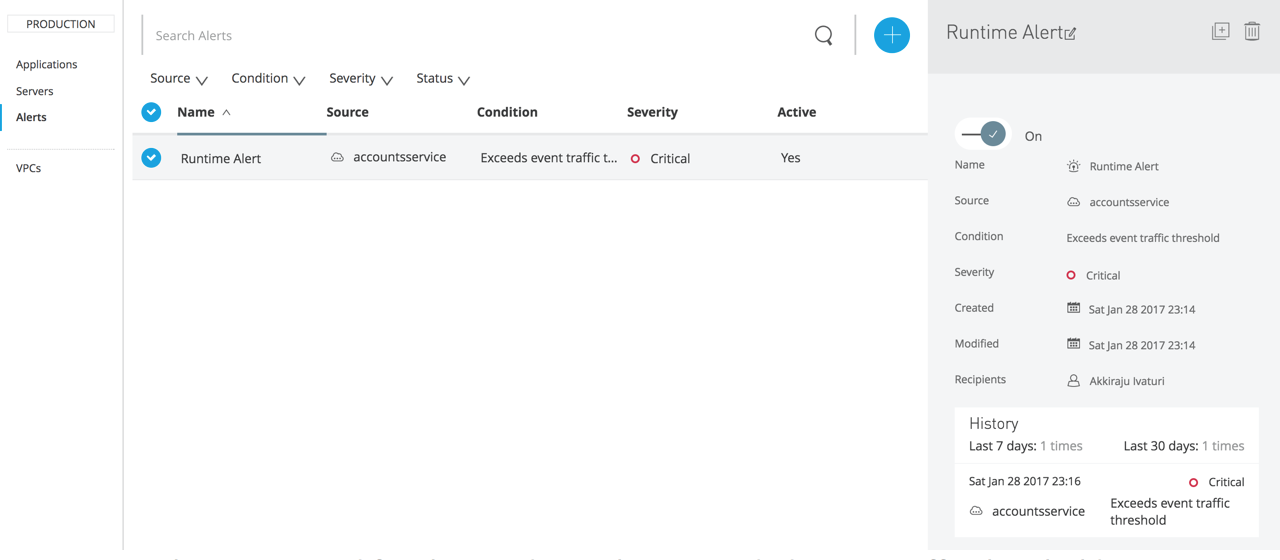 Figure 35 – Alert generated for the condition that exceeded event traffic threshold
In the next article, we will discuss about sharing deployed service through Developer Portal.