
In the previous article we discussed about deploying the application in CloudHub and in this article, we will discuss about sharing the deployed service through Developer Portal.
Share deployed service through Developer Portal:
Now that we have created and deployed the service, the next step is to share the service to the outside world. This can be done with “API Manager” in the Anypoint Platform website.
Login into Anypoint Platform and click on the API created and then it displays 3 sections in the page.
- API Definition, where we have defined our RAML file to prototype the API.
- API Portal, where we will expose our service to the outside world.
- API Status, provides status of your API Implementation i.e. your deployed service.
Now in order to expose our service to the outside world, we need to create a portal. A portal is a web page that is designed for specific purpose. So, select “Create new portal” as shown below:

Figure 36 – Create new API Portal
Then you will be landed to a page where we can define the name of the portal and add a description of the portal with images and other content.
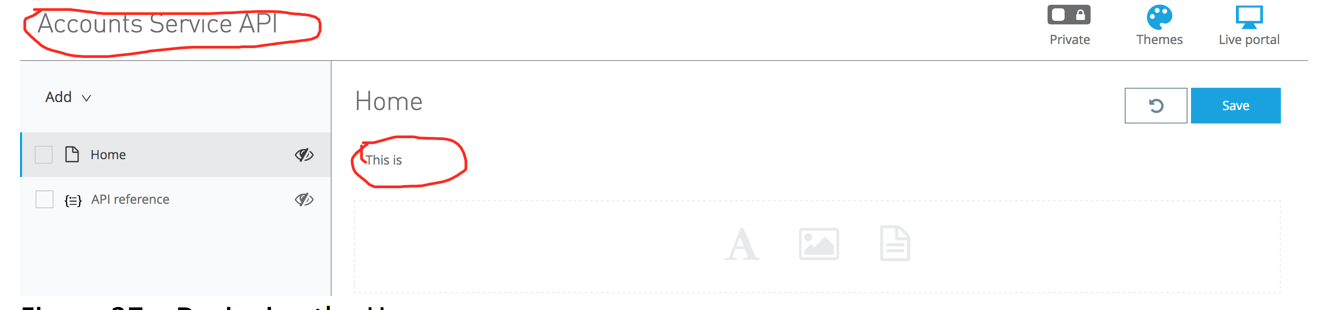 Figure 37 – Designing the Home page
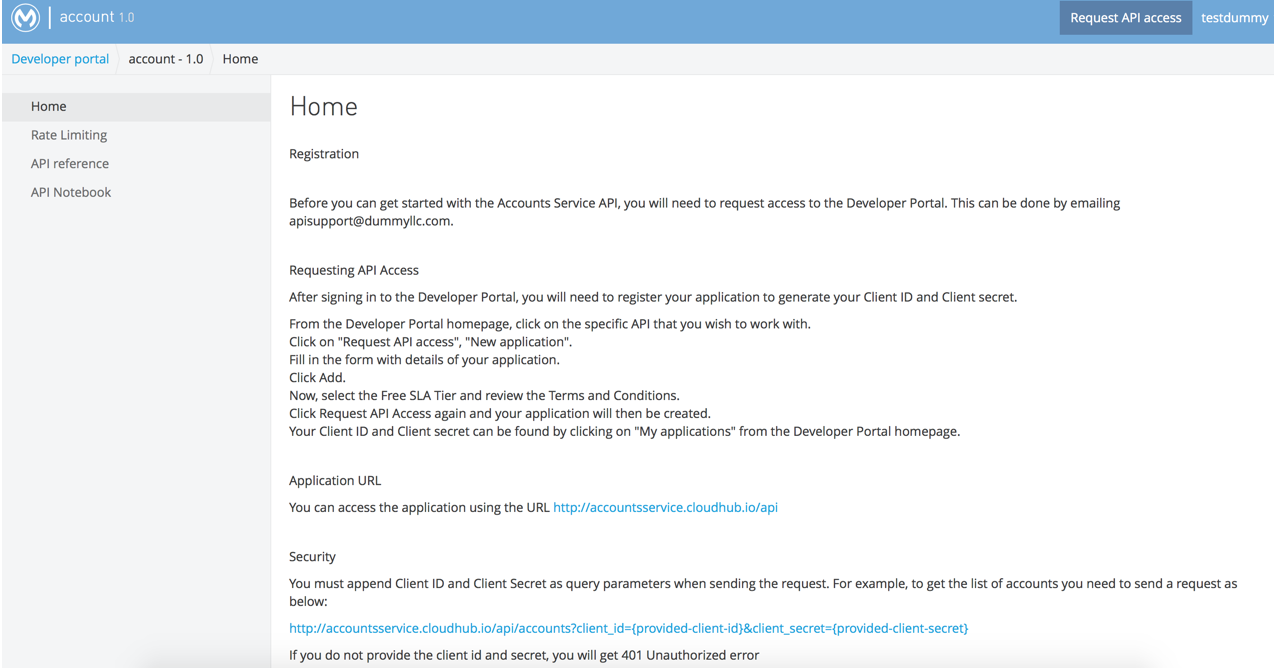
Figure 38 – Final design of my Home page
Once you design your home page, you need to save your content and if you click the next option “API Reference” it displays all the resources of your API and the operations that you can perform.
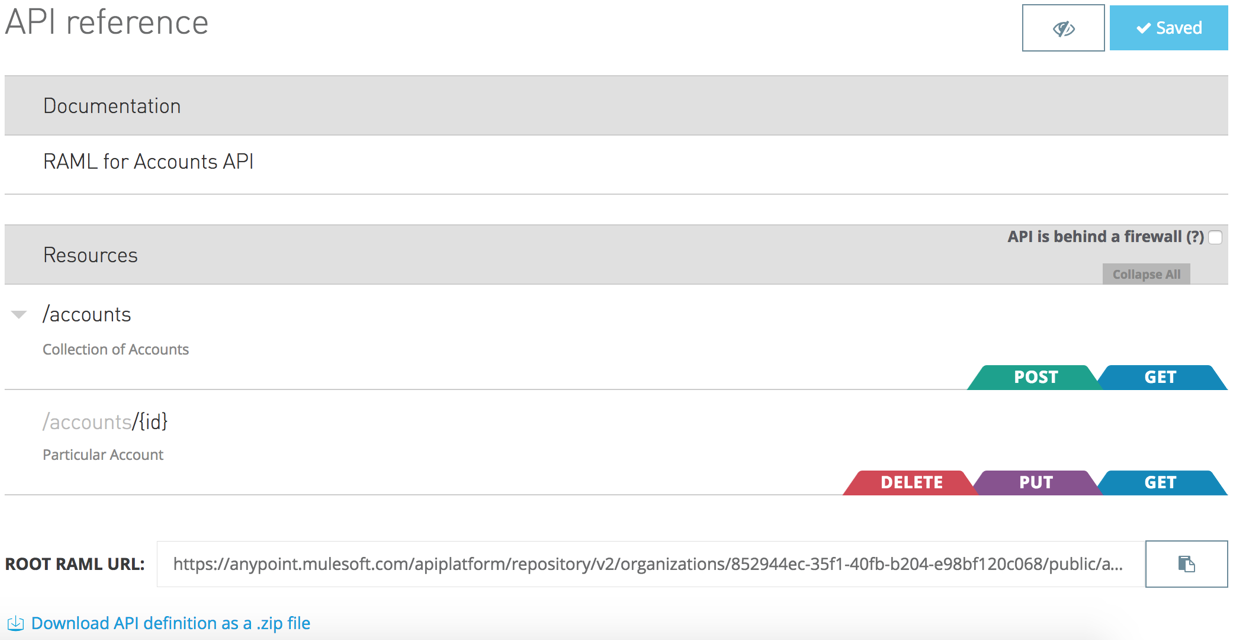 Figure 39 – API Reference screen
You can select “Themes” for your portal by clicking the “Themes” icon on the right top corner of the page.
Now, I also would like to include the program constructs for consuming the APIs to the outside developers. I will be showing that feature but will not be explaining in detail in my future articles. The feature I am discussing here is called “API Notebook”. API Notebook is like you write notes about your API, how to use them and takes copies of it so that everyone who likes to read your book can pick up the copy and implement in their programs or projects. But the added advantage here is that not only you see the operations of the API but also run it to see how it works. This is a beautiful feature that helps in sharing our APIs to the outside world.
To add API Notebook to your portal, click “Add” and select “API Notebook”.
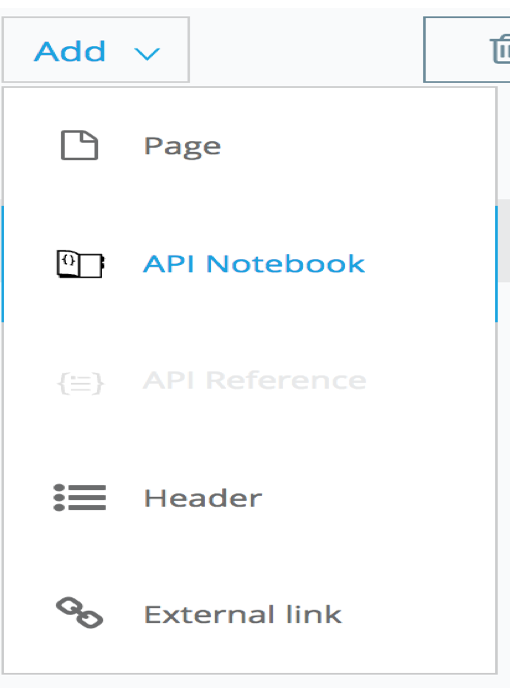 Figure 40 – Adding API Notebook
It creates first two steps about how to create client for API by default as below:
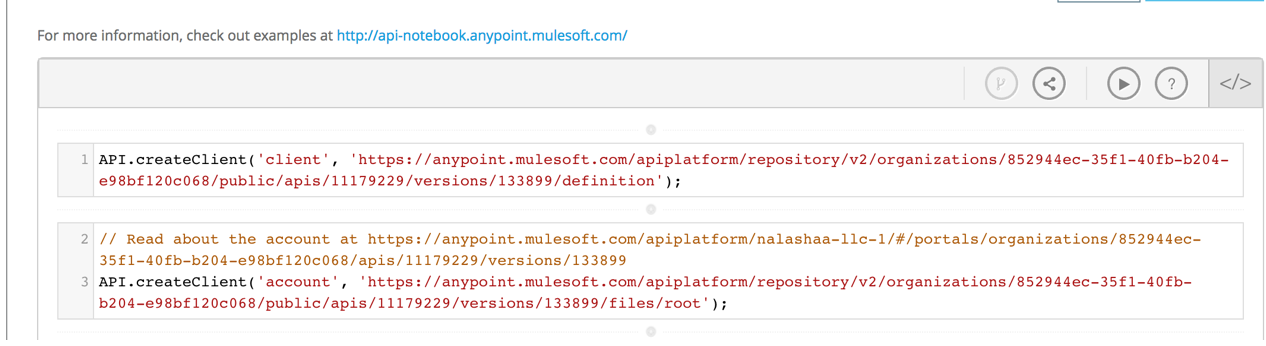 Figure 41 – First two steps in creating client
I am going to create next steps to include instructions on how to access account object and invoke the operations.
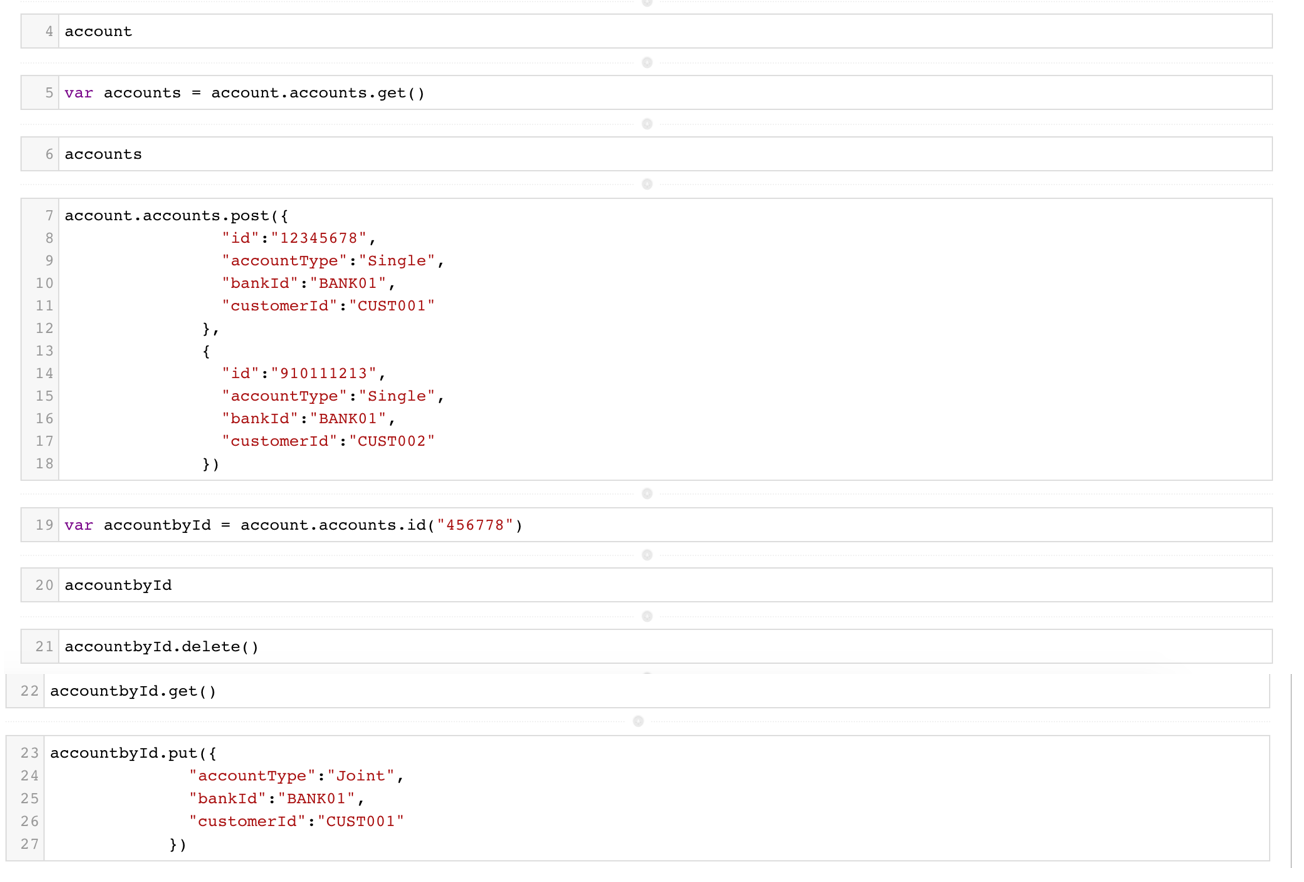
Figure 42 – Accessing account object and invoking operations.
The final step to expose the Home page, API Reference and API Notebook is click the “eye” icon before each of those links and they should turn out to green color as below:
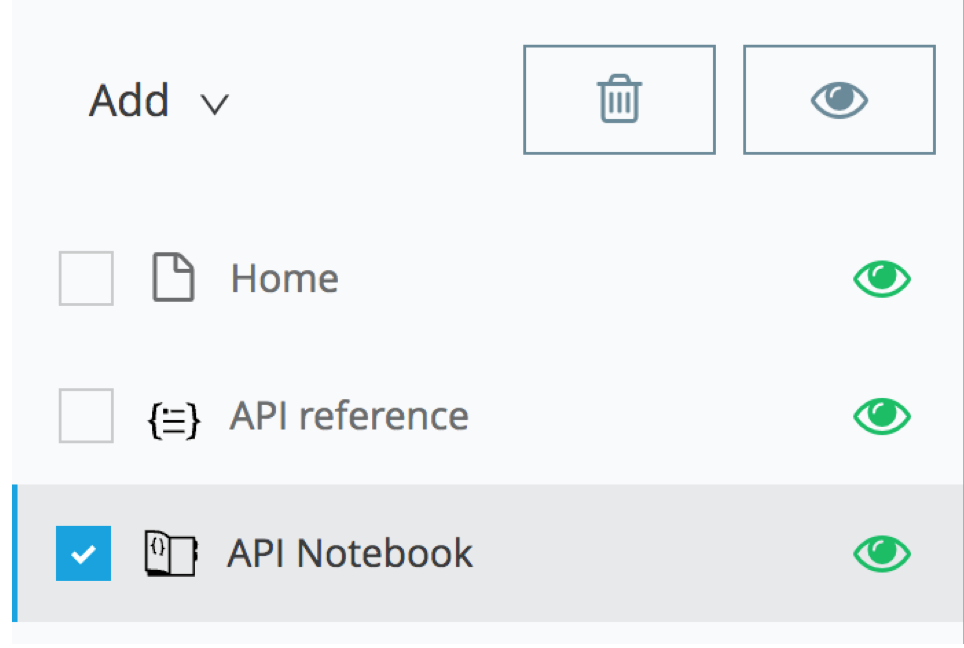 Figure 43 – Making the links visible in the Portal
Once we are ready to share our victory with the other developers, we need to check the portal by ourselves first and so click the “Live Portal” icon on the top right of the page and it should open a new page with the 4 links as below:
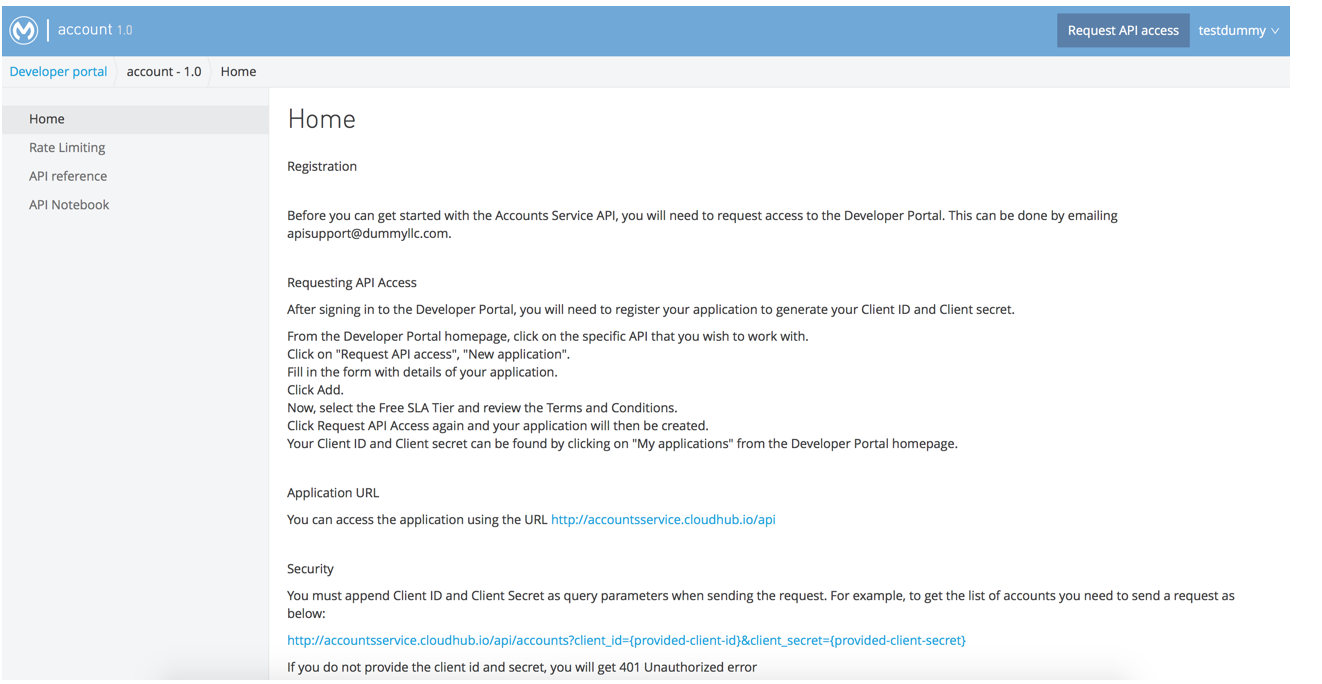 Figure 44 – Home page
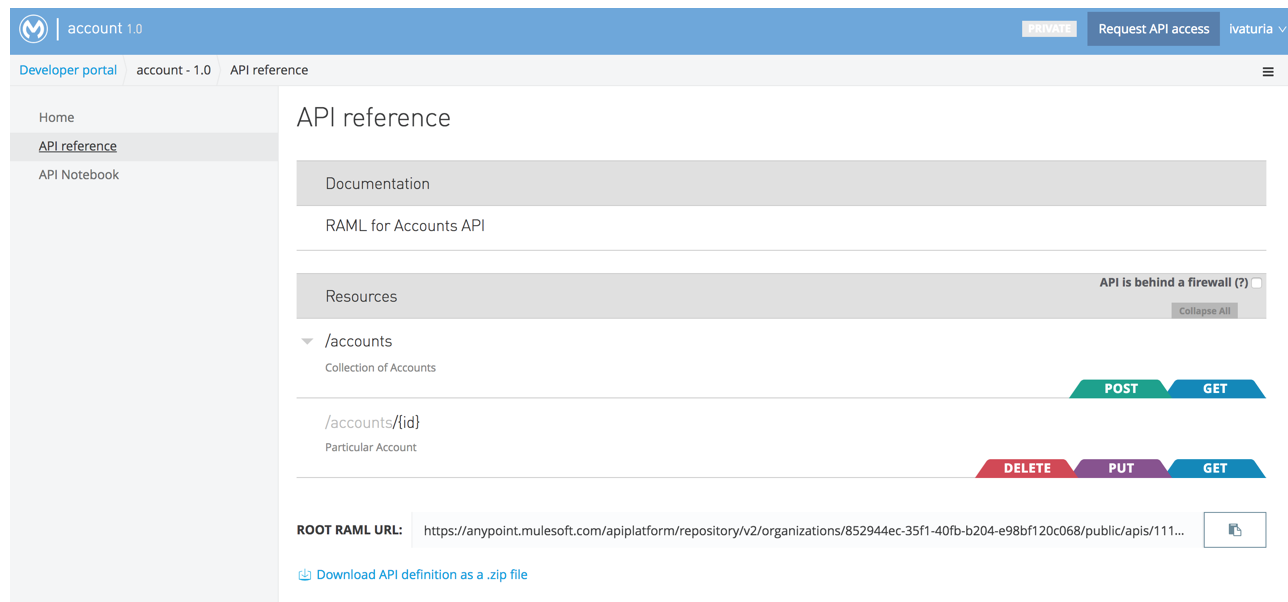 Figure 45 – API Reference page
 Figure 46 – API Notebook page
On the bottom of the API Notebook page, there is an option to play the notebook instructions and we should click and see how the APIs code works.
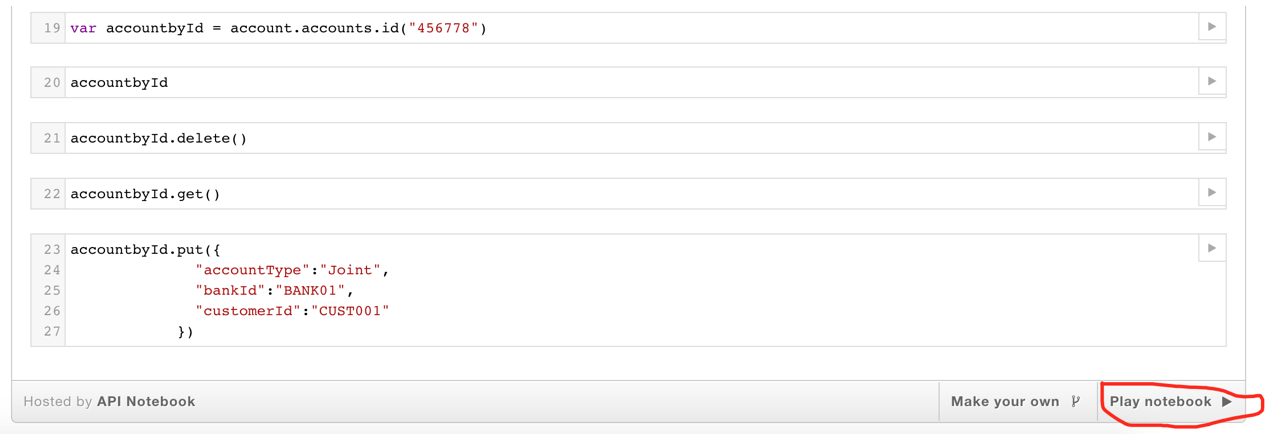 Figure 47 – Play notebook
Play notebook basically executes the instructions added in each of the cell to simulate the actual calls to the APIs and their operations.
For example, if we expand the object for accounts after I click the link “Play notebook” you should see body as an array of two account objects and the header with the content type as “application/json” as below:
 Figure 48 – accounts object
Similarly, accounts.post has posted an object and it shows the status as 201. These instructions use the mocking service as we have played at the beginning of this article.
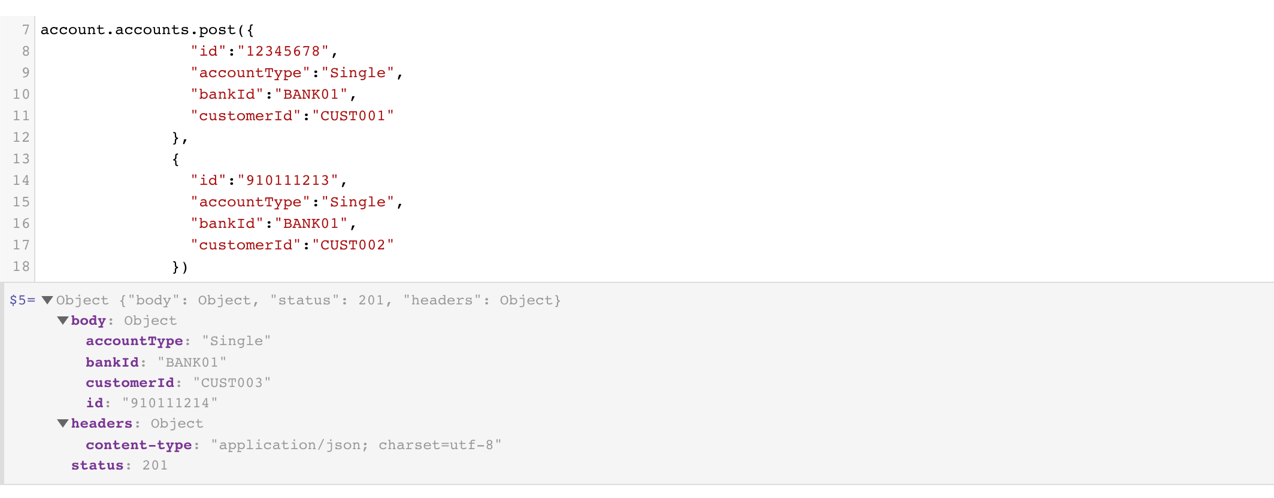 Figure 49 – Post Method
Also, if you try to get one account by id, it shows the supported operations delete, get and put that can be invoked on the object.
 Figure 50 – account object
So, with the API Notebook, not only the creator of the API can share his/her API to the outside world but also can simulate how it appears in the developer’s code. This helps any developer who is interested in learning about the API to have a first-hand impression of the API and its operations.
Right now, only the administrator can view the Portal and in order it to be visible to the outside world, he needs to make the portal as public by click togging the “Private button” on the top of the portal design page.

Figure 51 – Toggling the Private button turns the button to blue with Public as the text
Note that, the portal does not provide access to the actual service endpoint and to get the access the developers should request the administrator for the approval.
For interested developers, first they need to sign up for Anypoint Platform and then can access the Developer Portal. The developer portal presented to the outside developers can now play with API reference and API Notebook. These two pages still uses the mock service to send and get the requests. The actual API will not be called as the logged in developer did not request for access.
To get the access to the actual APIs you need to click the button “Request API Access” on the top of your developer portal.

Figure 52 – Request API Access button page
To gain access to the actual API, it is mandatory to become a user of the Business Group. Normally, in the home page the administrator provides the email or a registration page to become user of his/her Business Group in order to access the actual service APIs.
The URL of any Business Group’s list of APIs will be provided at https://anypoint.mulesoft.com/apiplatform/{group name}/#/portals
Note: If the administrator does not make his portal, you will not be seeing it after logging and hitting the above URL. So, the portal should be public for other developers to view.
Administration settings for the API will be added by the API owner or the administrator so that he can manage the API easily.
Administration section contains the following tabs:
- Applications, lists all the applications created for accessing API. Whenever someone requests access to API they will need to create an Application by specifying the SLA tier. Then that application will be listed in this tab.
- Policies, provides the API owner or administrator to add policies like Throttling, Rate limiting, Client ID enforcement and other policies needed.
- SLA tiers, defines SLA tier and description and if approval is needed for the creation of the application and limits on the requests in using the service.
- Permissions, this page shows the list of users registered for the API and API owner can change the permissions on the API for the user.
- Alerts, used to create alerts for the APIs like when request count is more than 500 per minute.
I have created application “Accounts” after I created my Portal.

Figure 53 – Applications
I have applied policies for throttling and throttling – SLA based. Throttling setting is number of messages per time period processed by an API. For this example, I have set up 3 requests per hour and if it exceeds the number of requests specified, the service should return error “API calls exceeded“.
Also, added another policy that says user must send the Client ID and Client Secret along with the request. Otherwise, the request will be denied. You will see the following errors:
- Unable to retrieve client_id from message
- Invalid client_id or client_secret
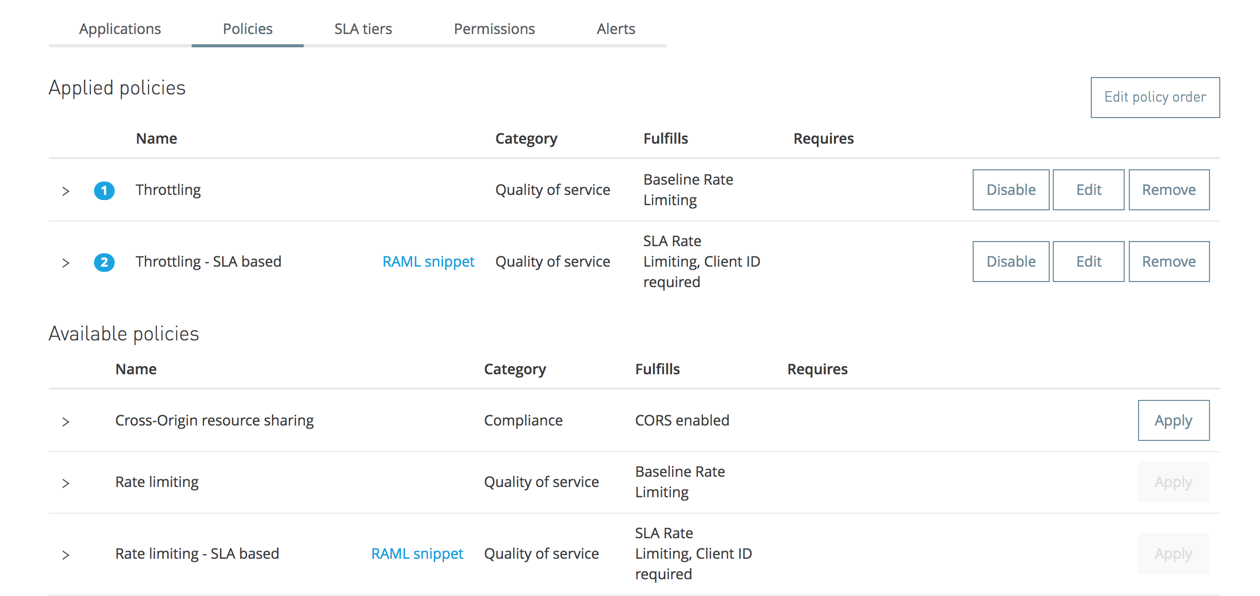
Figure 54(a) – Policies
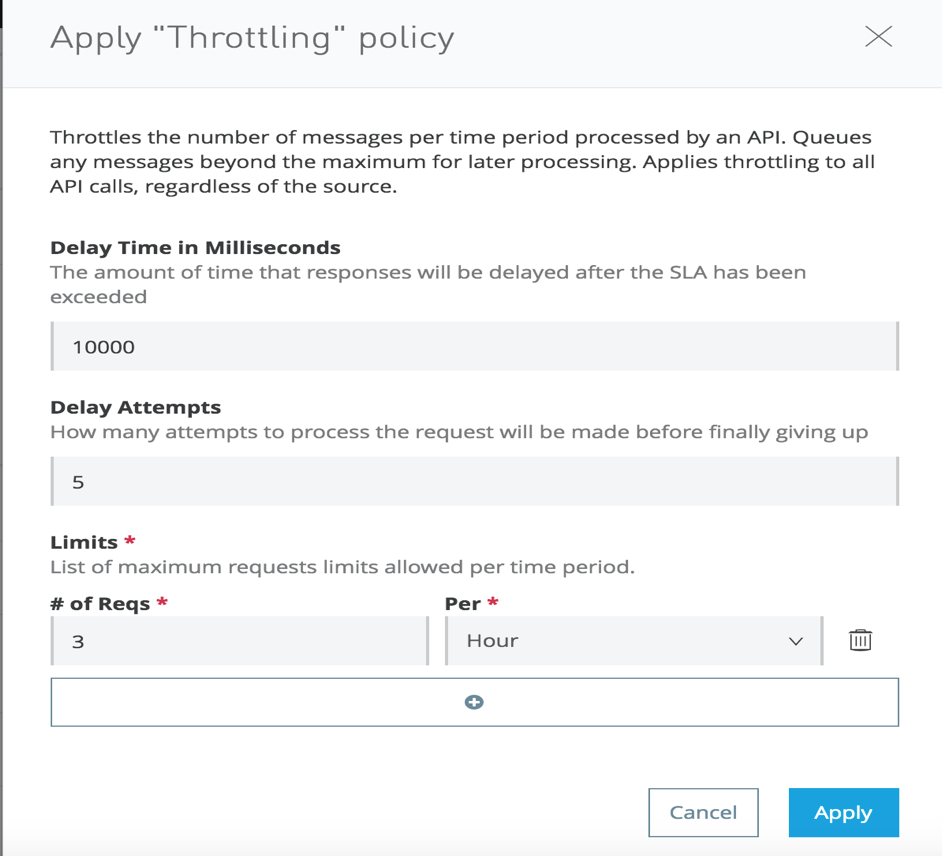 Figure 54(b) – Throttling policy
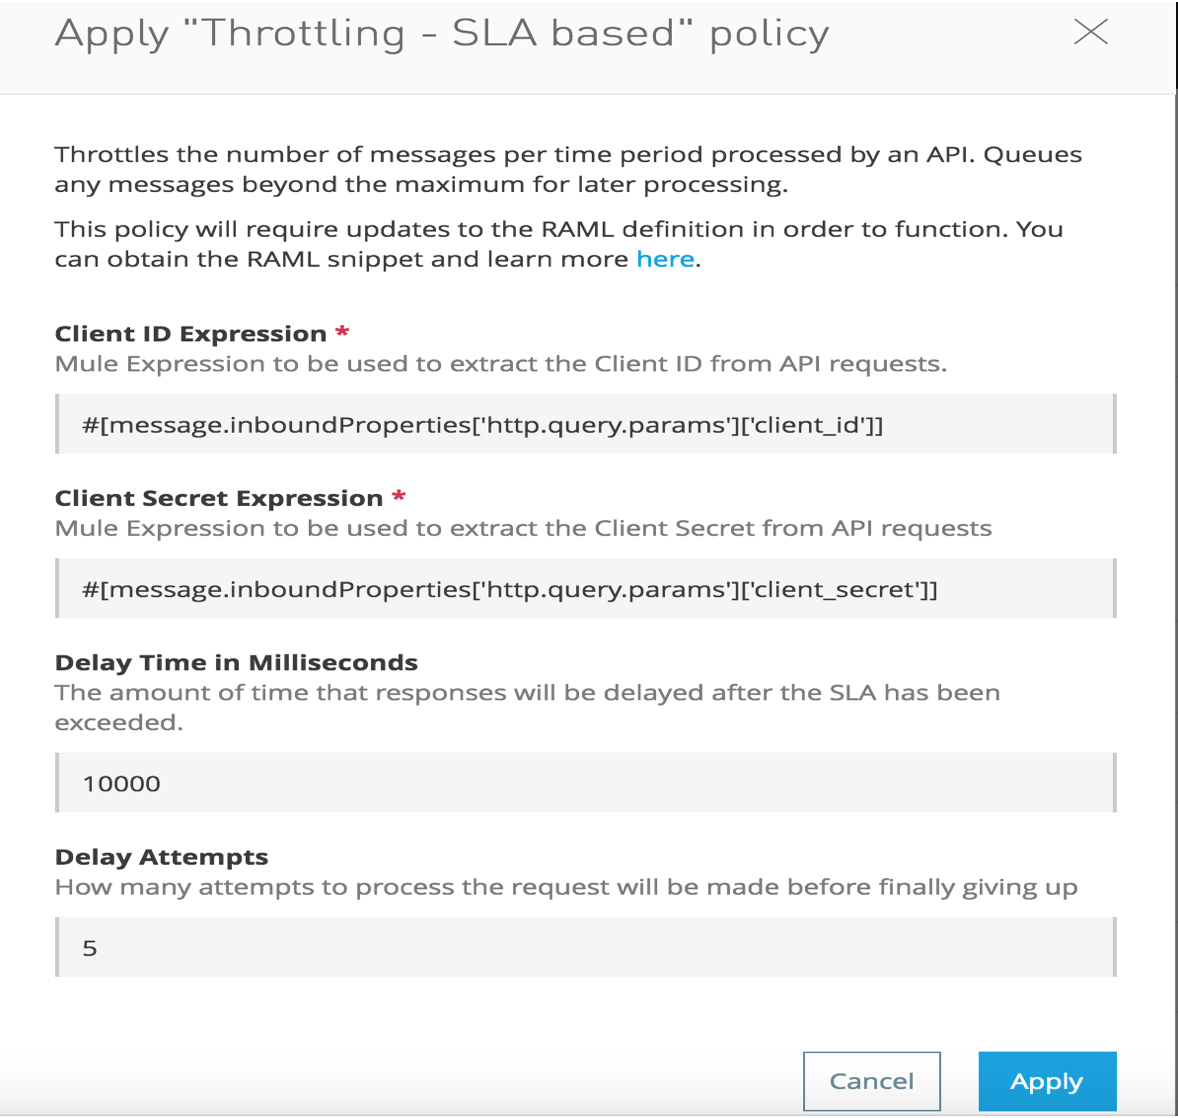 Figure 54(c) – Throttling-SLA based policy
Also, I have added SLA tier “Free” which specifies the limit of 2 request per hour and the approval is needed for other developers when they request the API from developer portal. Note, I would have random numbers for number of requests in my example. But when you define the policies you need to make sure that you need to plan properly. Otherwise, it will affect the traffic for your service.
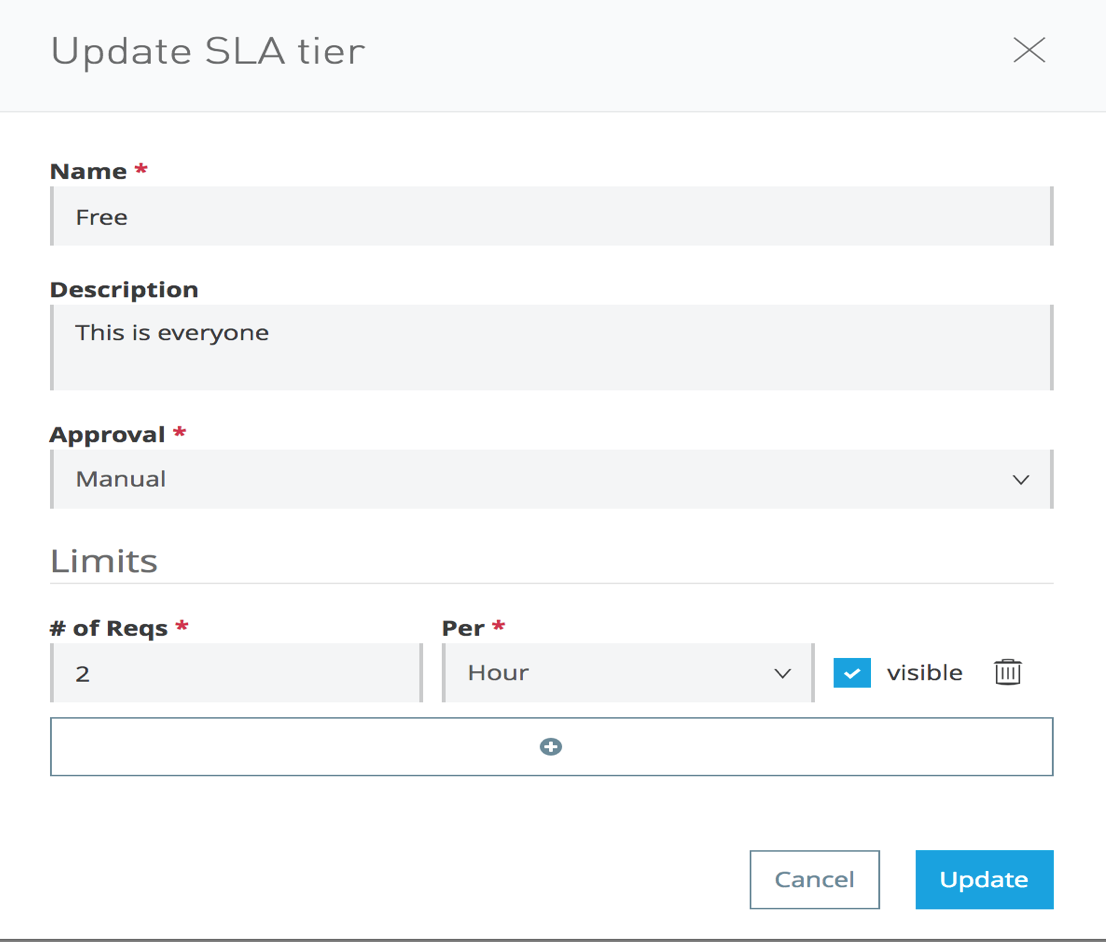 Figure 55 – SLA Tier
Permissions tab displays list of users and you can also set permissions for other registered users. For adding new permissions you need to enter a user name in the textbox and then set the permission for the user.
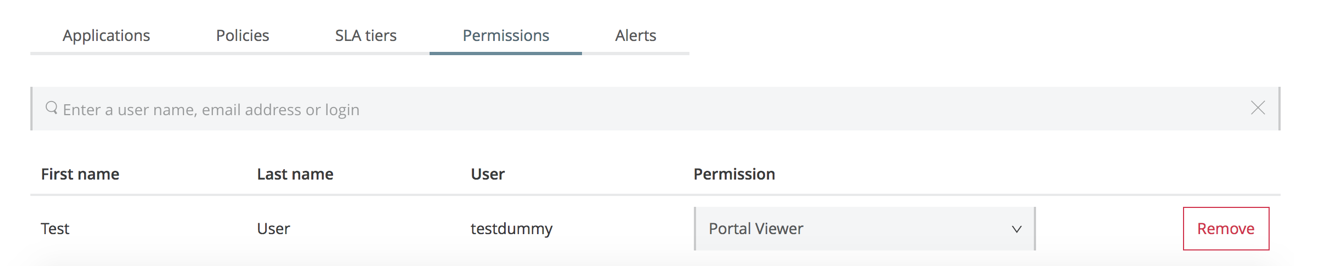 Figure 56 – Permissions tab
Alerts tab lets you add alert with severity as Critical, Warning and Info.
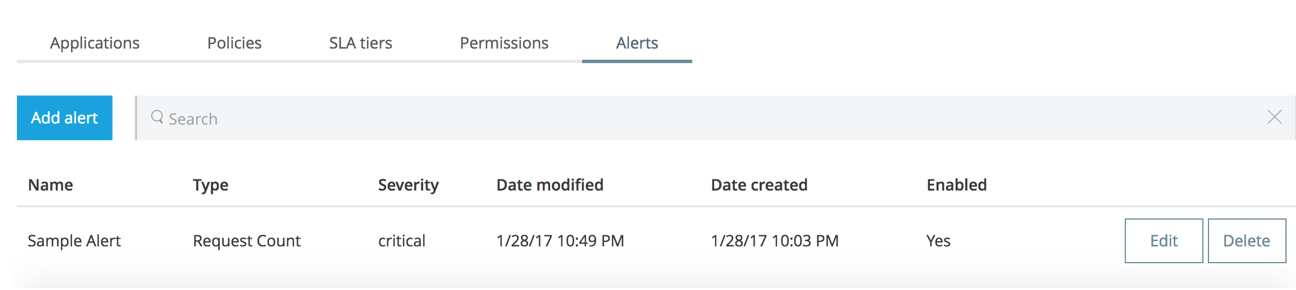 Figure 57 – Alerts tab
If any of the alerts condition meets your specification, then it will send you an alert to the email registered with your profile.
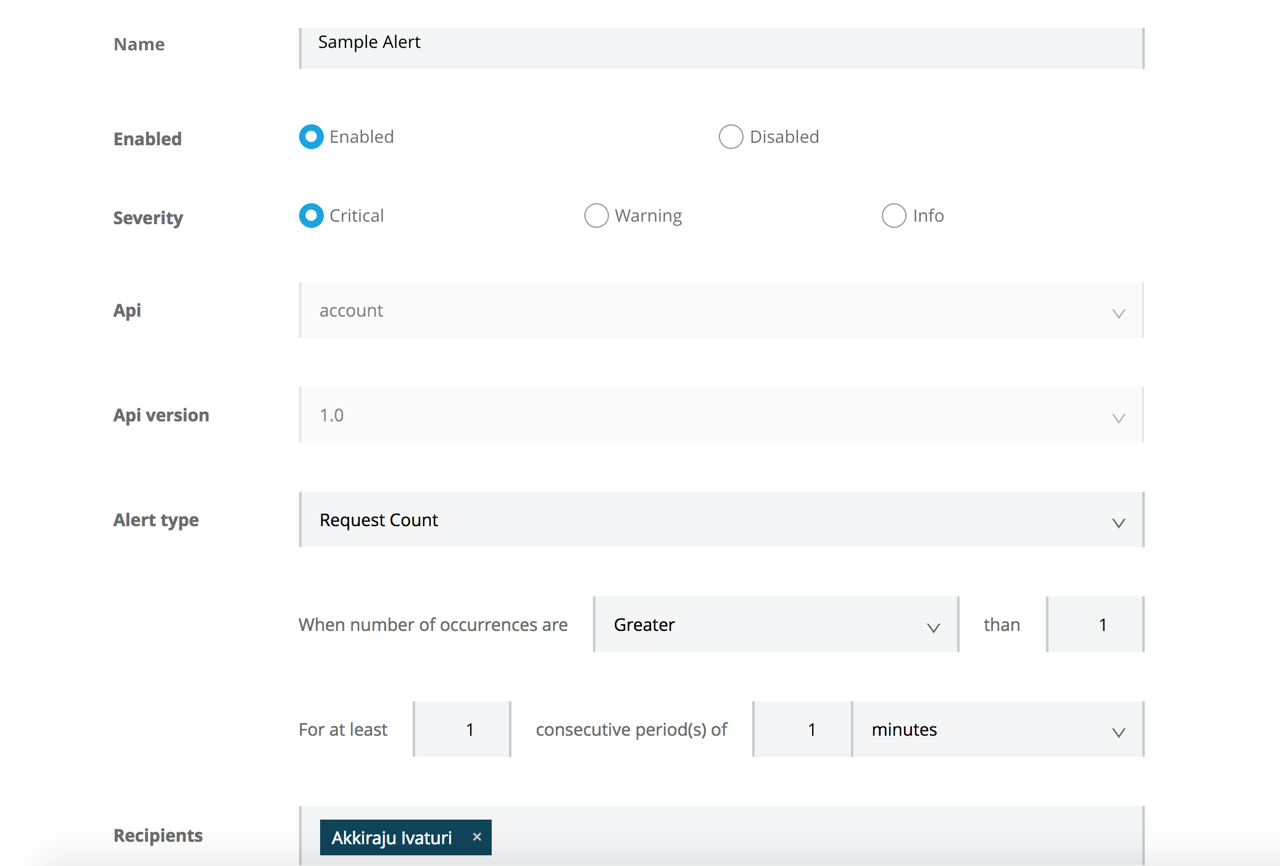 Figure 58 – Sample alert
I have set up the count as 1 so that I can demonstrate the alert message.
In the next article, we will discuss about accessing the Developer Portal.