This article is not going to discuss more on Cosmos DB. For any information on Cosmos DB you can refer Microsoft’s website https://docs.microsoft.com/en-us/azure/cosmos-db/introductionand Microsoft has provided pretty much everything needed for building solutions for connecting to Cosmos DB.
Targeted audience: Any MuleSoft developer who has built applications using ON PREM NOSQL databases and moving to Cosmos DB or new developers who want to play with SQL API for Cosmos DB.
Bonus: You do not need to have Azure subscription for playing with Cosmos DB. You can try for free as on today by clicking the link https://azure.microsoft.com/try/cosmosdb/
I have tried with the link for trial for this article and it looks great for first hand experience on Cosmos DB and it is free. Mind you, unlike other resources Cosmos DB is expensive and so it is truly a good offer from Microsoft to try for some free minutes. There is no Mule connector available for SQL API for Cosmos DB from MuleSoft and so we will be making HTTP calls to the Cosmos DB using SQL API.
Note: If your application is developed using Mule flows, then this article helps. Otherwise, you can do HTTP call from any other tool or programming languages.
After clicking on the link, login with your credentials and click “Azure Cosmos DB”. Then add a container by clicking “Add Container” link in the Overview section as below:
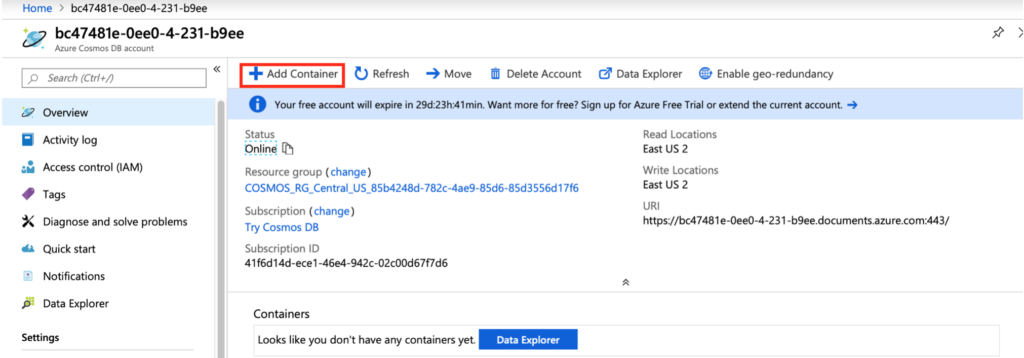
Figure 1 – Add Container
Fill in the details:
Database id – tempdb, the actual database name
Container id – testcontainer, where your documents are stored.
Partition Key – Zipcode. In our example, we are going to provide Zipcode as part of the message. You need to specify partition key value while posting the message. Otherwise, you may get errors.
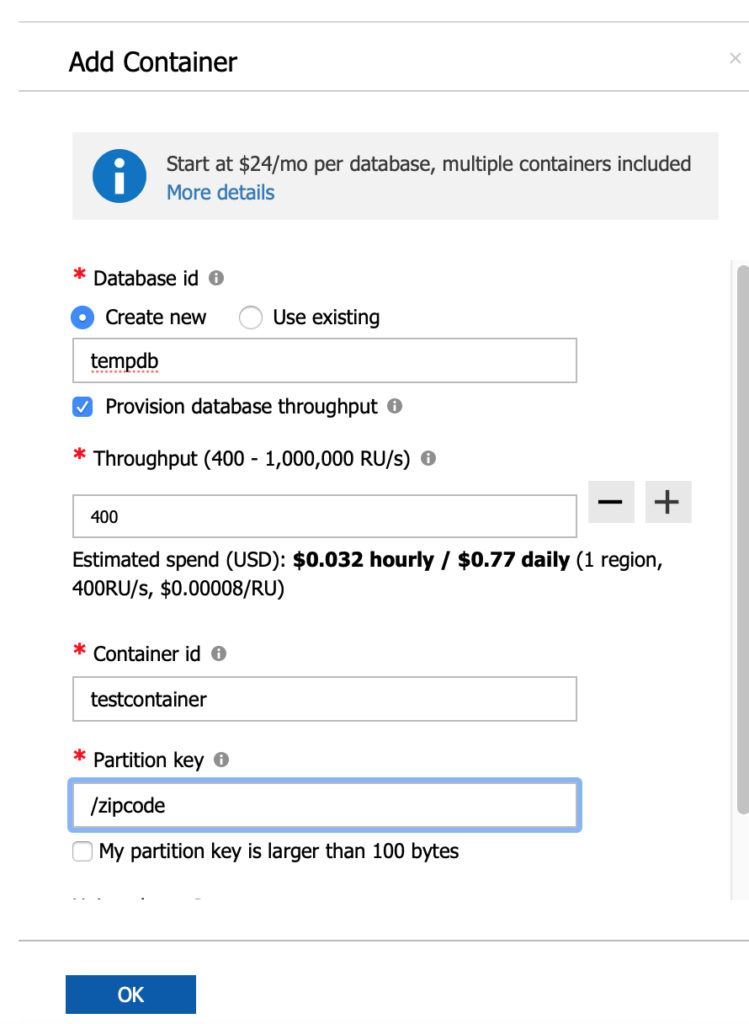
Figure 2 – Add Container details
Click on “Keys” and copy the URL and primary key in a notepad. We will be using those details to connect the Cosmos DB.
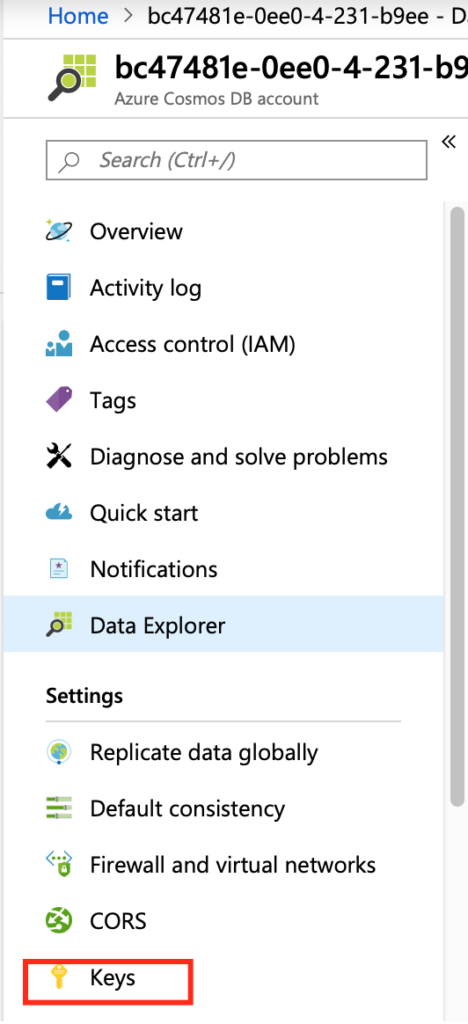
Figure 3 – Keys
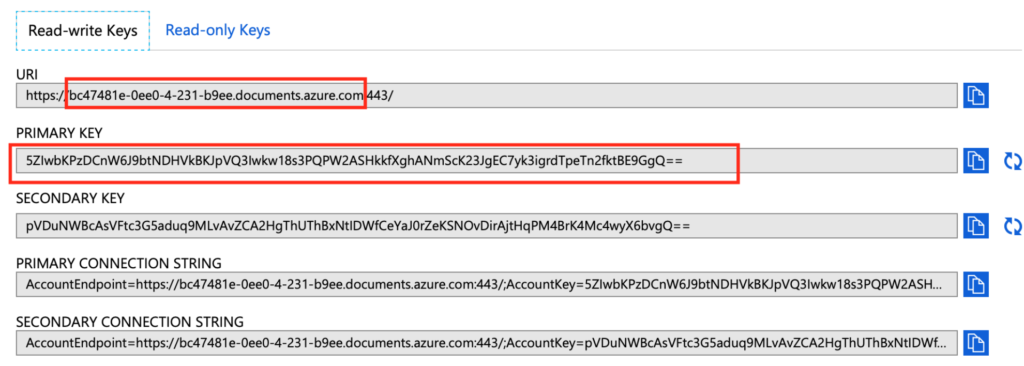
Figure 4 – URI and Primary key
I will be using Mule 4.1.5 runtime and Anypoint Studio 7.3.4 for building the application. The application flow will be a basic one as below:
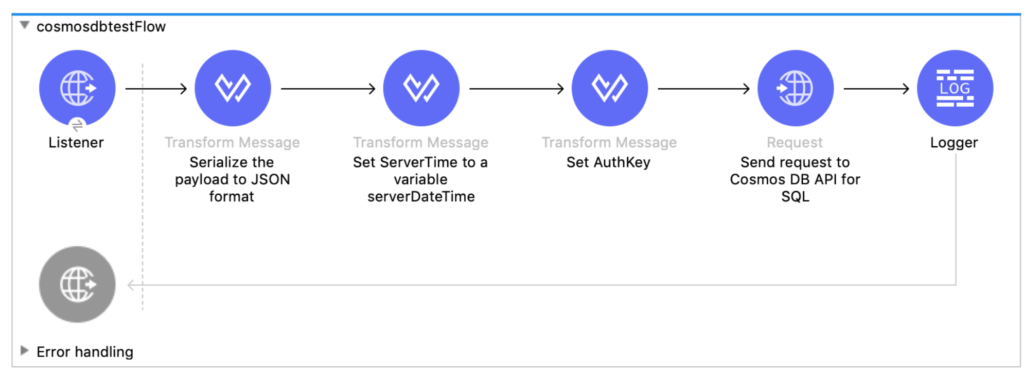
Figure 5 – Mule flow
Application details:
- A HTTP listener that listens to the request payload.
- Transform the message to JSON format.
- Another transformer that calls custom class’s method getTime() that gets the system time in GMT.
- Another transformer that calls custom class’s method generate() that generates the Authorization key.
- A HTTP request that makes a request to Cosmos DB endpoint. In the header, we need to specify “Accept”, “x-ms-version”, “Authorization”, “x-ms-date”, “Content-Type” and “x-ms-documentdb-partitionkey” values. If any of the required attributes are missing, Cosmos DB will throw an error.
- In this example, I have created two sets of classes for generating Authorization key. One requires com.microsoft.azure.documentdb package that requires following dependency in the POM file:
   <dependency>
            <groupId>com.microsoft.azure</groupId>
            <artifactId>azure-documentdb</artifactId>
            <version>2.1.2</version>
   </dependency>
- Other one requires basic Java packages.
Before going into details of Java class, I would like to thank and provide credit to the authors of the following blogs who provided these classes, thus saving time for us:
https://github.com/aaronmboyd/cosmos-auth-header-java
In my application, the highlighted classes are from the first link and the class “GenerateHeader.java” is based on the second link mentioned above. You can use either of them in order to generate the Authorization key.
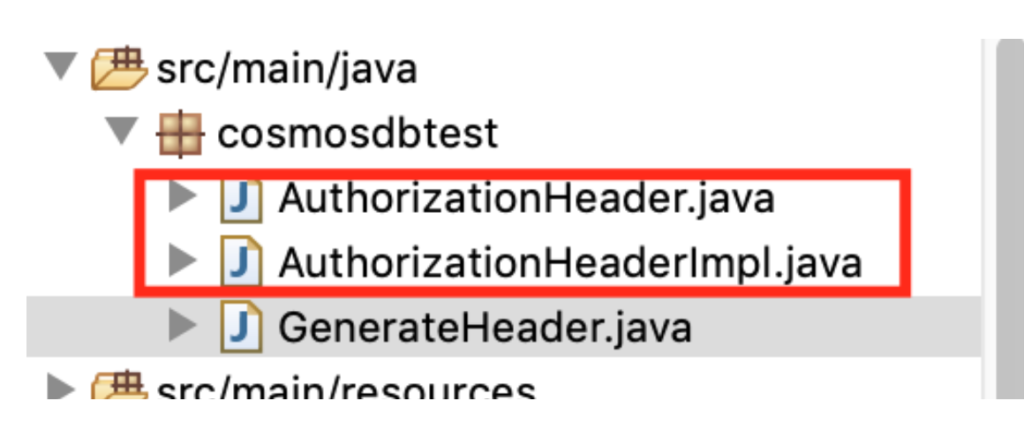
Figure 6 – Java classes for generating Auth token
In my example, I am using “GenerateHeader.java”. If you want to use the first set of classes replace the transformer “set AuthKey” with the following:
<ee:transform doc:name="Set AuthKey" doc:id="62a9c131-437b-4bf4-a25f-10f51276d1ee" >
	<ee:variables >
		<ee:set-variable variableName="authKey" ><![CDATA[%dw 2.0
import java!cosmosdbtest::AuthorizationHeaderImpl
output application/java
---
AuthorizationHeaderImpl::generateHeader(vars.serverDateTime)]]></ee:set-variable>
	</ee:variables>
</ee:transform>
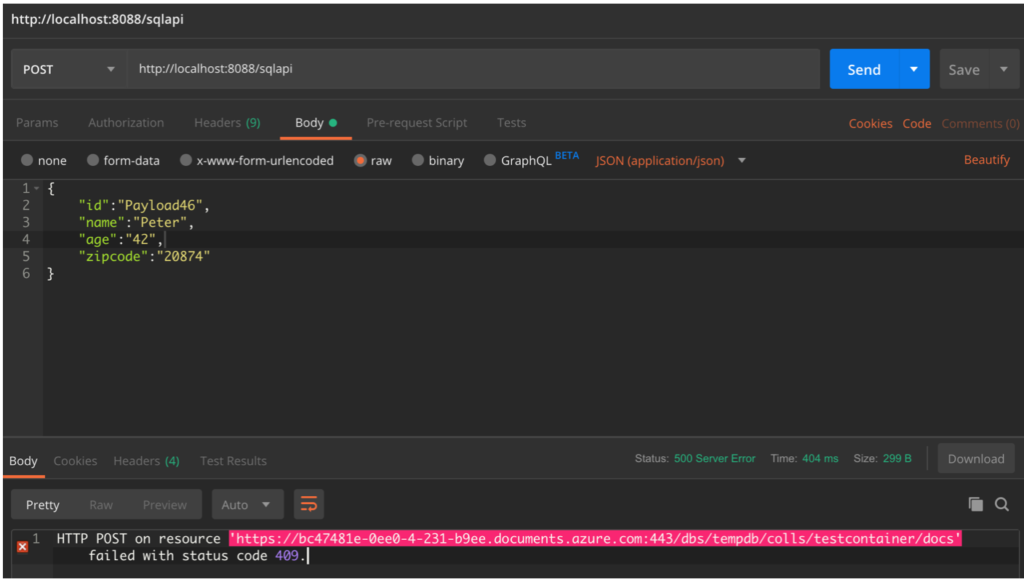
Http listener listens on port 8088 and the path is “sqlapi”. Make sure when you post the request, the message has “zipcode” which is a partition key and “id” is unique. I am using Postman for posting the request, but you can use any other tool like Fiddler etc.
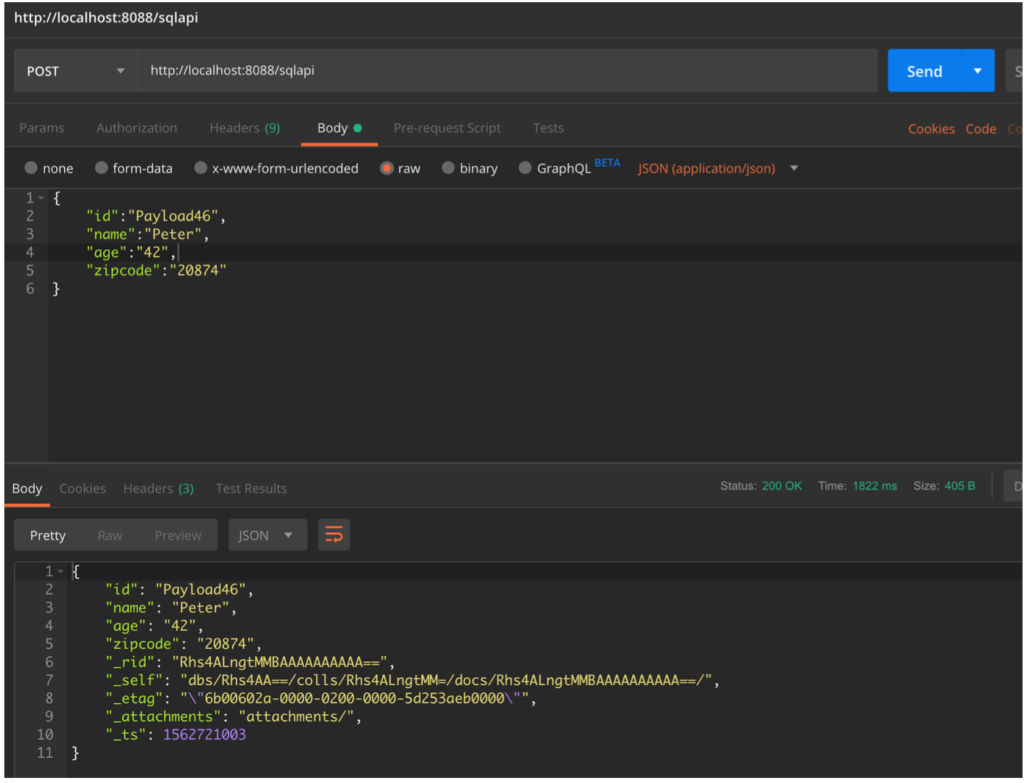
Figure 7 – Postman Request
When the status is 200, go back to Azure portal and click on “Document Explorer” which should ask you to click on “Data Explorer”. When you click “Data Explorer”, you should see the “Items” link underneath the “testcontainer” and if you click on the link it should display the posted message as shown in the Figure 8.
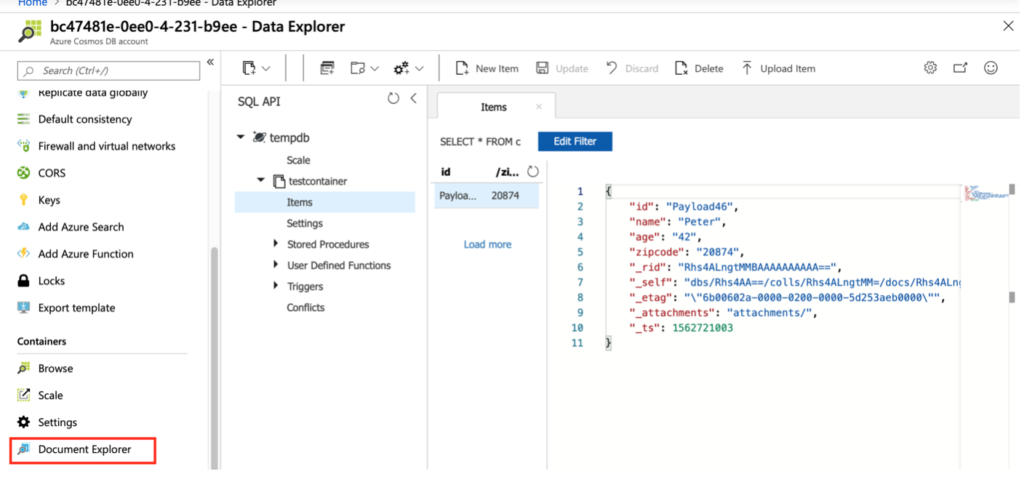
Figure 8 – Data Explorer
If “id” value already exists, Cosmos DB throws 409 status code indicating conflict has occurred.
You can find the source code for the application at https://github.com/ivaturia/learncosmoswithmule
If you directly want to play with Cosmos DB by making HTTP requests from POSTMAN, there is great collection available at https://github.com/MicrosoftCSA/documentdb-postman-collectionThanks to the author for posting this. It is a great way to test different APIs provided by Cosmos DB.
Hope this helps. If you find this post useful, do not forget to share with your friends. Happy coding!!!