
In this article, I will go through simple steps of consuming messages from Microsoft Azure Service Bus Topicand inserting into Cosmos DB SQL API. I will not cover on more about Azure Service Bus topics/subscriptionsor Cosmos DB SQL API. But will provide sufficient information to follow along the article.
Intended audience:Anyone interested in learning Microsoft Azure Service Bus topics and Cosmos DB SQL API and using Azure Logic Apps as an integrator between these two technologies. Have your Azure Subscription ready in order to test the implementation.
Microsoft Azure Service Bus in simple terms is a cloud-based Message Broker and you can integrate Enterprise Systems developed on different technologies to talk to each other, but at their own convenience thus providing asynchronous communication and guaranteed delivery of messages. It provides features like de-duplication, ordering of messages in the form of Topics, Queues. If there are multiple recipients for the same message, Topics cater to the need and if there is only one recipient for a message then Queues are used for the purpose.
Logic Apps are Microsoft’s serverless application, built based on features that are supported by Microsoft Biztalk server. It provides drag and drop experience, web-based and have 200+ connectors falling into Standard, Enterprise and Premium categories. Monitoring and Logging are provided out of box and it is easy to integrate any Azure component used in building the enterprise applications.
Azure Cosmos DBis Microsoft’s globally distributed, multi-model database service available in Microsoft Azure. It is a good choice for any serverless application that needs low order of millisecond response times and needs to scale rapidly and globally.
I am not going to handle any retry logic or exception handling in this article, but it is must when we develop a production-ready application. My intention is to show how easy it is to integrate Microsoft Azure Service Bus Topicwith Cosmos DB SQL API.
There are 3 steps involved in this implementation. First consume the message from Azure Service Bus and acknowledge it. Second, parse the message JSON body and third step is to insert into Cosmos DB SQL API as a document.
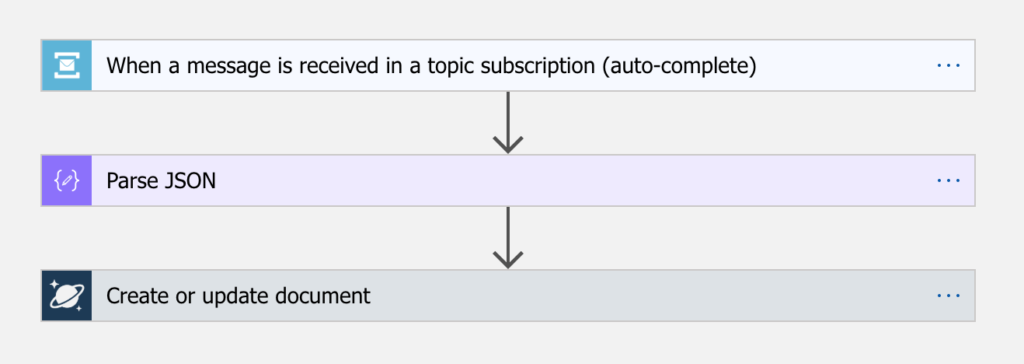
Figure 3 Steps
First step, I am going to create a resource group for provisioning the 3 components needed for the application. Resource Group helps us in maintaining resources easily by grouping them together. I am naming the resource group as “testlogicapps”.
Next, I am going to create a resource for Azure Service Bus. I am using my subscription “Pay-As-You-Go” and creating a namespace under the resource group created above. In order to create Topic in your subscription make sure to select “Standard” Pricing tier. Otherwise, you will not be able to create topics.
Please note if you are using your own subscription like me, try to delete the resources especially the Cosmos DB SQL API as it will add bill based on request units and you should not be paying high for simple example.

Figure 1 – Creating namespace
Now we need to create a Topic for publishing the messages. Click on the “+ Topic” link highlighted and name the topic as shown in the figure 2.
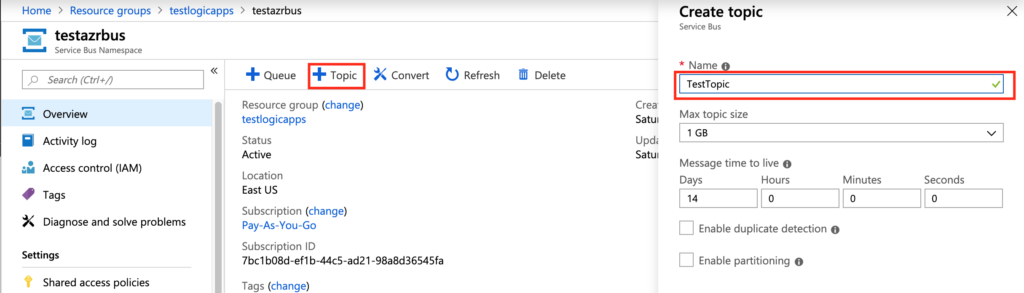
Figure 2 – creating a topic
Next step is to create a subscription in the topic. In order to do that, click on the “testtopic” an go into the details as shown in the Figure 3 and click the link “+ Subscription”.

Figure 3 – Topic
I am going to set the Message time to live value to 2 hours. Time To Live (TTL) dictates how much time the message can live in the subscription. I am not going to handle any dead-lettering of messages and so not going to select any other options. Also note that I am not creating any Filters and any message published in the topic should end up in the subscription. If you have multiple subscriptions under the topic and if you want the message to reach particular subscription(s) then specifying filter helps in filtering the messages published to the topic.
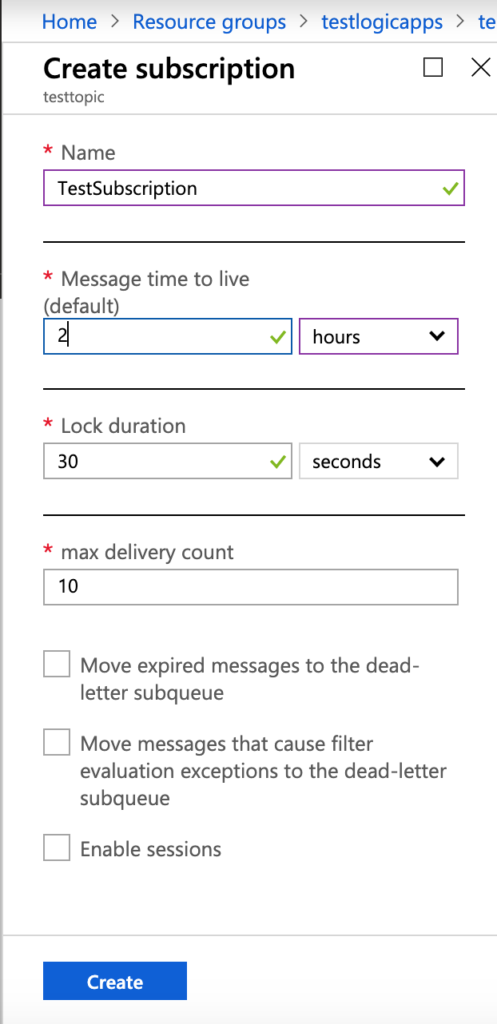
Figure 4 – Create a Subscription
In order to publish a message, we need to know the access key and value. By default, when we create a namespace, Shared Access Policies will list out one policy key i.e. RootManagerSharedAccessKey as shown in the figure 5. If you click on the policy, then you can copy-paste the primary key. This key has power to send, listen and manage topics/queues/subscriptions created in the namespace.
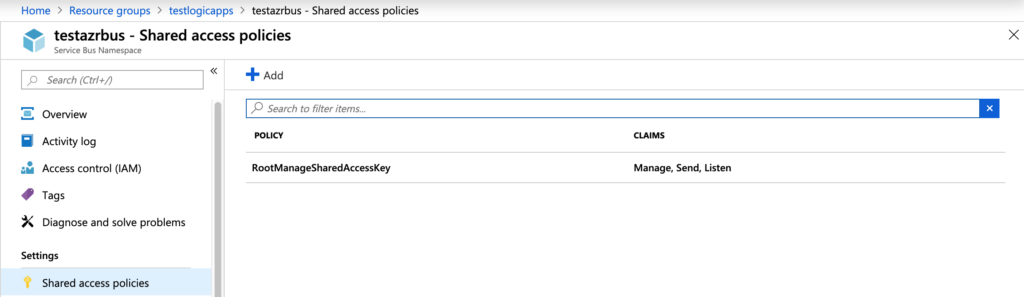
Figure 5 – Shared Access Policies
You can publish messages/read messages from topics using Azure Service Bus Explorer available in GitHub https://github.com/paolosalvatori/ServiceBusExplorer/releases. I have used this tool to publish messages.
I have posted a message to Azure Service Bus and you should see the message count in the subscription incremented.
{
    "id": "doc-6768868",
    "name": "Peter",
    "age": "42",
    "zipcode": "20786",
    "property_location": {
        "city": "NYC",
        "State": "NY"
    },
    "property_cost": "$500k",
}
Now we need to provision Cosmos DB SQL API using “zipcode” as the partition key. Cosmos DB SQL API expects partition key to be sent as an array in order to insert the data into database.
Search for Cosmos DB and click on “Create” button.
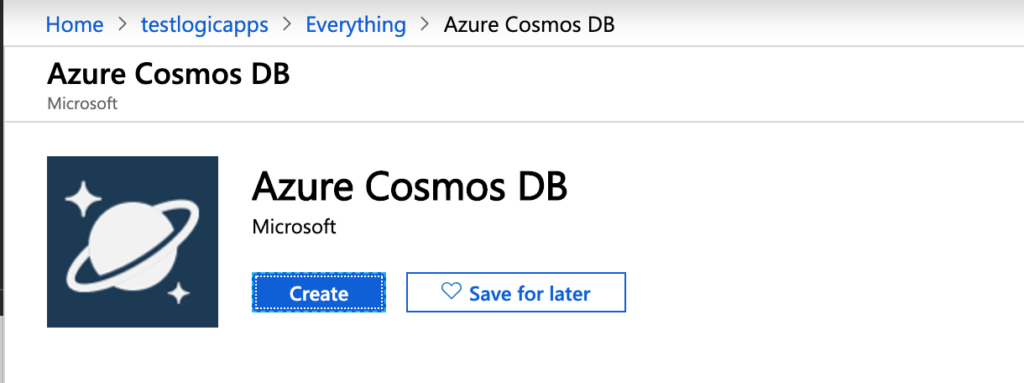
Figure 6 – Create Azure Cosmos DB
Create Account Name and do not forget to keep the API as “Core (SQL)” as in figure 7.

Figure 7 – Review and Create
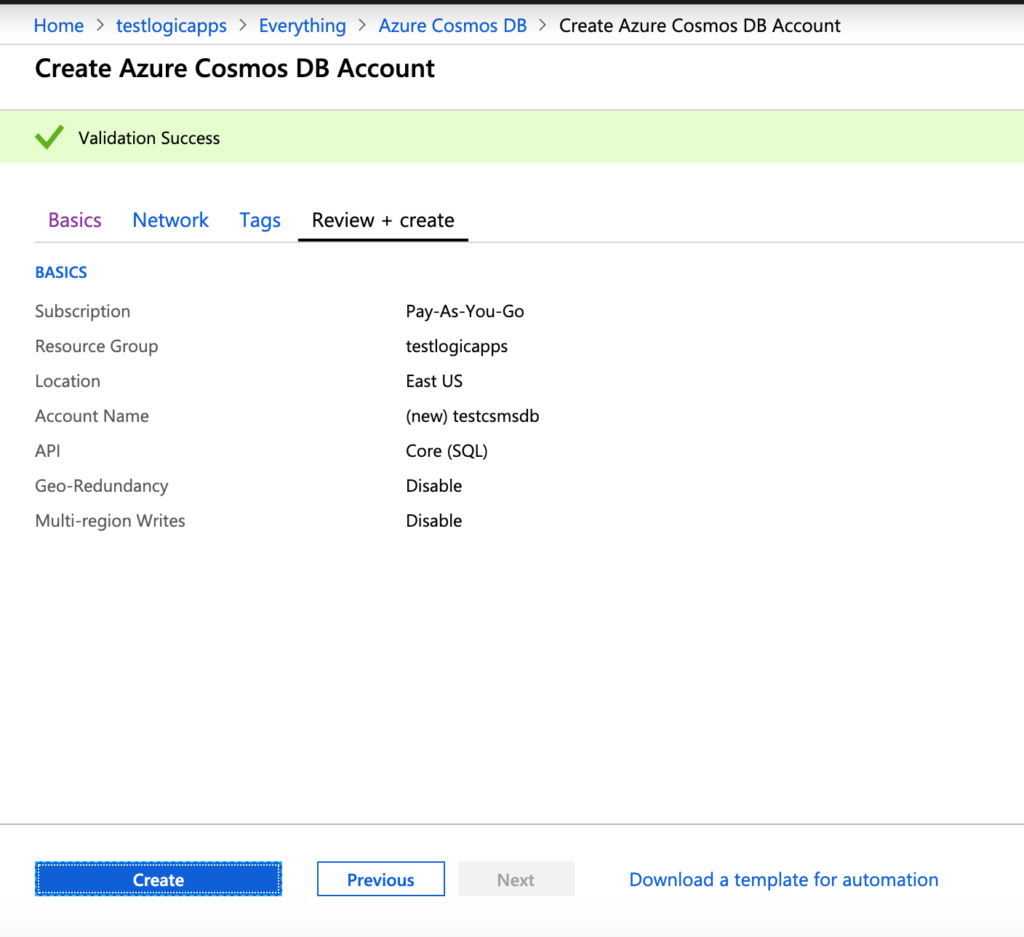
Figure 8 – Create Azure Cosmos DB Account
Once it is successfully created, go to “Data Explorer” and Create a “New Database” and “Collection”.
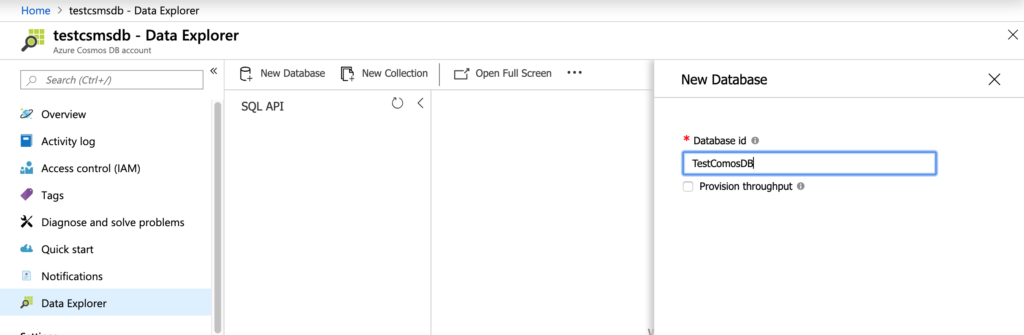
Figure 9 – Create a Database
Make sure to enter partition key as “zipcode”.
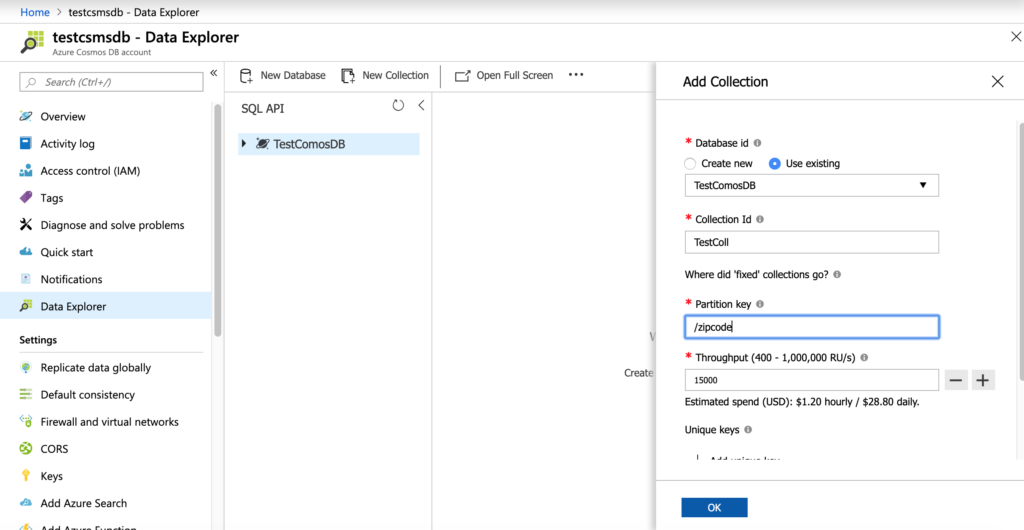
Figure 10 – Create a collection
Now create a logic app by searching for logic app and enter the details and click on the “Create” button.
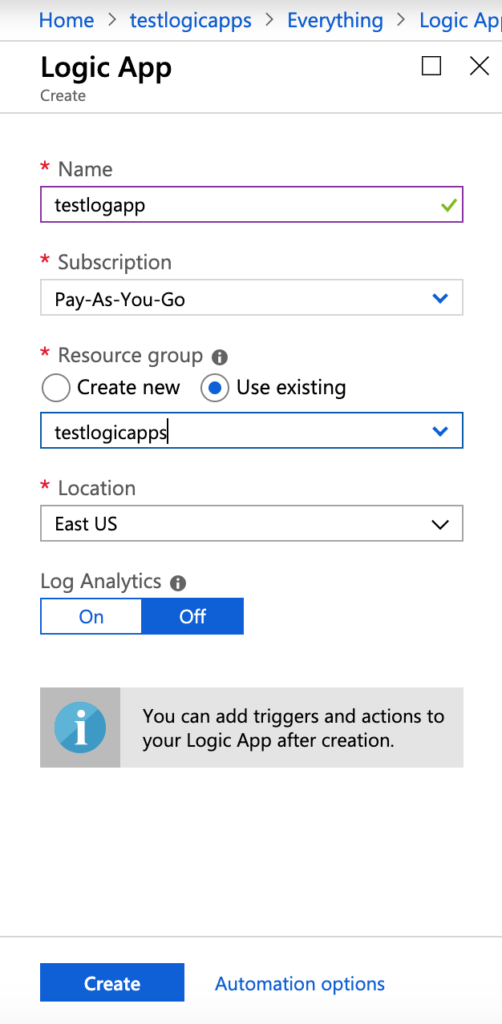
Figure 11 – Create a logic app
Once the logic app is created, it goes to a Logic Apps Designer page and select “Blank Logic App” in the page.
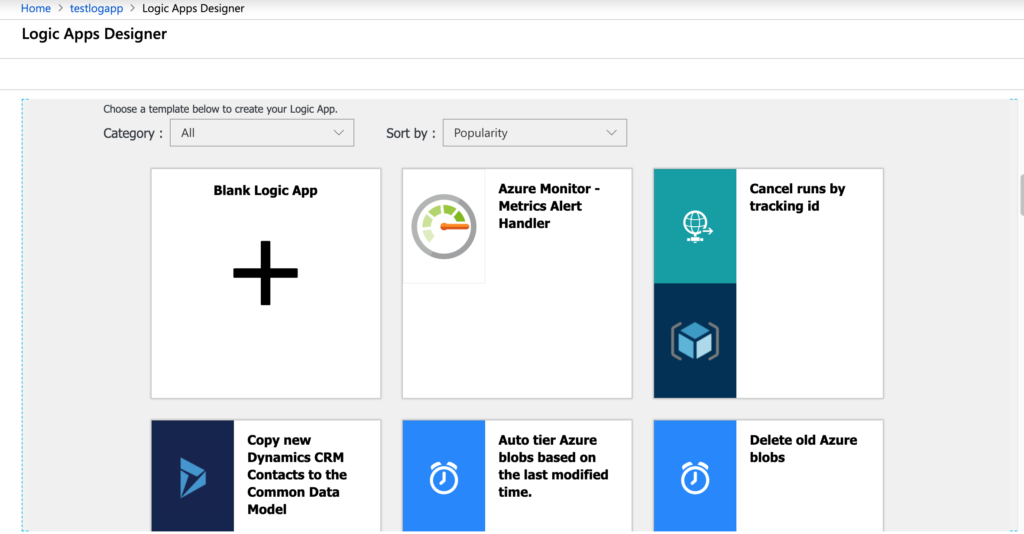
Figure 12 – Blank Logic App
Search for “Service Bus” in the search box and select “Service Bus”
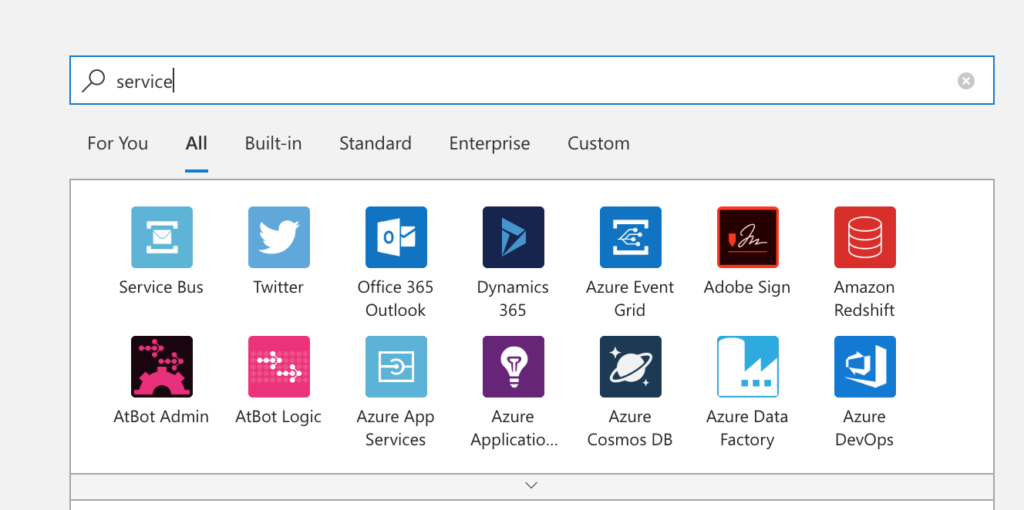
Figure 13 – Search “Service Bus”
Now select a “trigger” for the service bus. Trigger is the one that initiates the logic app to start. Select “When a message is received in a topic subscription (auto-complete)” as highlighted in figure 14.
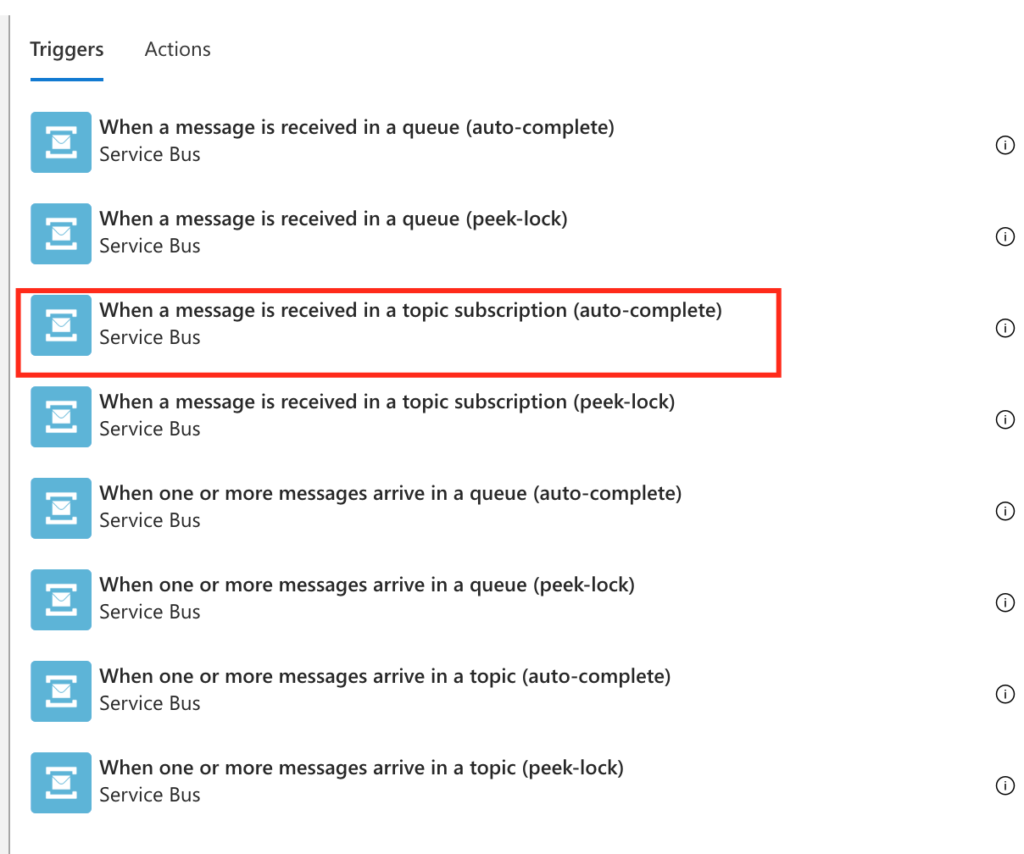
Figure 14 – Select a Trigger
Now enter the connection name and select the listed service bus namespace as shown in figure 15.
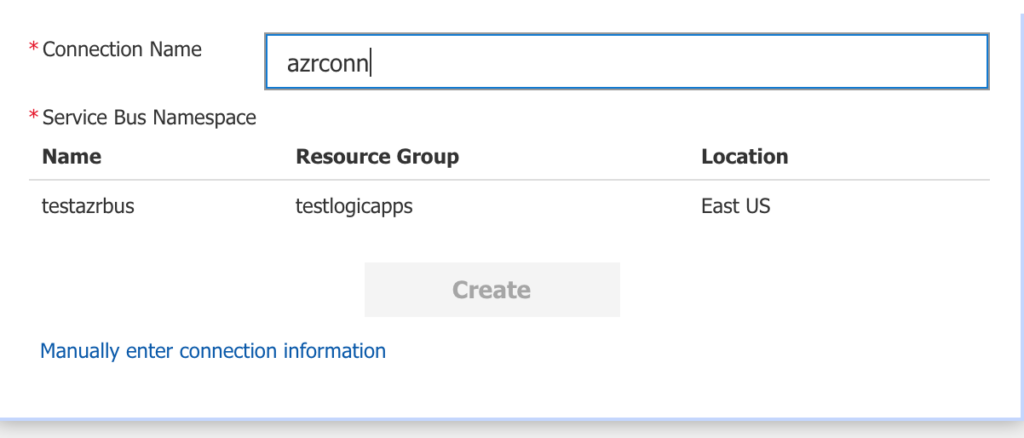
Figure 15 – Enter Connection Name and selecting service bus namespace
Then select “Service Bus Policy” as “RootManageSharedAccessKey” and click on button “Create”.
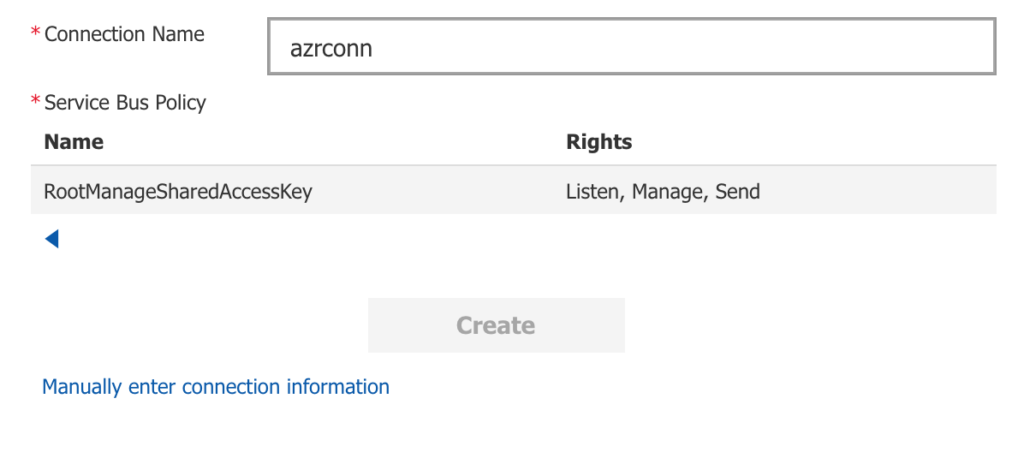
Figure 16 – Select a Service Bus Policy
Now you will be presented with inputs to enter “Topic Name”, “Subscription Name” and type of Topic. All the values should be auto populated. In the Subscription type, we are looking for main subscription. In case, if you want to read from dead letter queue, we need to select “Dead Letter”.

Figure 17 – Enter topic, subscription details
I will keep the default interval value.
Now click on “+ New Step”.
Now search for “Parse” and select “Data Operations”.
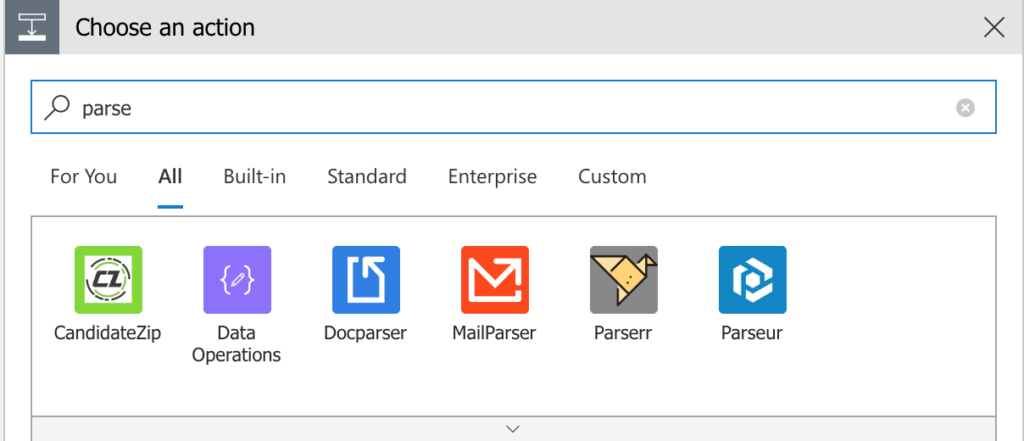
Figure 18 – Search for Parse
Now select “Parse JSON” from the list.
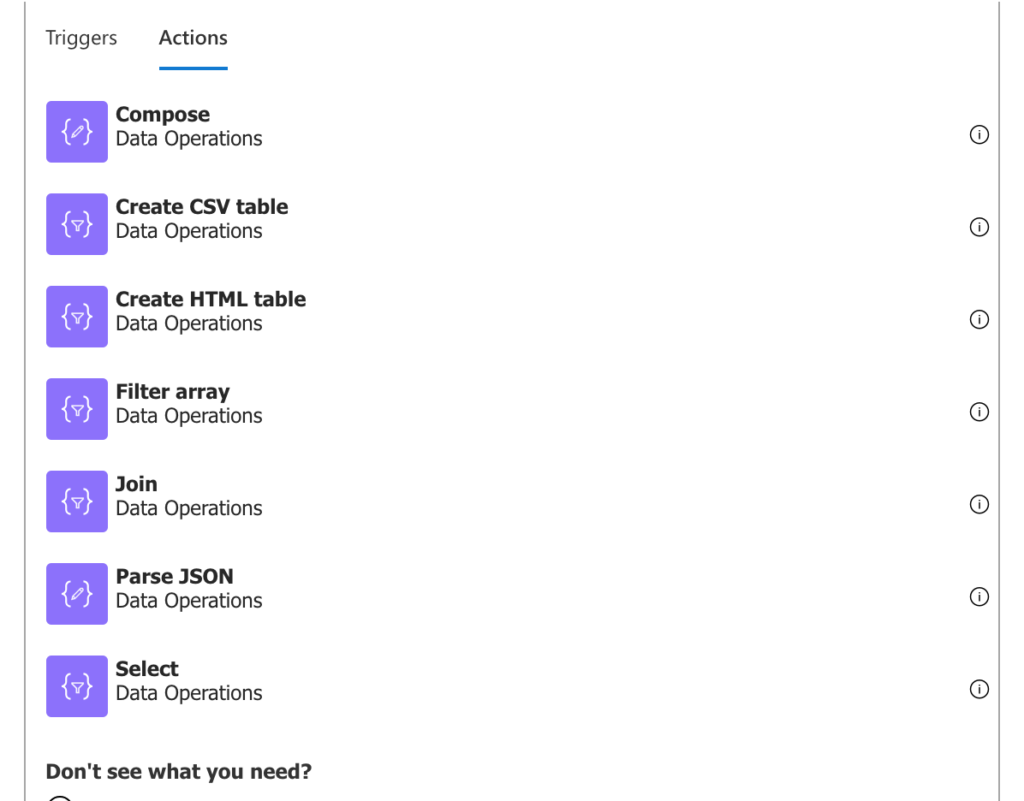
Figure 19 – Parse JSON
When you click in the input for “Content”, it lists out all the available options in the “Dynamic Content” explorer as shown in figure 20. Select first option available i.e. “Content” as the value.
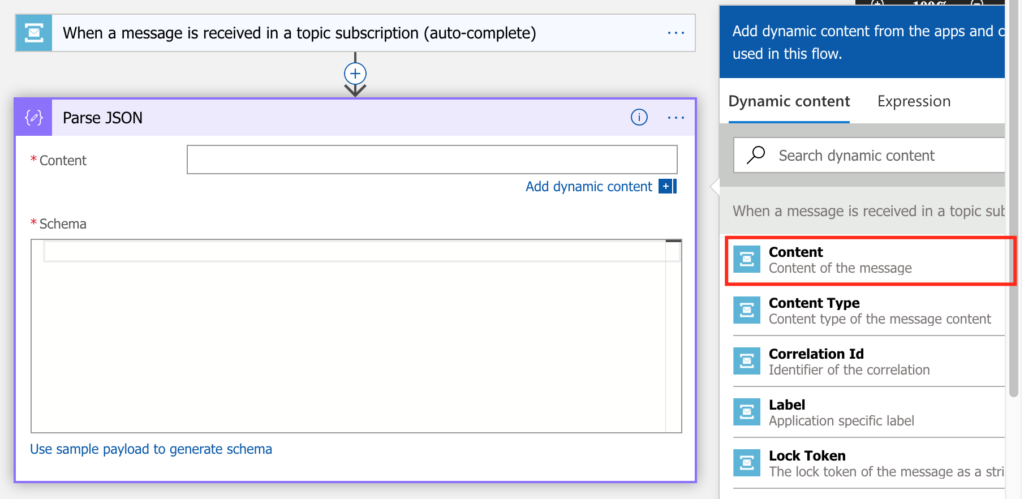
Figure 20 – Select Content
Now select the schema by selecting the link “Use sample payload to generate schema” and pasting the input JSON that we used for inserting into Azure Service Bus.

Figure 21 – Select Schema
Note: One point to note is that the content that we get from Azure Service Bus is in Base64 encoded and so we need to convert it to string. Try to check without changing the expression and you will know the issue.
So, go back to input for “Content” and remove the “Content” and select “Expression” and enter base64ToString(triggerBody()?[‘ContentData’])in the input and click OK.
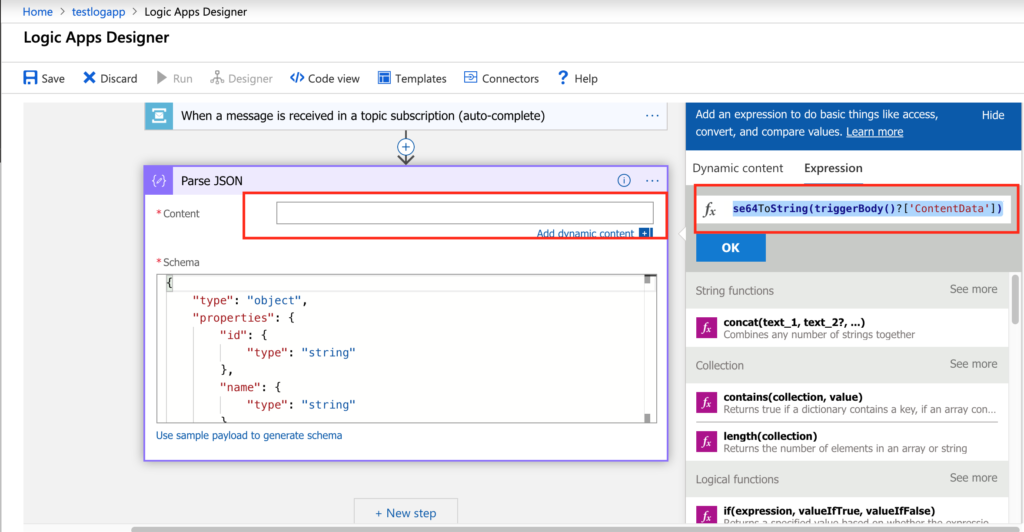
Figure 22 – Base64 Encoding to string
After that click “Save” on the top of the window. Just to make sure that it is saved properly, we can select “Code View” on the top of the window and look at the code. It should be in JSON format.

Figure 23 – Code view
Now click the “+Next Step” and search for “Cosmos DB” and select “Azure Cosmos DB”.
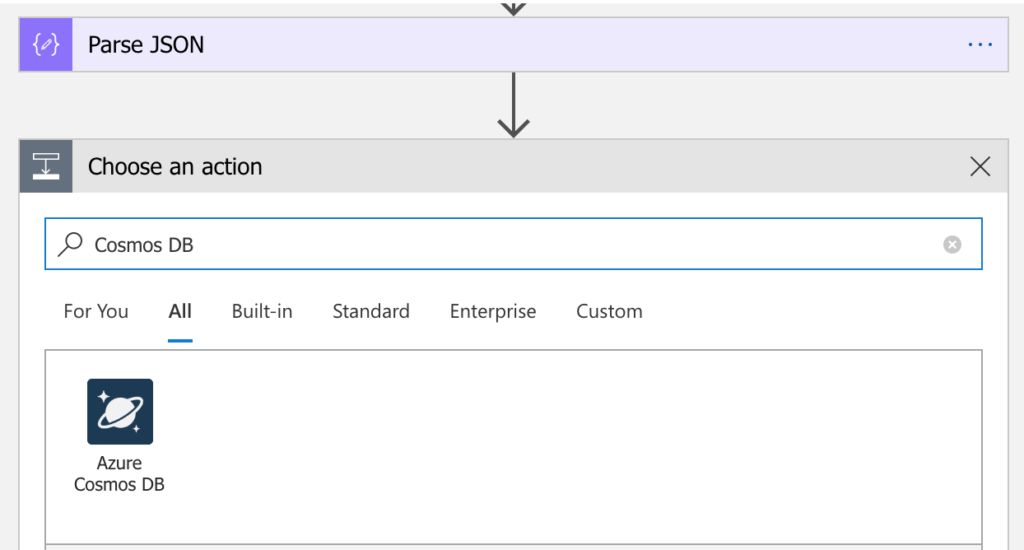
Figure 24 – Search Cosmos DB
Select the action “Create or update document” in the list of actions available.
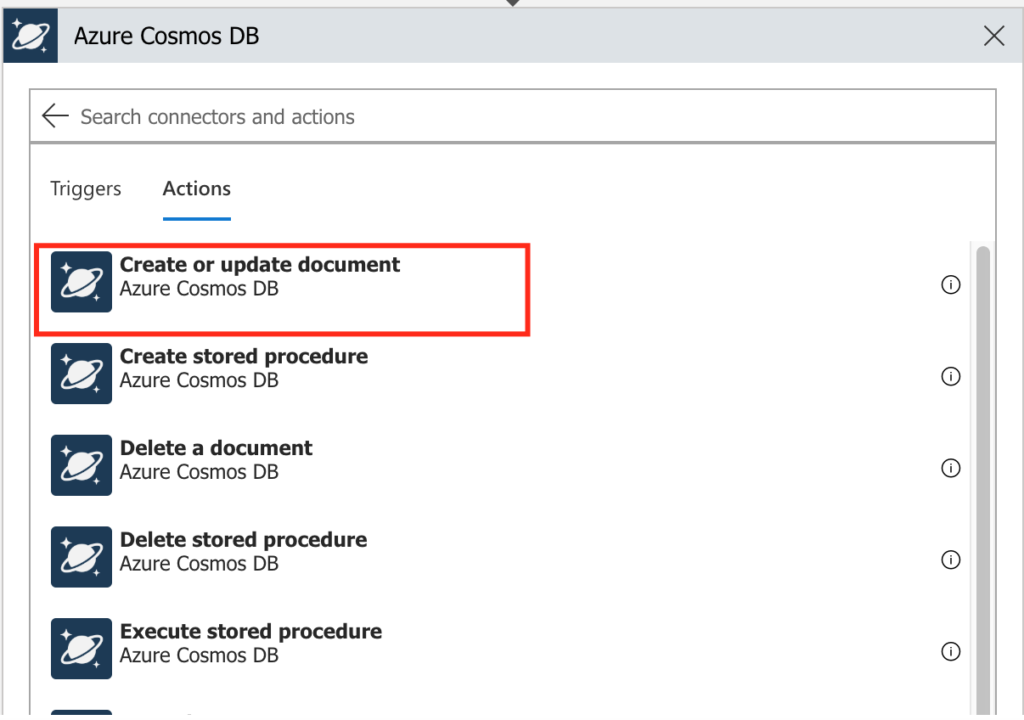
Figure 25 – Create or update document action
Enter connection name and select existing database listed out in the window and click on “Create” button.

Figure 26 – Create Cosmos DB Connection
Now enter the details. For inputting the Document specify same thing entered above base64ToString(triggerBody()?[‘ContentData’])
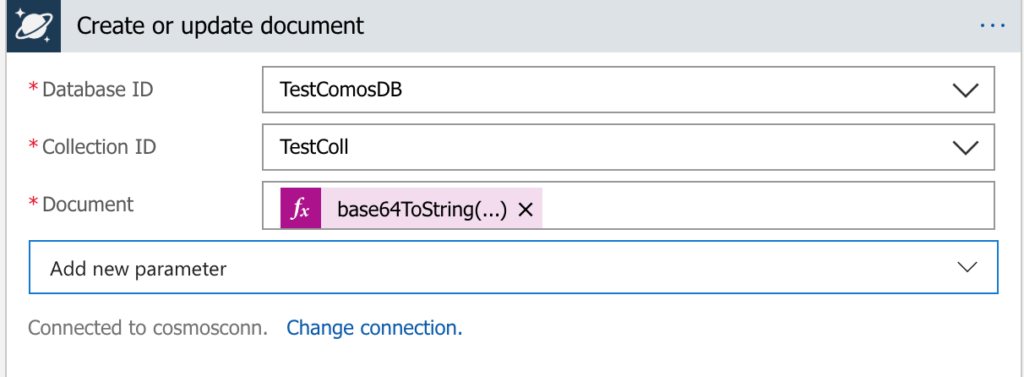
Figure 27 – Input properties
As mentioned before Cosmos DB expects partition key value to be specified in while creating a document and so click “Add new parameter” and check “Partition key value” checkbox.
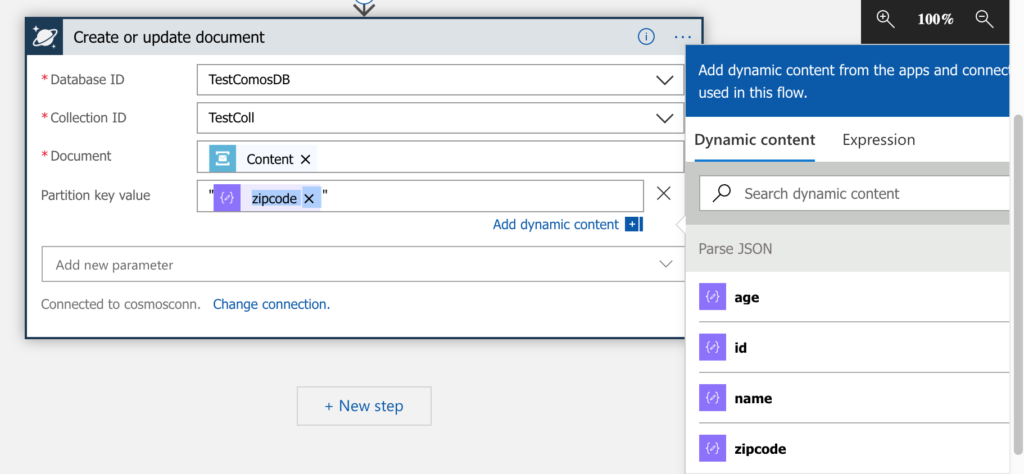
Figure 28 – Specify Partition key value
Select “zipcode” from the list of Dynamic content and make sure that you put double quotes before and after the JSON value selected.
Now click the “Run” button on top of the window.
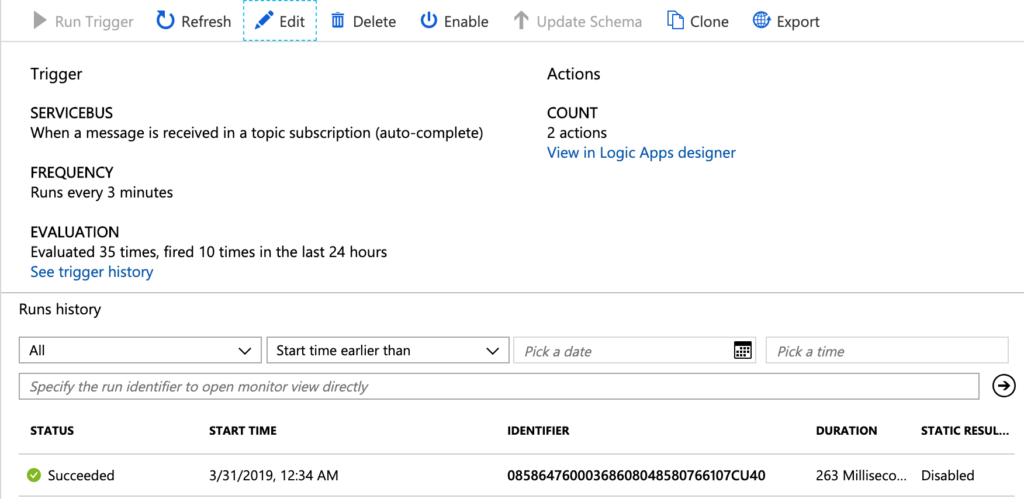
Figure 29 – Run logic app
In the window you should see the status of the run and click on the status. In our case, “Succeeded” and it should show the screen as below:
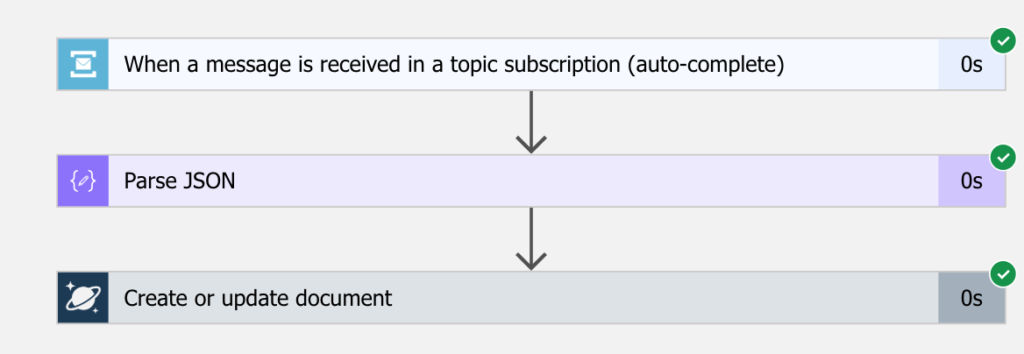
Figure 30 – Green Check Marks
If you see any red check mark, then click on the icon and check the issue.
Now let us see if the data has made to Cosmos DB. Go to data explorer and see if data is populated.
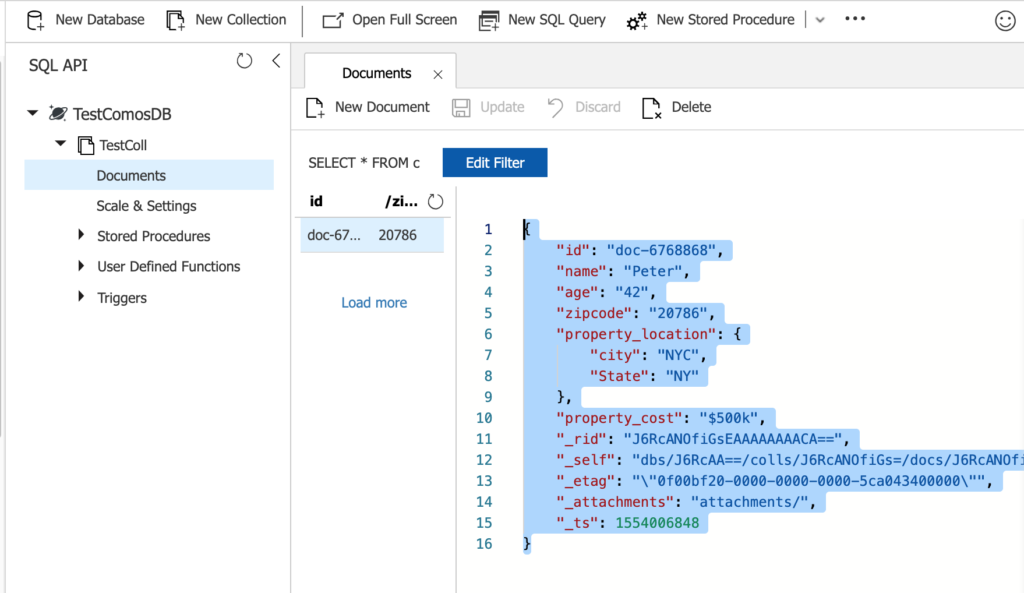
Figure 31 – Data Explorer
This is a simple flow. In real time situations, we may need to add exception handling and retry logic for guaranteed data insertion into Cosmos DB.
Hope you like this article and learnt simple integration of Azure Service Bus with Cosmos DB SQL API. If you find this post useful, do not forget to share with your friends. Happy coding!!!