In this article, I am going to discuss on the following topics:
- Introduction to Azure Key Vault
- Creating a Key Vault and Secret
- Registering the application to access Key vault service
- Accessing the Key Vault Secret from Postman
- Accessing the Key Vault from a Mule Application
Intended Audience: Anyone who are interested in understanding Azure Key Vault and have a trial or paid Azure subscription to follow along with me. If interested from accessing the Secret in a MuleSoft application, you can follow further on building a MuleSoft application and integrating with Azure Key Vault. Otherwise, you can skip the last topic on MuleSoft integration.
Introduction to Azure Key Vault
As per the Microsoft’s documentation,
Azure Key Vault is a cloud service for securely storing and accessing secrets. A secret is anything that you want to tightly control access to, such as API keys, passwords, certificates, or cryptographic keys.
For more information, you can browse the web page https://docs.microsoft.com/en-us/azure/key-vault/general/basic-concepts and https://docs.microsoft.com/en-us/azure/key-vault/
In simple terms, Azure Key Vault is a secrets management system that provides securely store and tightly control access to tokens, passwords, certificates, API keys. As per best practices for security, we should never store the passwords or any texts that are security-sensitive in plain text format and most common pitfall of this is we observe most of the developers store the passwords in plain text either in the configuration files and sometimes, goes with code hard-coded if unchecked.
Azure Key Vault provides a security mechanism where you store the secrets in the Vault that can only be accessed with a secured channel and if application gets compromised due to some security issues, still your secrets are safe and provides more control over handling the unforeseen situations like security breaches.
Azure Key Vault supports storing of secrets, keys and an Azure Key Vault Certificate. Examples of Secrets are Database connection strings, account keys or passwords for private key files. Only authorized applications can read the secrets from the Vault. Key Vault is also used to store and manage cryptographic keys. Key Vault certificate provides management of X.509 certificates.
Creating a Key Vault and Secret
In order to provision a Key Vault, first login into https://portal.azure.com and click “Create a resource” and search for “Key Vault“. A blade for creating Key Vault will be displayed. Click on the button “Create“.

Fill in the details for the resource group, key vault name, region and pricing tier as below and click “Review + Create” button:
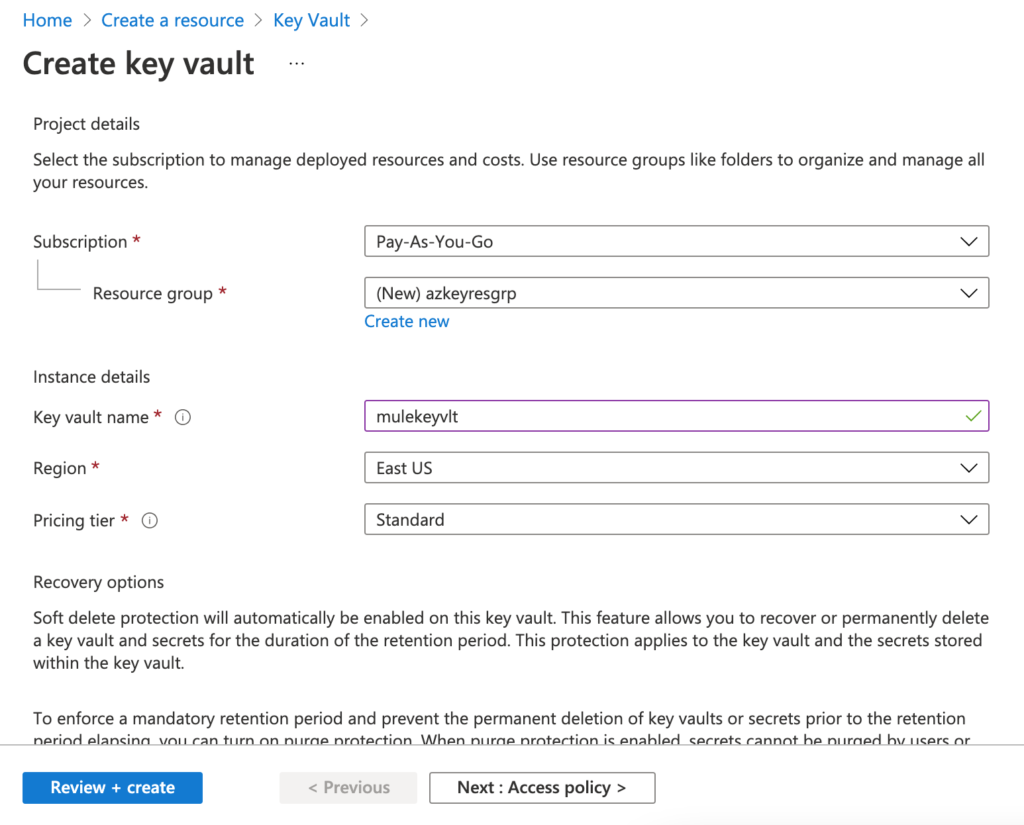
Finally click the “Create” button and it should deploy the resource. Navigate the resource page and click “Secrets” in the “Settings” section.
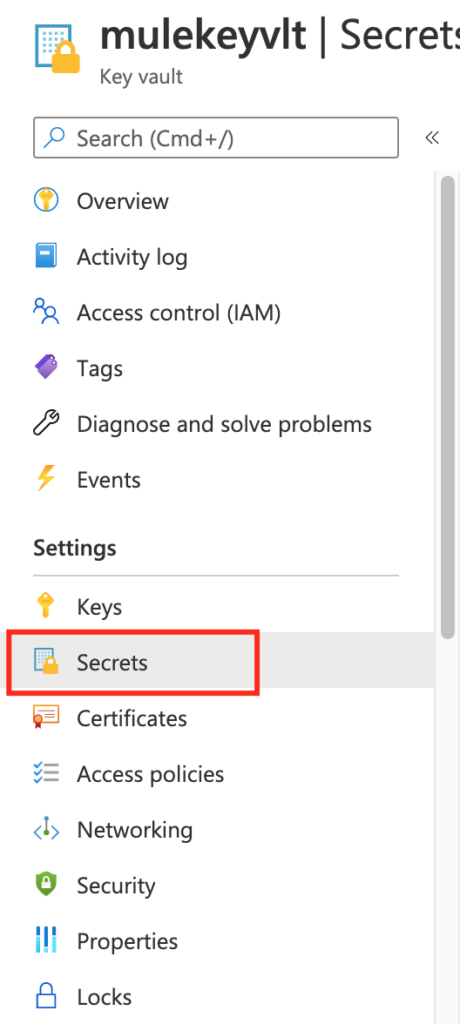
Click on the “Generate/Import” option displayed in the header.

Now let’s create a secret with the name as “connectionstring” and value as “connectionvalue” and keep remaining as it is unless you want to modify the values. I am going to keep it simple for this article. Click on the button “Create“.
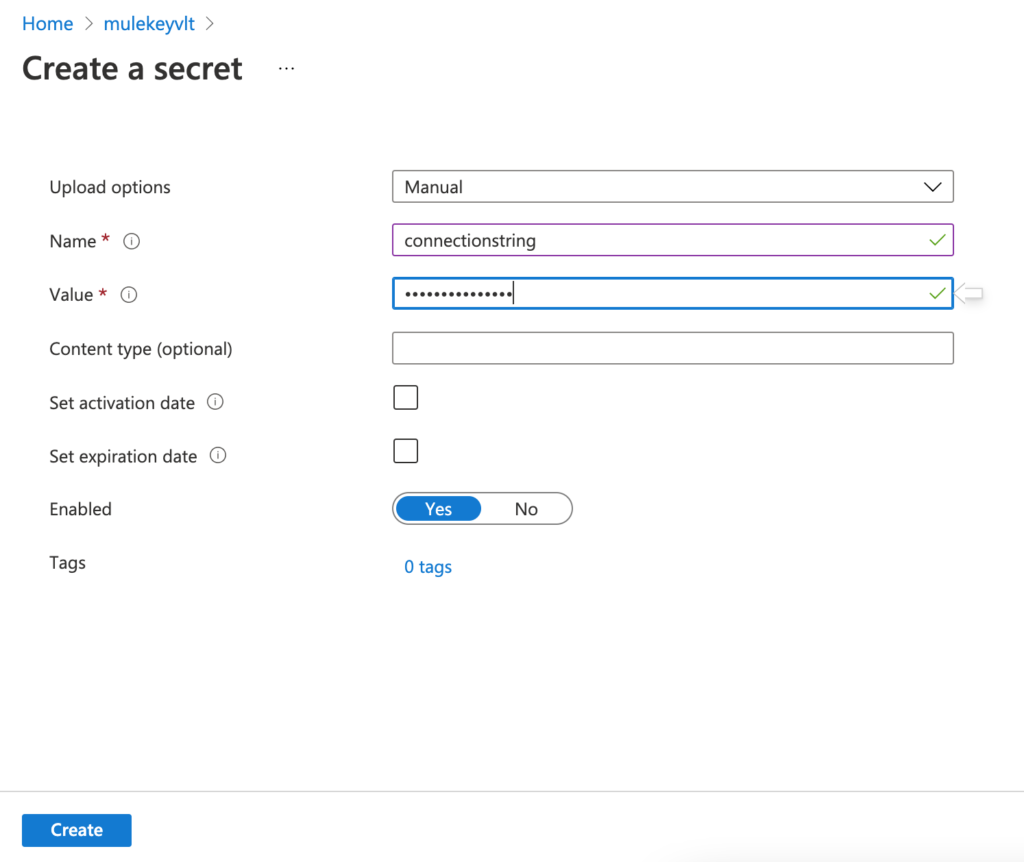
Once the secret is created, it is listed in the Secrets page. You can view the secret by clicking on the secret name and further drilling into the options to view the secret and other information that you created earlier.
Registering the application to access Key vault service
In order to access secret using HTTP request, I am going to register the application in the Azure Portal so that Microsoft Identity Platform can provide authentication and authorization services for the application. Once we register the application in the Azure Portal, next step is to add the service principal into the access policies of the key vault.
Microsoft Identity Platform implements OAUTH 2.0 authorization to get access to the Azure resources.
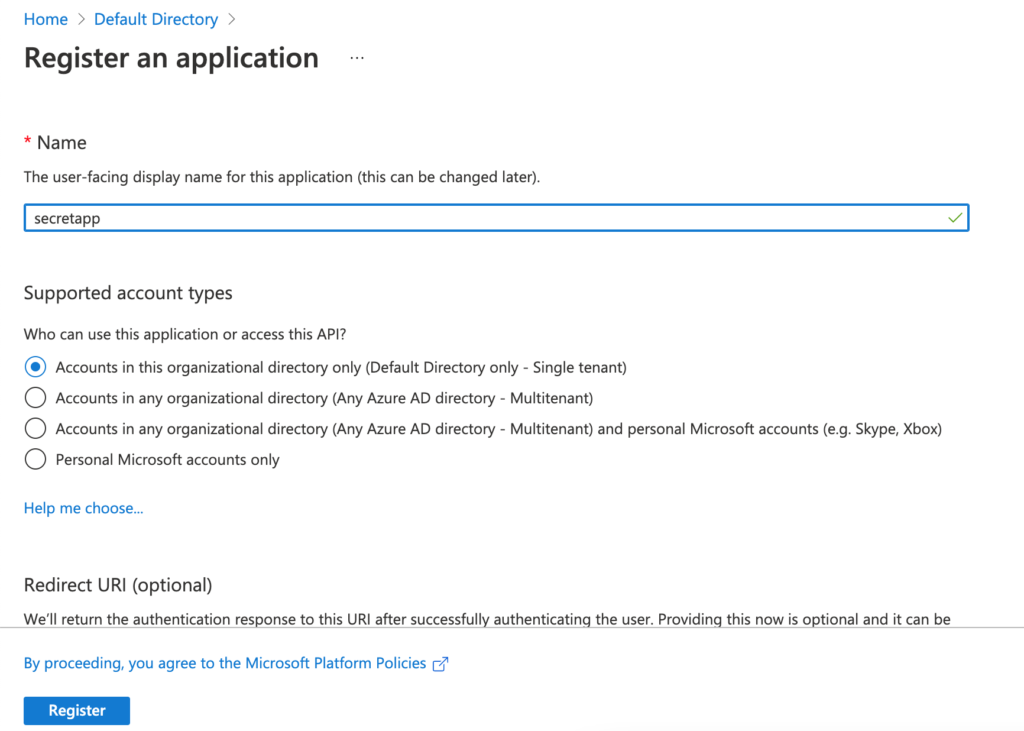
Go to Azure Active Directory in the Azure Portal and click “App registrations” and click on the “+ New registration“.
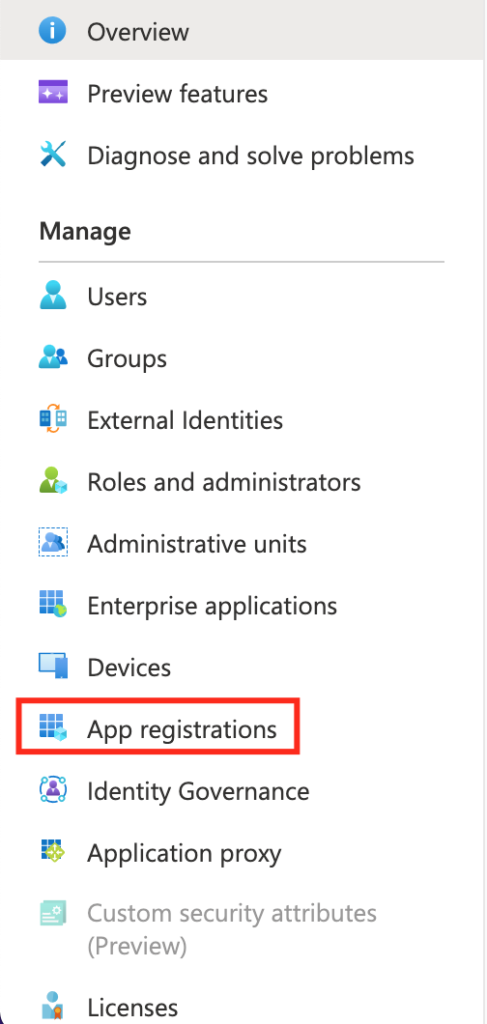
Enter the name of the application and click on the button “Register” to register the application.
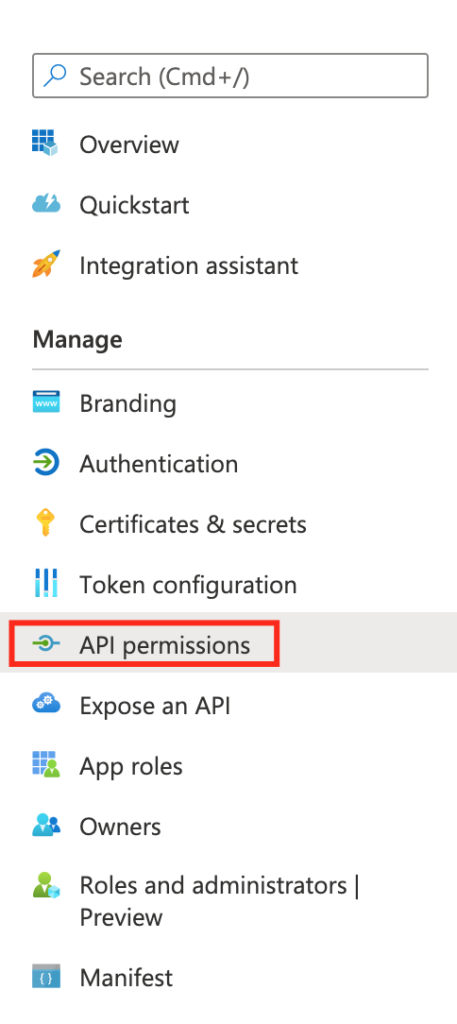
In the registered app page, click “API permissions” option and click “+ Add a permission“.
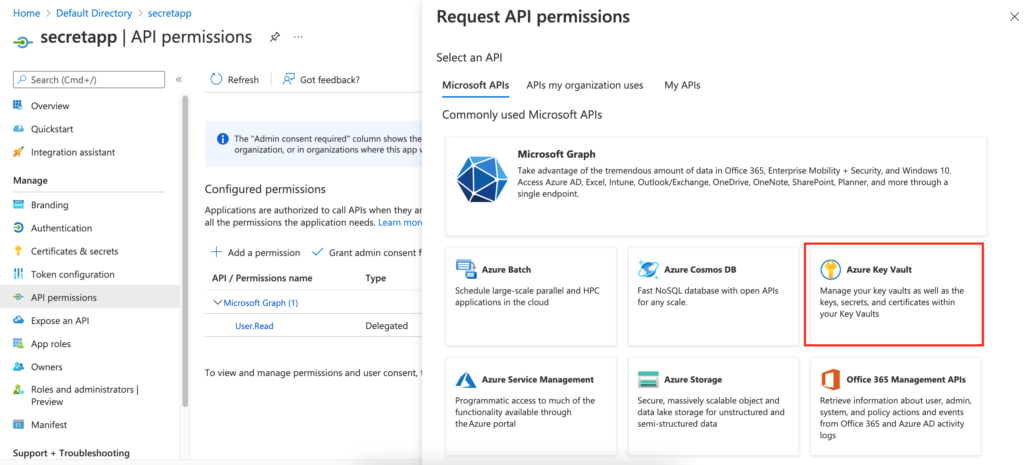
Select Key vault from the list of Microsoft APIs.
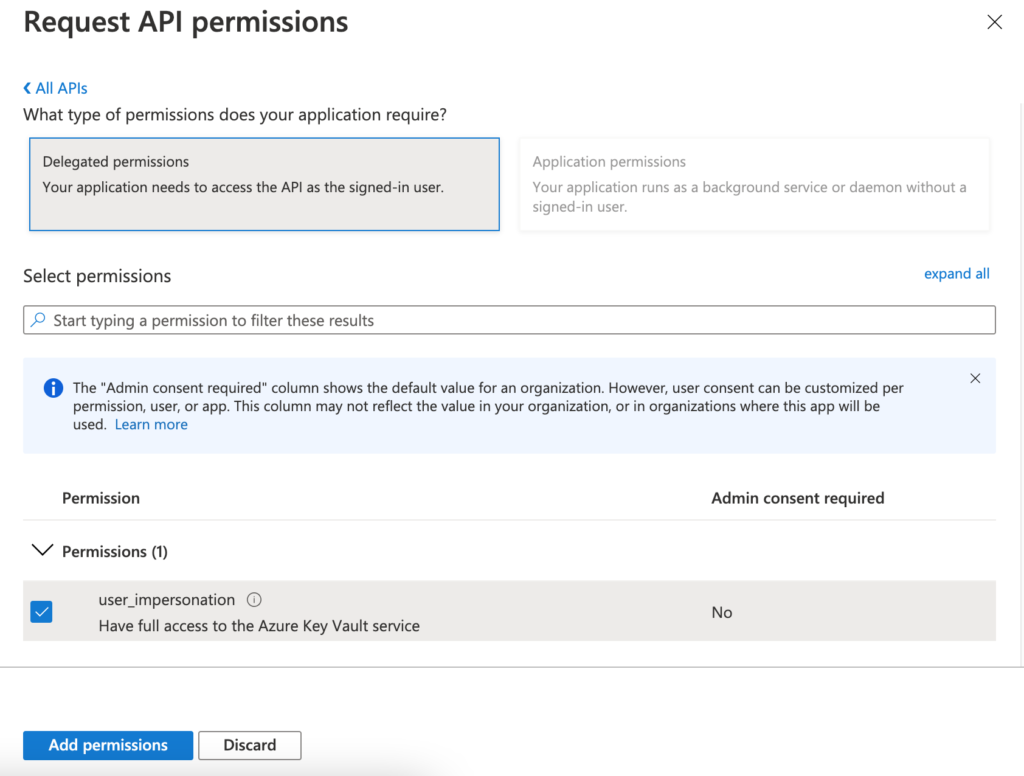
Now select “Delegated permissions” and check the permission “user_impersonation” and click on the button “Add permissions“.
Next step is to generate client secret that is needed for authenticating the application. Now click on the “Certificates & secrets” option in the “Manage” section of the registered application and click “+ New client secret“. Add description and click the “Add” button.
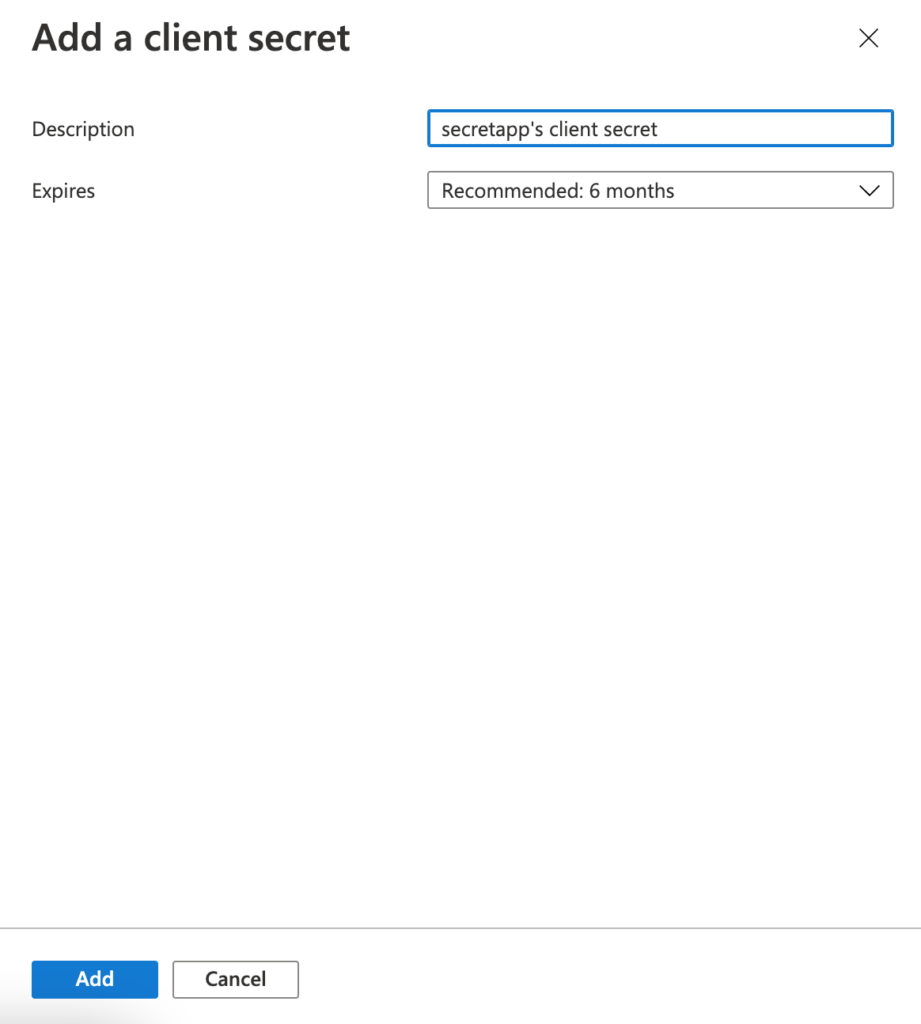
Now copy the secret value and keep it in a notepad for reference.

Also look out for the “Application (client) ID” in the registered application’s overview page and copy it.
Now go back to the key vault that we created earlier and authorize the registered app. Click “Access policies” and in the blade for Access policies, click “+ Add Access Policy“.

Select “Key, Secret, & Certificate Management” in the dropdown for Configure from template and then click on the “None selected” link for the “Select principal” and search for your registered app and click the button “Select” and then the “Add” button.
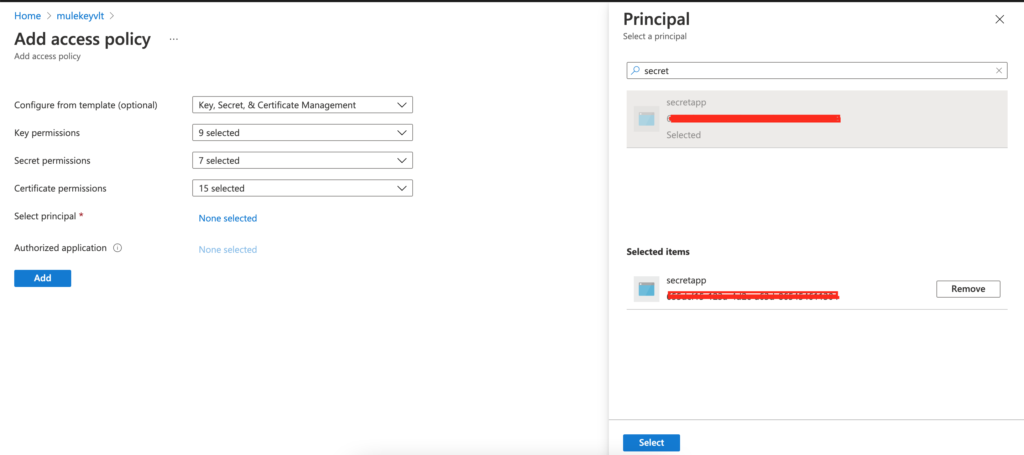
Don’t forget to save the policies once access policy got created.

Accessing the Key Vault Secret from Postman
As mentioned earlier, Microsoft Identity Platform supports OAUTH 2.0 authorization to Validate requests to Azure resources from applications. In order to hit the key vault service, first off we need to get the access token. In this section, we use Postman to request the token using the client_id and client_secret that we copied earlier.
The request URL would be https://login.microsoftonline.com/<tenant-id-copied-from-azure-directory>/oauth2/v2.0/token and it would be a POST with the body as below:
grant_type:client_credentials
client_id:<client-id-value>
scope:https://vault.azure.net/.default
client_secret:<client-secret-value>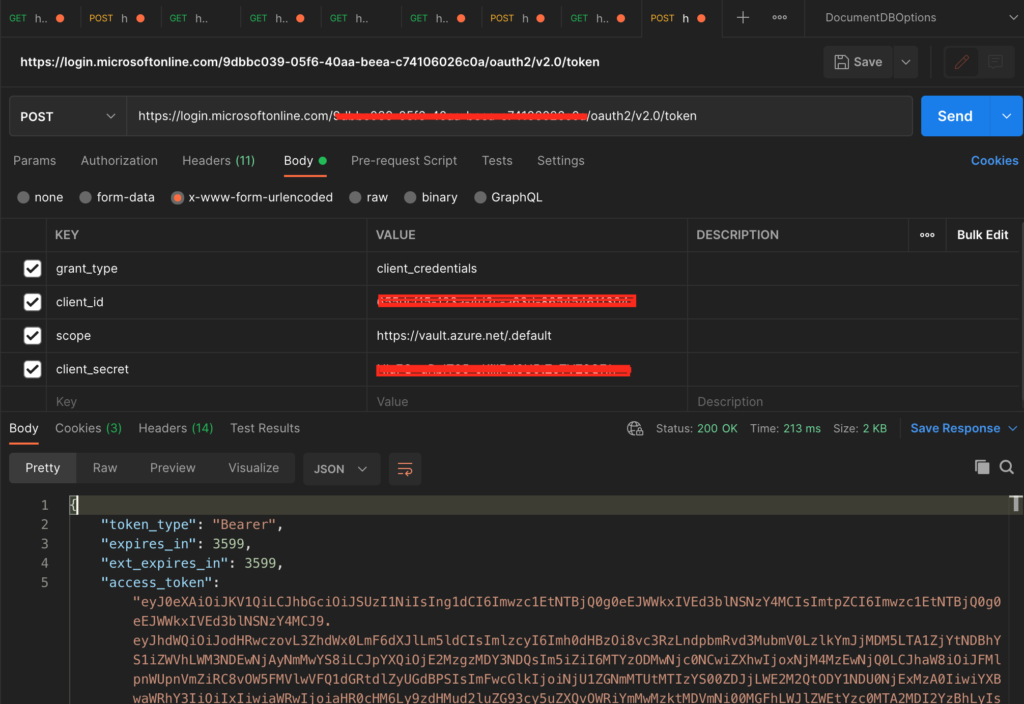
Now copy the access_token value and hit the key vault URL with GET request.
The URL should be https://<<keyvault-name>.vault.azure.net/secrets/<secretname>?api-version=2016-10-01 and add the authorization header with Bearer Token type.
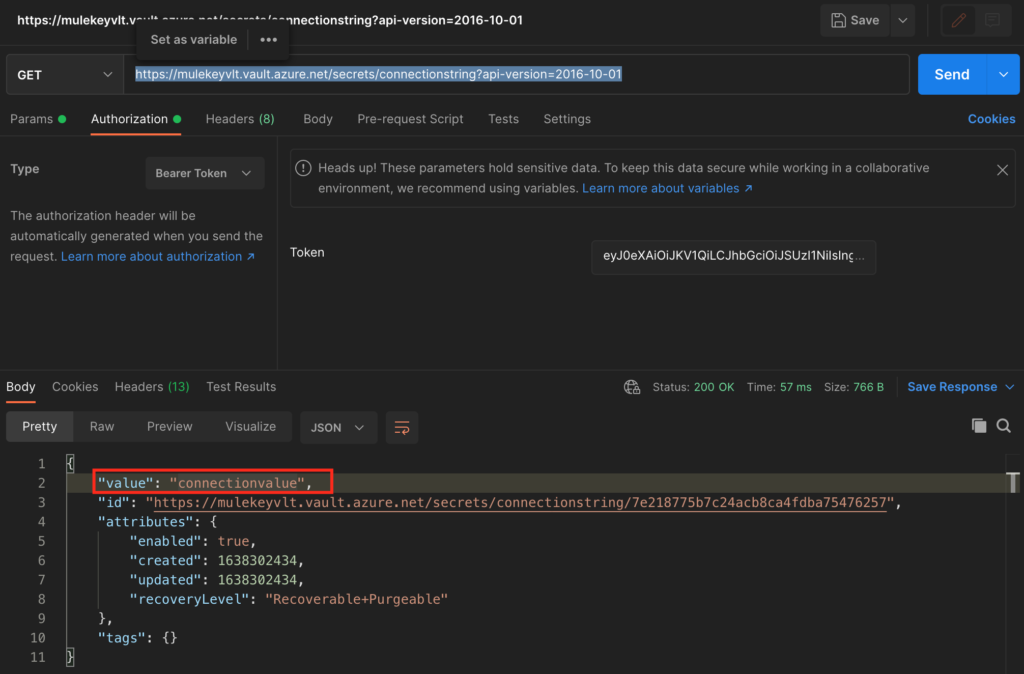
Now we are able to retrieve the secret value for the secret stored in the key vault using OAUTH 2.0 token.
Accessing the Key Vault from a Mule Application
There are two github repos available for accessing the key vault from a Mule application and so it is worth mentioning these two repos:
https://github.com/mulesoft-catalyst/azure-vault-custom-properties-provider-encrypted
If you want to explore the above repo to test the functionality, though it is already mentioned but I would like to stress on the following:
You need to encrypt Client Id, Client Secret with secure properties jar as mentioned in the link https://docs.mulesoft.com/mule-runtime/4.3/secure-configuration-properties#secure_props_tool and also make sure you specify parameter –use-random-iv while encryption.
Also, you need to encode encryption key with Base 64 and these should be specified in the runtime.
Another repo available is here: https://github.com/avioconsulting/mule-azure-key-vault-connector
I would skip providing my own solution for this as these two are already available.


