In my previous article, I have explained how to create a Web API using VS 2017 Community edition and ASP.NET Core Web application. In this article, I am going to explain how enable Swagger support to the Web API so that it can be discoverable.
Swagger in simple terms is a standard language that can be understood both by humans and the computer programs. A specification that provides overall operations supported by a service and the request/response mechanism. It is like an interface to an existing system and used to expose to the developer world with minimum guidance from the actual developers.
You can learn more about swagger from http://swagger.io/getting-started/. Azure API Management tool understands the swagger specification and so it would be beneficial to expose your service through Swagger JSON file or Swagger endpoint hosted in your application itself.
Coming back to the topic, how to enable our application to expose Swagger endpoint?
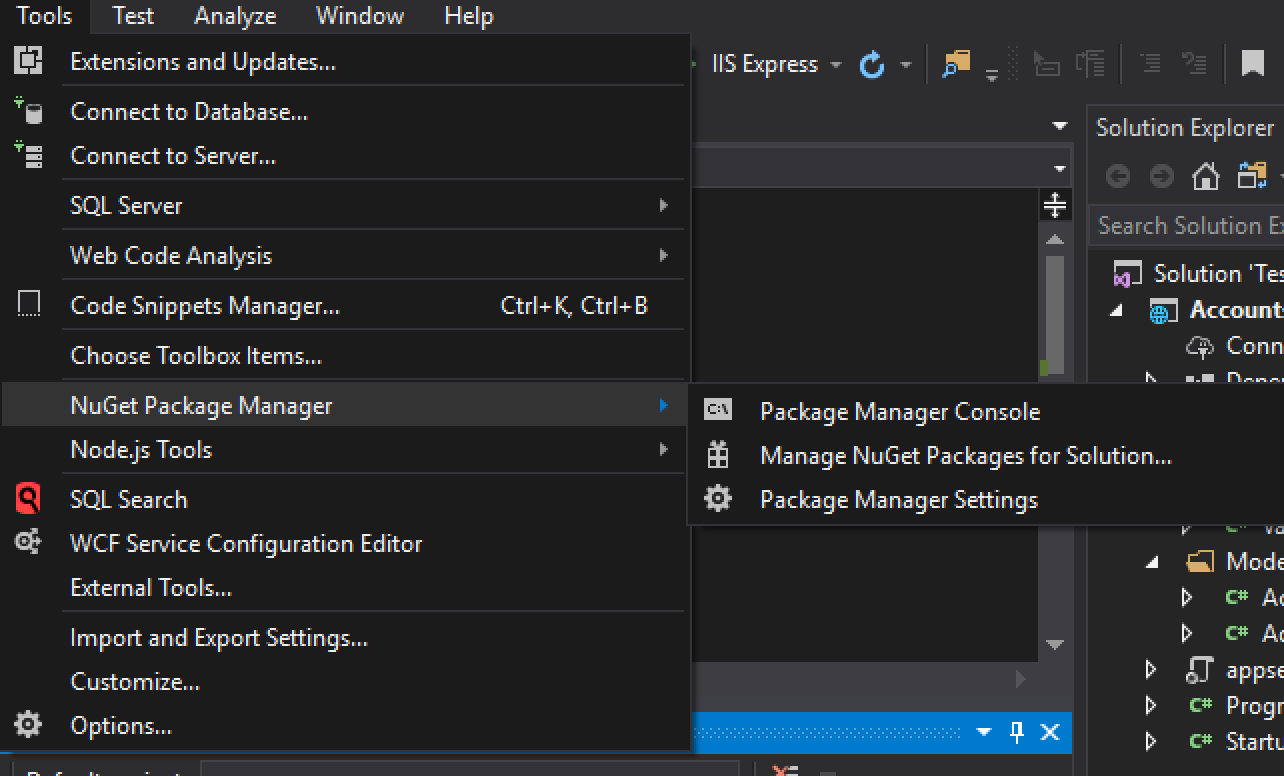
I would be using a NuGet package called Swashbuckle AspNetCore 1.0.0-rc3 to enable the Swagger for my application. Go back to Visual Studio project and select Tools à NuGet Package ManageràPackage Manager Console.

Figure 8 – Navigating to Package Manager Console
Now run the command in the console window and it should now install the Swashbuckle.AspNetCore NuGet package in the project.
PM> Install-Package Swashbuckle.AspNetCore -Pre

Figure 9 – PM Console
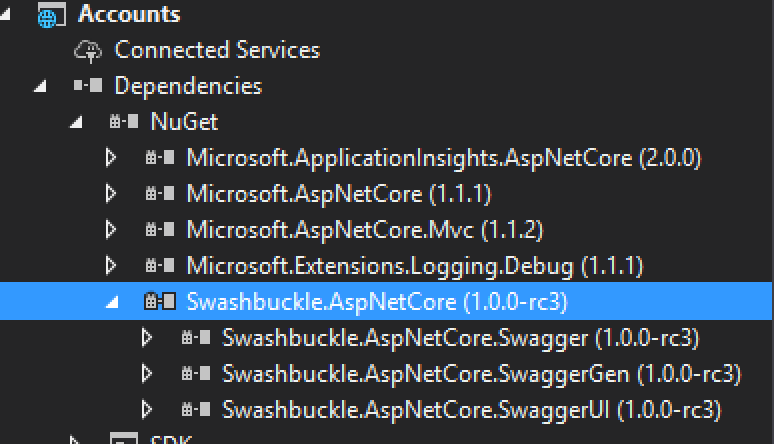
Now you should see the NuGet package added as a dependency to your project.

Figure 10 – Swashbuckle added as a dependency
Now in order for Swagger to be enabled, first we need to add some code to the startup.cs file.
Let’s first import the Swashbuckle.AspNetCore.Swagger in the startup.cs file as below:
using Swashbuckle.AspNetCore.Swagger;
We now need to register the Swagger generator by adding the following statement in the method ConfigureServices(IServiceCollection services)
services.AddSwaggerGen(c =>
{
    c.SwaggerDoc("v1", new Info { Title = "AcccountsAPI", Version = "v1" });
});
Now our code should look like below:

Figure 11 – Registering the Swagger generator in the code
Now in the Configure method, insert middleware to expose the generated Swagger as JSON endpoint:
app.UseSwagger();
Then we need to insert the Swagger-ui middleware to expose interactive documentation as below:
app.UseSwaggerUI(c =>
{
   c.SwaggerEndpoint("/swagger/v1/swagger.json", "Accounts API V1");
});
I have taken the above steps from the website https://github.com/domaindrivendev/Swashbuckle.AspNetCore and encourage you to explore more about how to generate Swagger.
But, with this code we should be able to run our application and check the Swagger UI and JSON. Let us run our application and it should expose the Swagger UI.
Once you run your application by pressing CTRL+F5, browse the following URL:
http://localhost:{portnumber}/swagger/
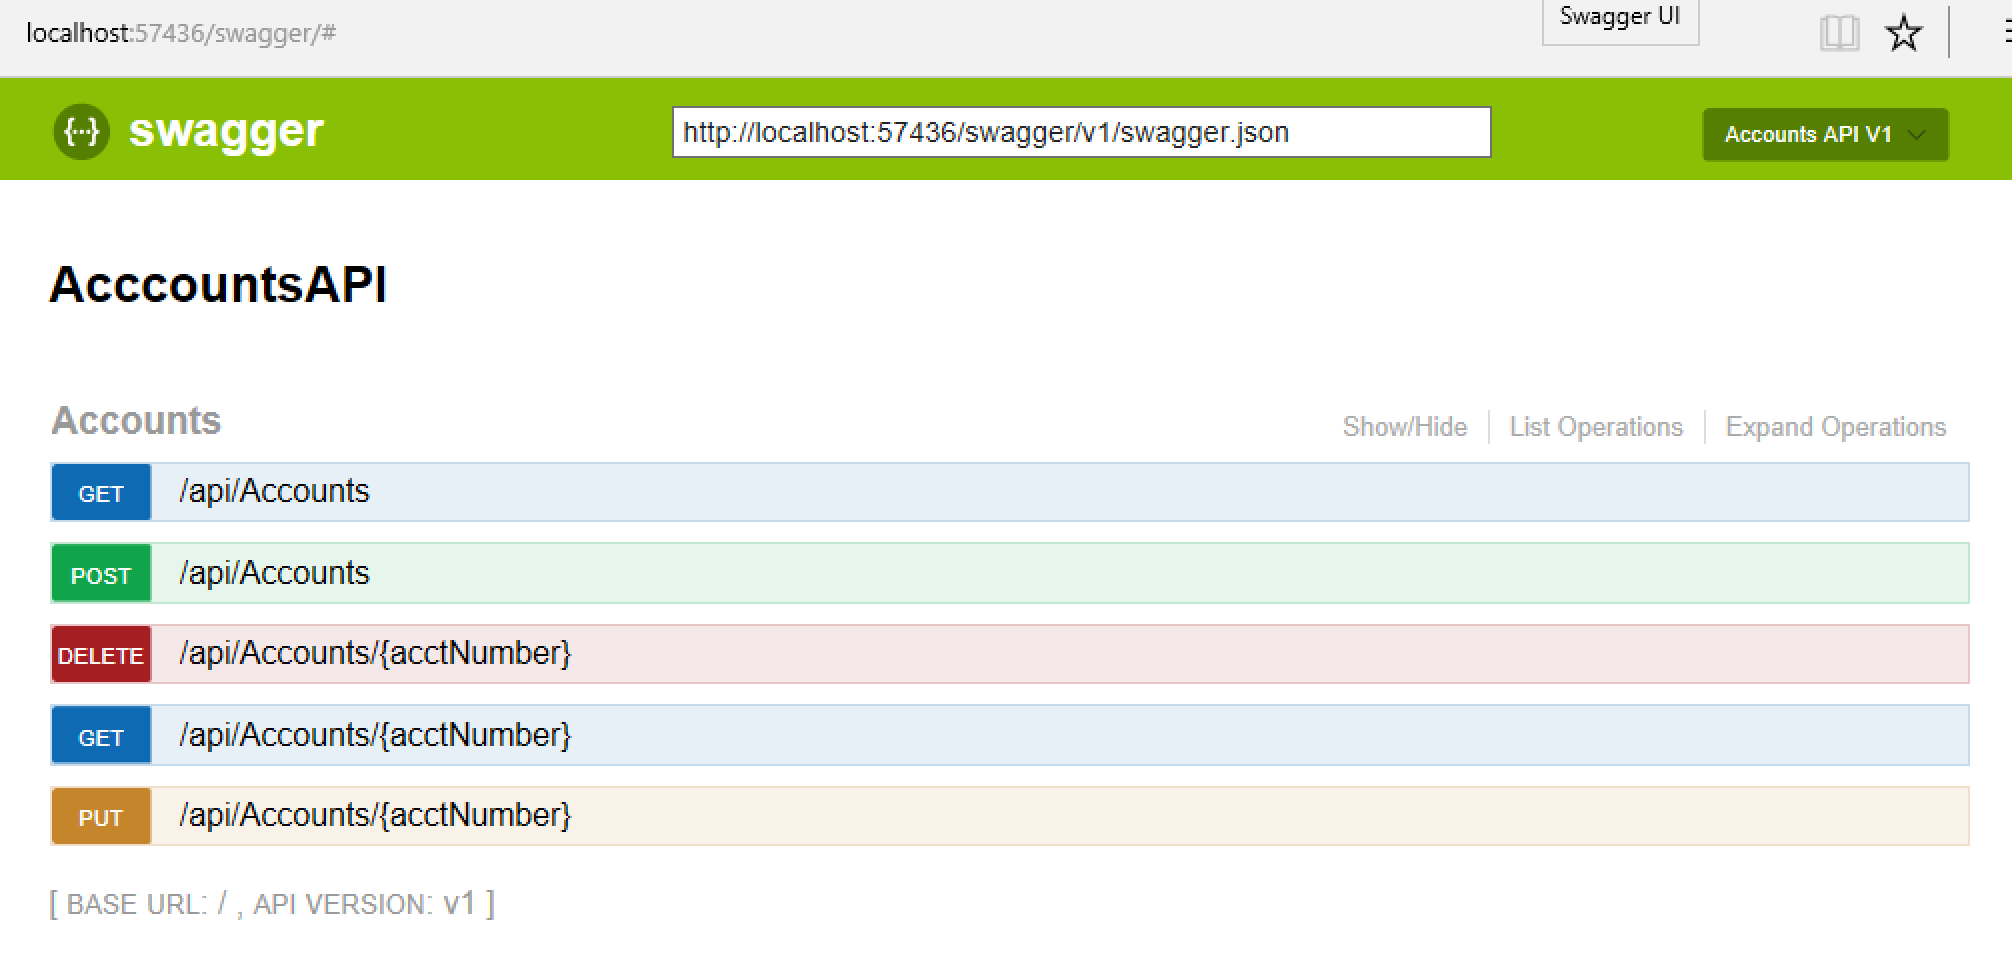
A pretty interface with all the operations (methods) defined in your controller are listed out and clicking on the colored buttons should show our Model, Example value with the response messages that we have added in our controller methods. It also provides you an option to hit the “Try It Out” to see how the request, response and the header looks like when you invoke the operations through POSTMAN.
 Figure 12 – Swagger UI
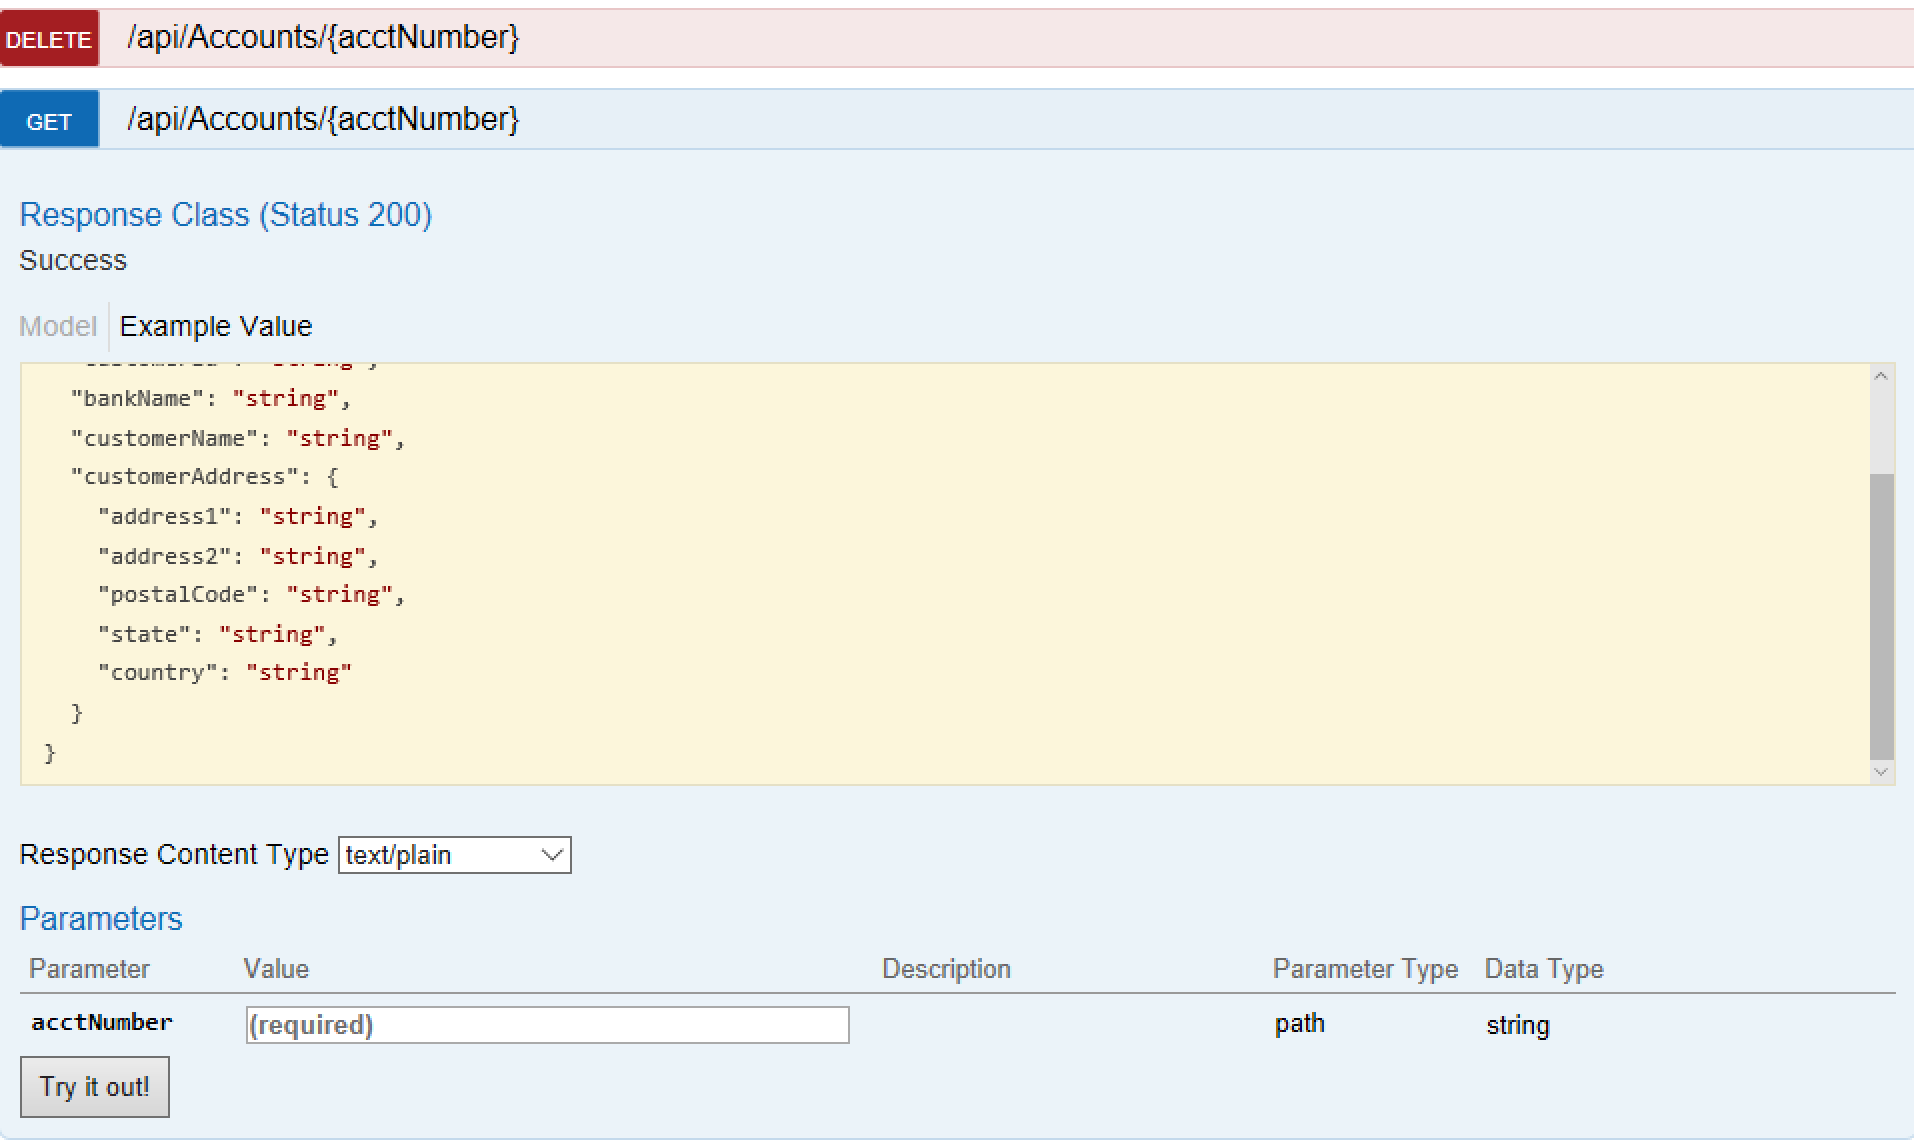
For example, if you click on the button “GET” which is associated with getting the account based on account number, you would see something like the below.

Figure 13 – GET Request
Basically, what the Swagger generator does is it reads your controller and lists out all the controller methods based on the HTTP Method attributes that we have decorated each controller method with and parses the return type and creates the sample data accordingly. Had we not added initialized the return types with values, it should have displayed the values with null when we hit the “Try It Out” button.
If you want to share the JSON of your service to other developers, you can get the JSON of your service from the endpoint http://localhost:57436/swagger/v1/swagger.json. Now since our service can emit the operations, what each operation consumes and produces, how the request looks and the response, it will be easy for other developers to understand at the first sight without we explain it.
Now it is time to publish our WEB API application to AZURE.

