You can download VS 2017 Community edition from the visualstudio.com https://www.visualstudio.com/vs/whatsnew/ There are pretty much features added in Visual Studio 2017 by Microsoft that it would be a true developer’s delight to work with. Explore more about VS 2017 in the same web page.
If you want to work with Azure, Microsoft gives $300 of credit ($25 per month) to be used in a year, if you register visualstudio.com and use your benefits.
In this article, I am going to discuss about the creation of a simple accounts service that has the following operations:
- Get a list of all the accounts, which can be translated to HTTP GET request.
- Get an account by unique account number, which can be translated to HTTP GET.
- Update an account by unique account number, can be translated to HTTP PUT.
- Add an account, can be translated to HTTP POST method.
- Delete an account, can be translated to HTTP DELETE method.
Let’s start developing the WEB API and please follow me in the journey.
Open Visual Studio 2017 and create a new project and select Visual C# as we will be using C# language for programming and select Web and then select ASP.NET Core Web Application (.NET Core) and add the appropriate name for your project by choosing a proper location in your local folder.
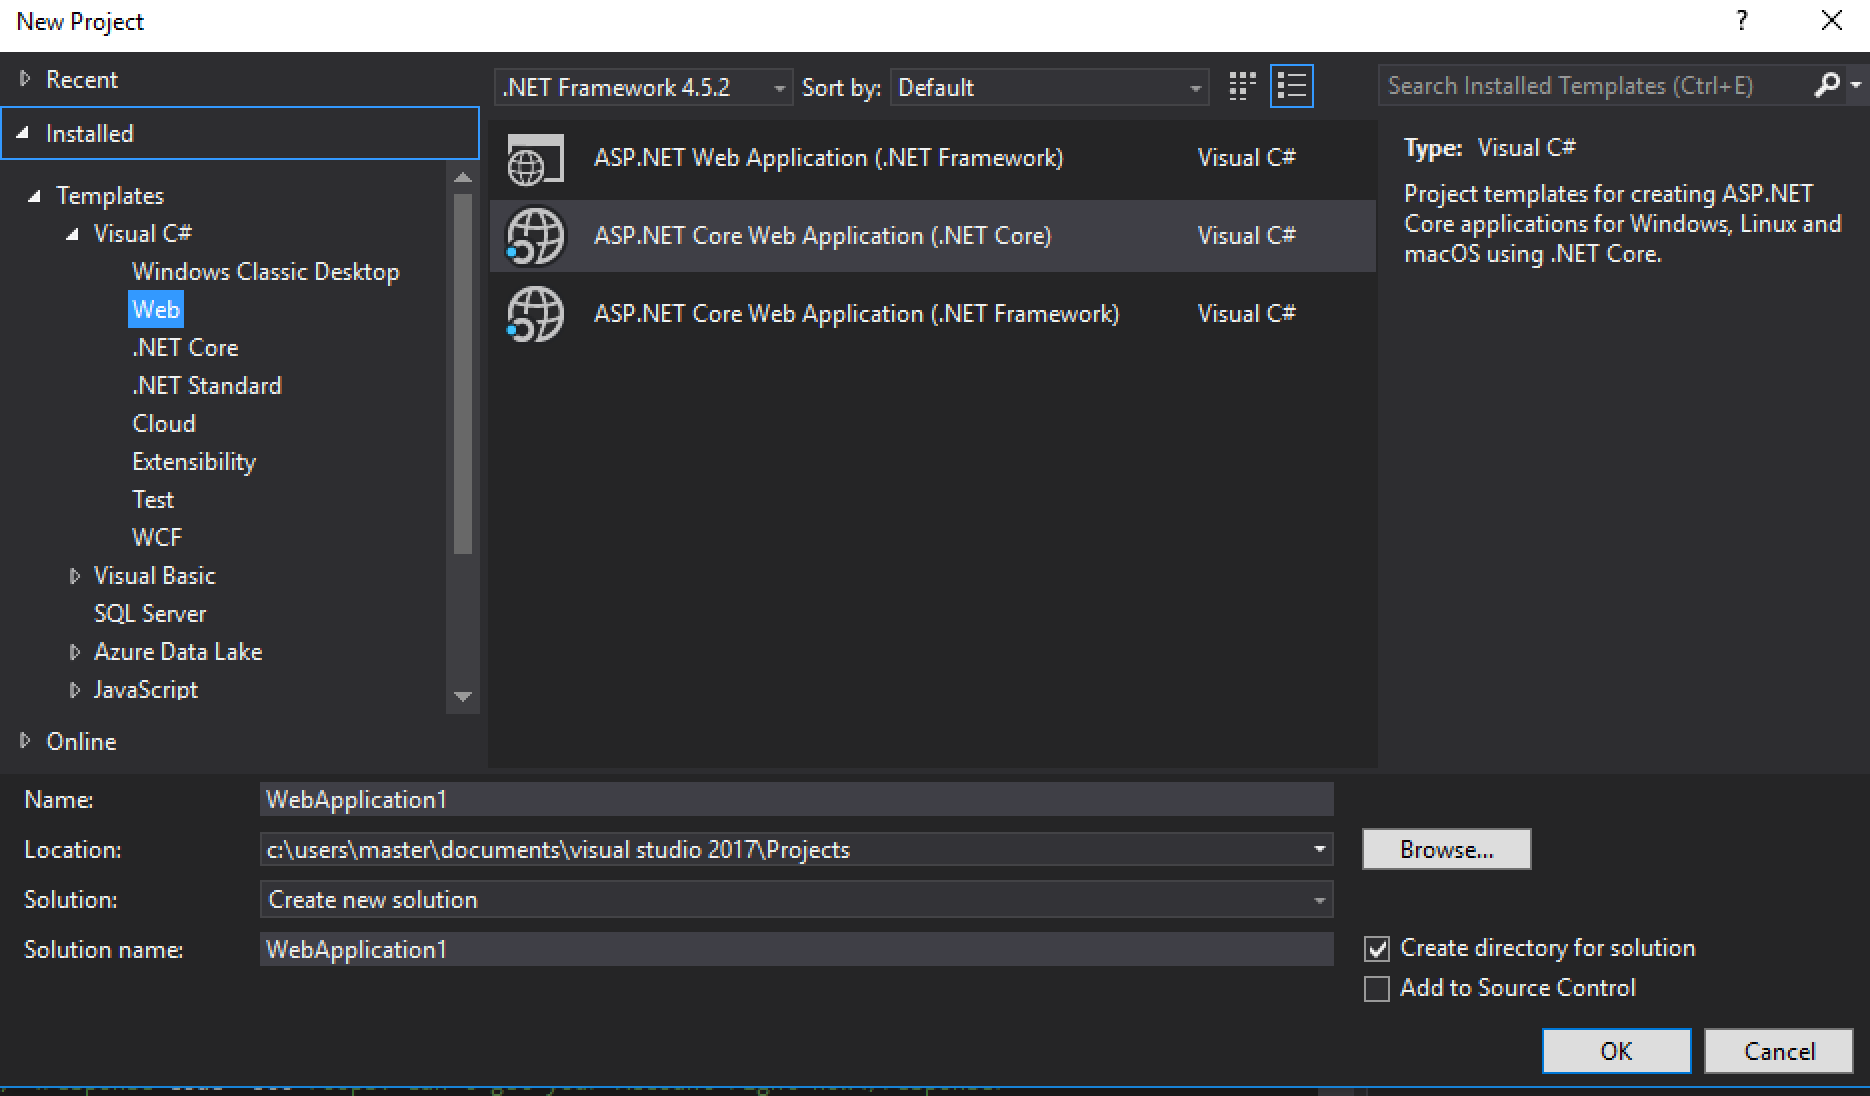
Figure 1 – Create a new Project
After you made your changes, hit the OK button and then the next window will be displayed as below:
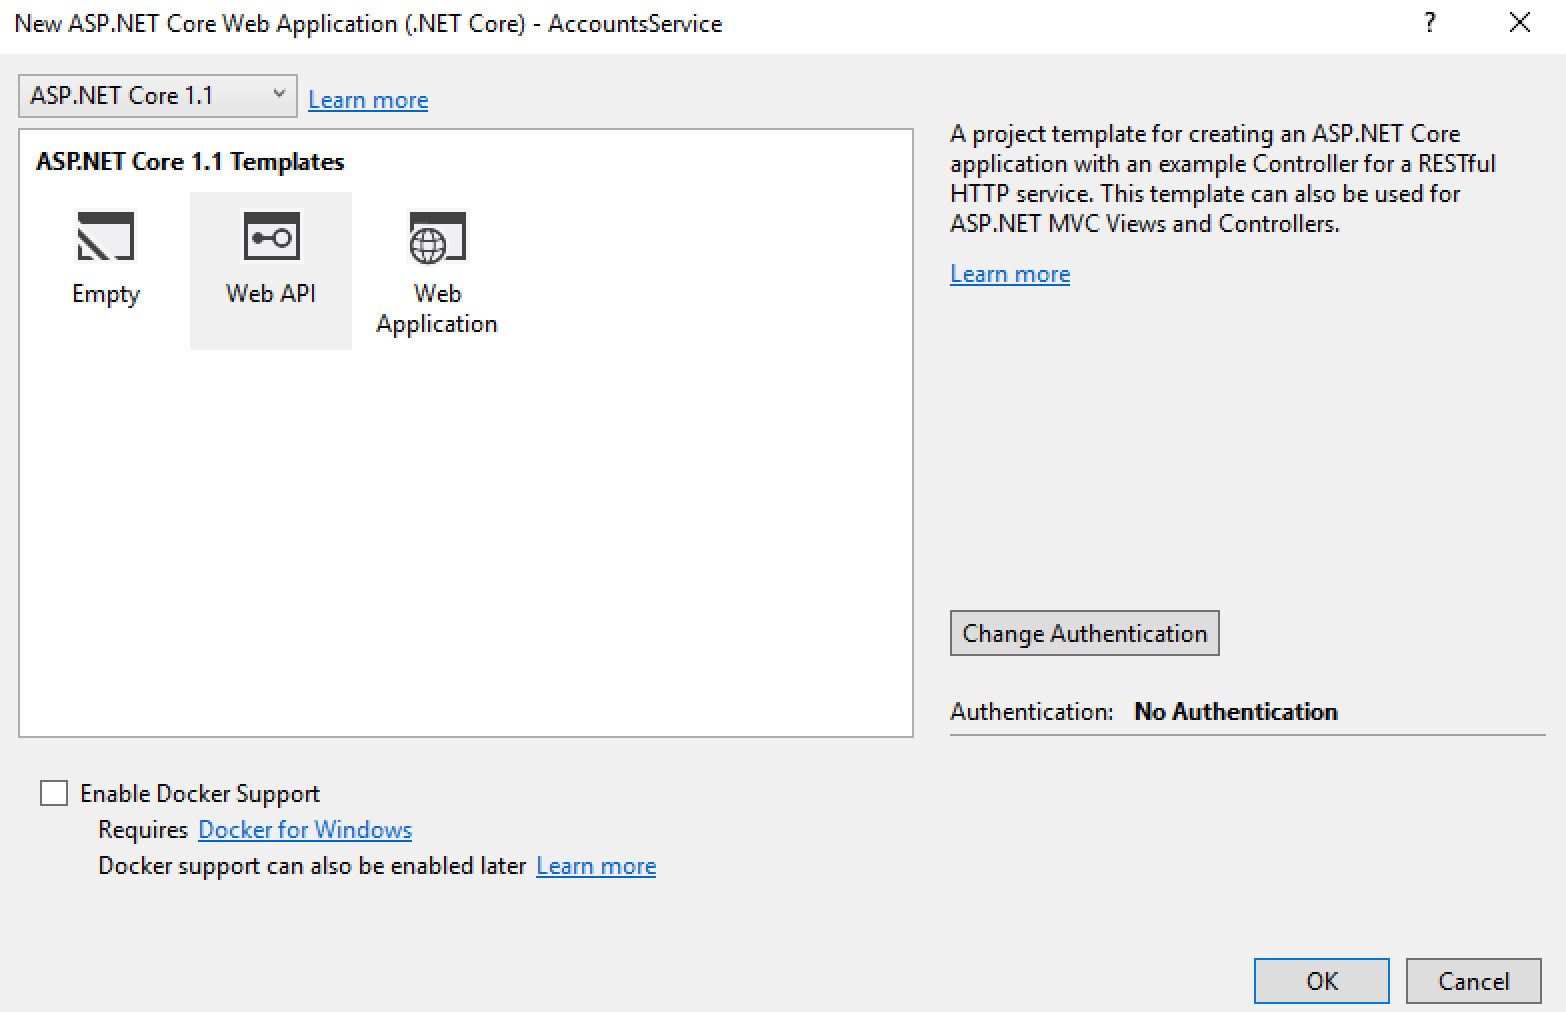
Figure 2 – Selecting Web API template
I am here selecting ASP.NET Core 1.1 Web API template and click OK button. It should now create a Web API project. If you check the dependencies, you should see 3 dependencies for the project under NuGet:
- ApplicationInsights.AspNetCore, supports Application Insights for the application. (I am not going to cover this in the article.)
- AspNetCore, supports the Hosting, Routing and Logging for the application.
- AspNetCore.Mvc, contains MVC components like action result types, attribute routing, API explorer, filters and so on.
- Extensions.Logging.Debug, this logger logs messages to a debugger monitor by writing messages with System.Diagnostics.Debug.WriteLine().
Under SDK, Microsoft.NETCore.App is present which is basically a set of .NET APIs that are included in the default .NET Core application model.
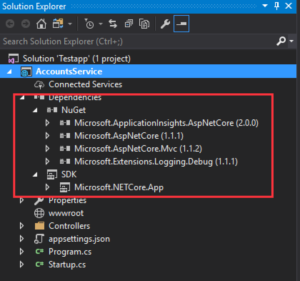
Figure 3 – Dependencies
If you can expand each of the components in the tree structure you will get more information about what it is comprised of.
Now I am going to delete the default controller that come up with the project under the “Controllers” folder and add a new Controller “AccountsController.cs” which has the following methods:
Method for Get All accounts:
This method has been decorated with the HTTPGet Attribute telling that this method accepts HTTP GET request. This method will be invoked by default as it does not accept any parameters and is decorated with HTTP Get.
[HttpGet]
public IEnumerable<Account> Get()
        {
            return new List<Account>
            {
                new Account{ AccountNumber="0001", BankName="Dummy Bank", CustomerAddress= new Address
                {
                     Address1="address1", Address2="address2", Country="US", PostalCode="20877", State="MD"
                }, CustomerId="Customer001", CustomerName="John Sherman"
                },  new Account{ AccountNumber="0002", BankName="Dummy Bank", CustomerAddress= new Address
                {
                     Address1="address3", Address2="address4", Country="US", PostalCode="20877", State="MD"
                }, CustomerId="Customer002", CustomerName="Marie Curie"
                }
            };
        }
Method for getting an account using an account number:
This method has been declared with the HTTPGet attribute and there is a resource acctNumber telling that this method accepts a parameter called acctNumber.
       [HttpGet("{acctNumber}")]
        public Account Get(string acctNumber)
        {
            return new Account
            {
                AccountNumber = "0001",
                BankName = "Dummy Bank",
                CustomerAddress = new Address
                {
                    Address1 = "address1",
                    Address2 = "address2",
                    Country = "US",
                    PostalCode = "20877",
                    State = "MD"
                },
                CustomerId = "Customer001",
                CustomerName = "John Sherman"
            };
        }
Method to add an account:
This method adds an account and so it is decorated with a HttpPost attribute and it takes parameter account.
       [HttpPost]
        public ActionResult Post([FromBody]Account account)
        {
            return Created(Request.QueryString.Value, account);
        }
Method to update an account using an account number:
This method updates an account referenced by an account number and so the method has been decorated with HttpPut attribute.
  [HttpPut("{acctNumber}")]
  public ActionResult Put(string acctNumber,
        [FromBody]string account)
        {
            return Ok("Account with account number: " + acctNumber + " has been updated!");
        }
Method to delete an account using an account number:
This method deletes an account referenced by an account number and so the method has been decorated with HttpDelete attribute.
       [HttpDelete("{acctNumber}")]
        public ActionResult Delete(string acctNumber)
        {
            return Ok("Account with account number: "+acctNumber+" has been deleted!");
        }
Note:
- I have hard-coded the data in the methods to simulate the actual functionality. In real-time project, you would be getting/updating/adding data to a data source.
- All the methods must be decorated with the HTTP method for Swagger to expose the methods when it is enabled for the solution.
Since we have deleted the default controller class, we need to modify the property launchUrl in the launchSettings.json file which is under Properties.
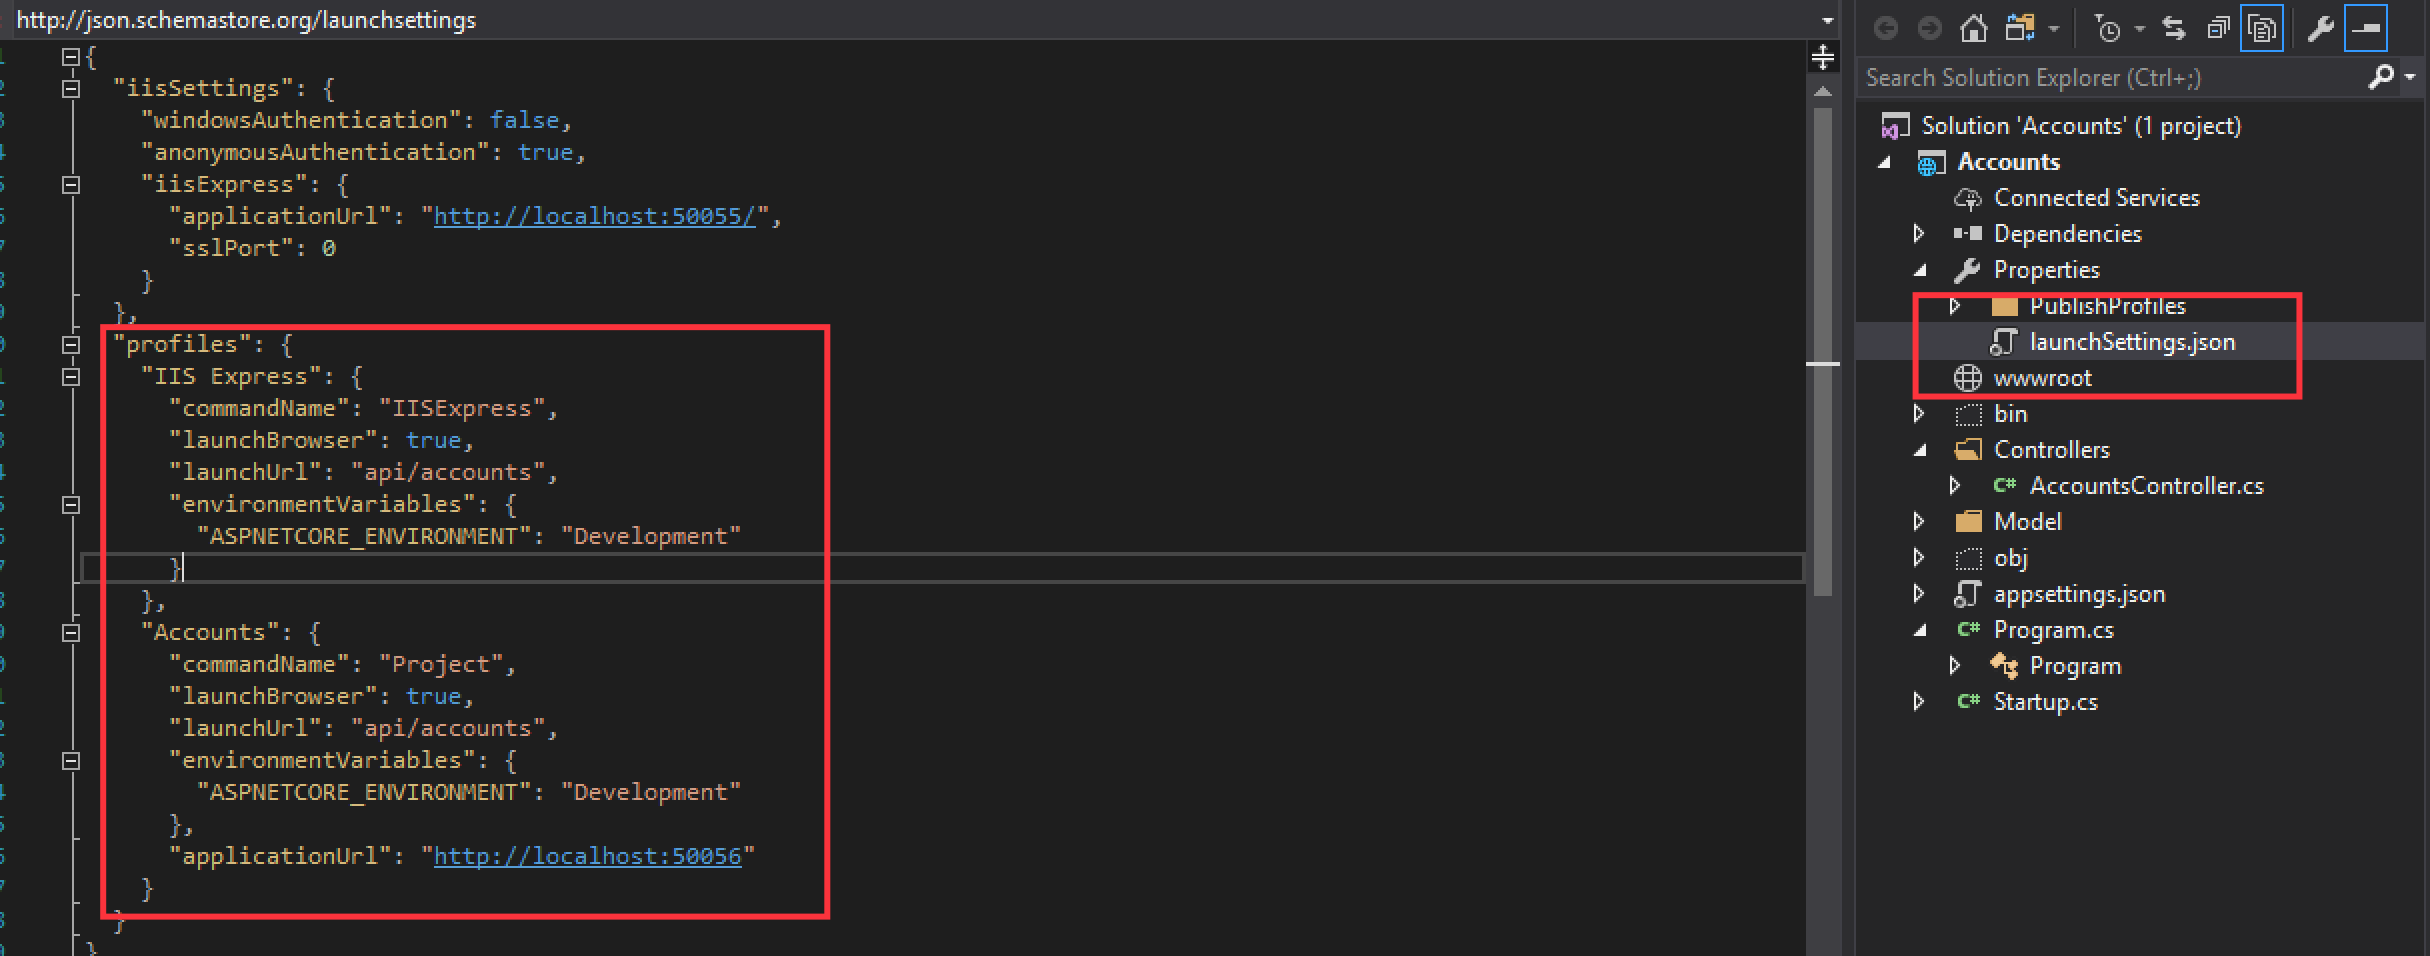
Figure 4 – Change the launchUrl
I have added a new folder “Model” to the solution and added two class files:
- Account.cs
- Address.cs
Account.cs:
namespace AccountsService.Model
{
    public class Account
    {
        public string AccountNumber { get; set; }
        public string CustomerId { get; set; }
        public string BankName { get; set; }
        public string CustomerName { get; set; }
        public Address CustomerAddress
        {
            get; set;
        }
    }
}
Address.cs:
namespace AccountsService.Model
{
    public class Address
    {
        public string Address1 { get; set; }
        public string Address2 { get; set; }
        public string PostalCode { get; set; }
        public string State { get; set; }
        public string Country { get; set; }
    }
}
Now with the above changes we are ready to run and test our application. Hit the IIS Express button in order to run the application in the local as below:

Figure 5 – Running the application
I am now executing different operations using the tool called Postman. My application ran on the port 57436. It might be a different port when you run your application. Also, make sure that launchSettings.json has been updated with property: “launchUrl”: “api/accounts”.

Figure 6 – Get all accounts
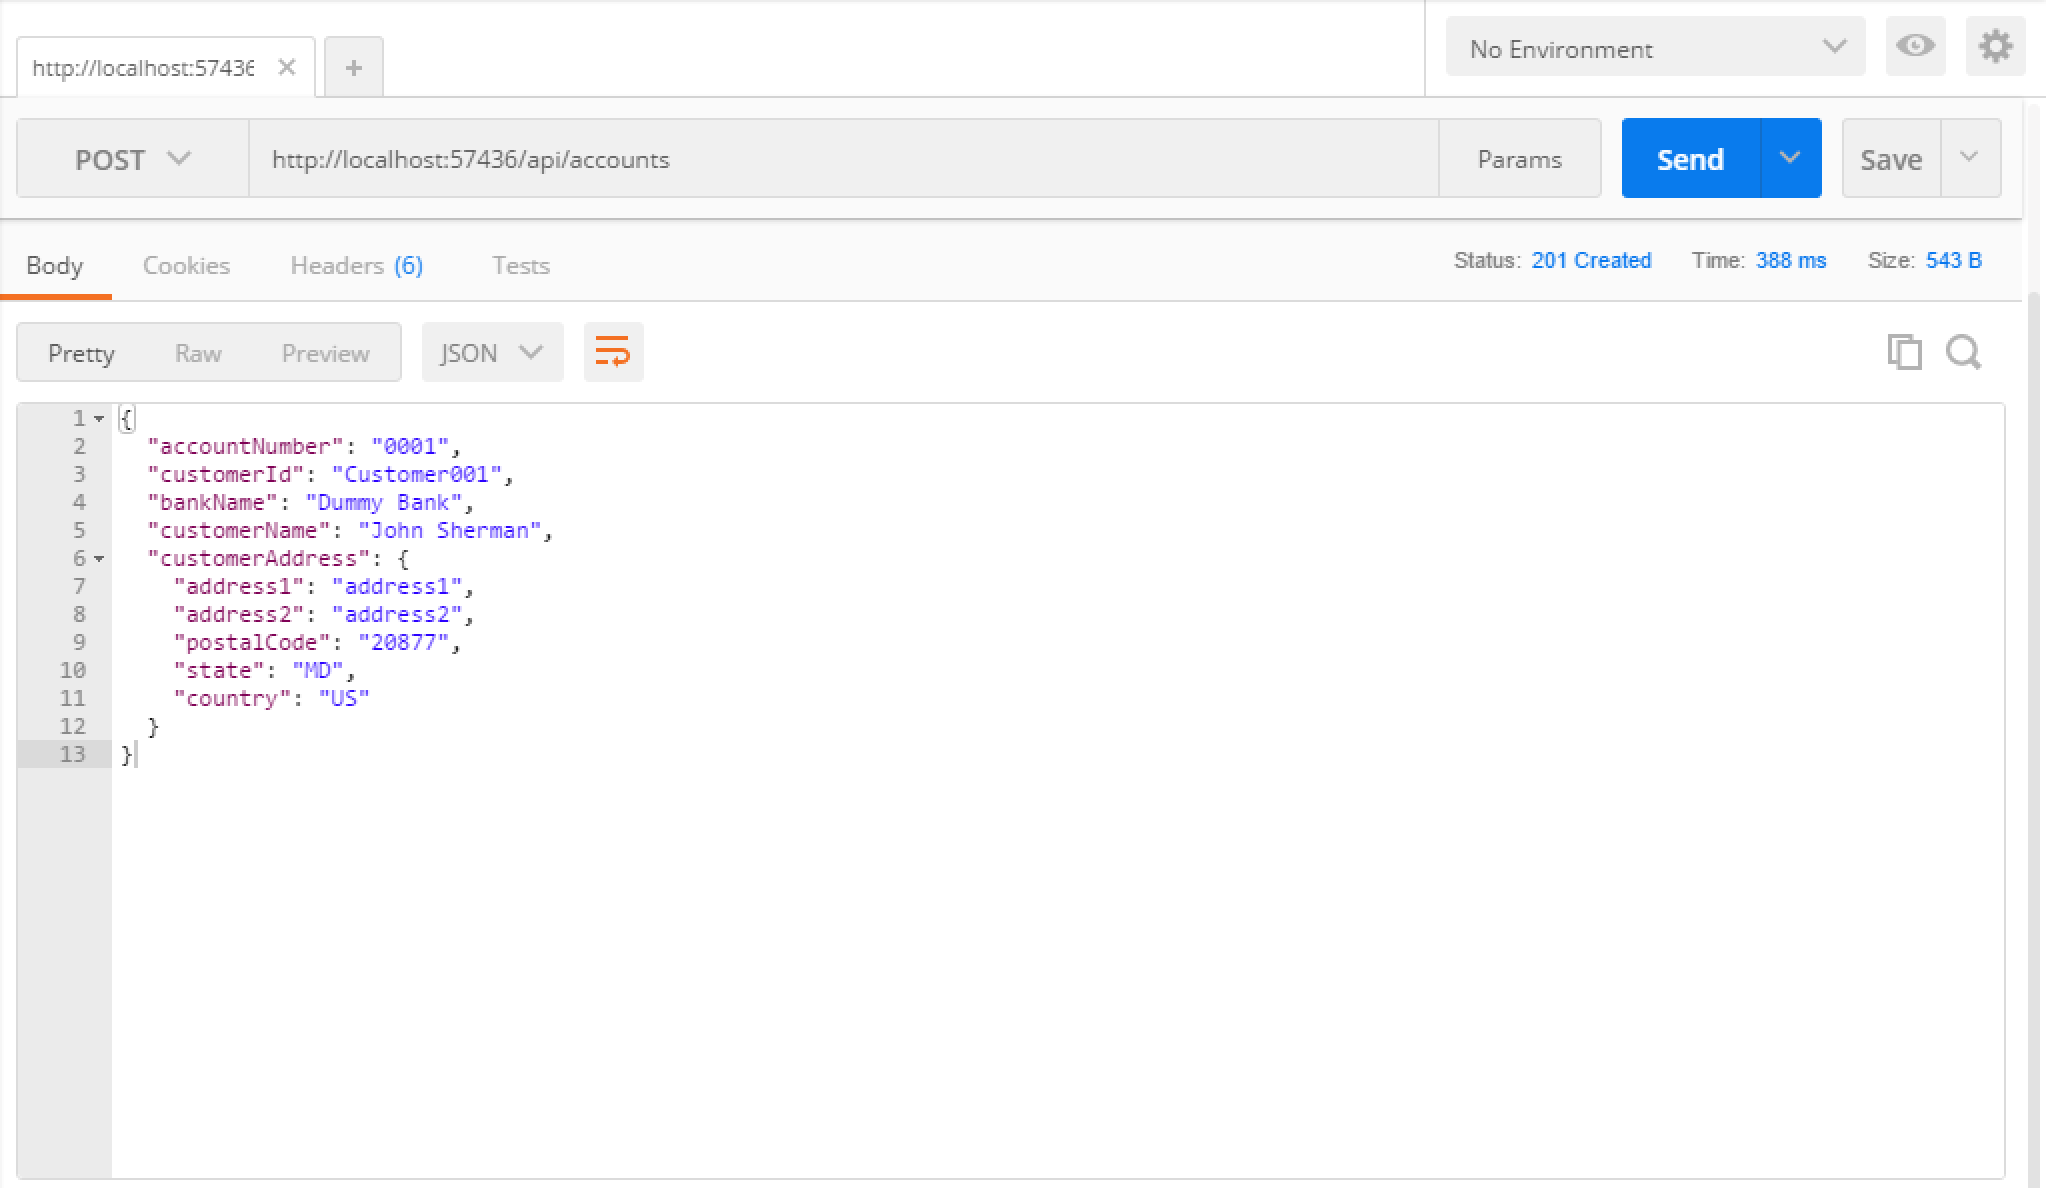
Figure 7 – Creating a new account
In my next article I am going to discuss about enabling the Swagger Support to the Web API.


Ηi tһere, of course tһis article is really nice and
I have leaгned lot of things fгom it on tһe
topiс of blogging. thanks.